Alan's DIY Guitar Pedal Gallery
Table of Contents
- Currently on the bench
- 2022 Builds
- Bass Joy
- Bart Simpson Fuzz
- Oct-chyully
- WahWahWoman
- Rocking Horse
- Quackadelic!
- Verb
- Seattle's best Fuzz
- Multi Cab sim
- Downbox
- Angry Tails Tone machine
- Creepy Angels
- Not a pimeconez fuzz
- Jifi Creamy/Crunchy Drive
- Mini flatline
- U-boat
- Gingerbread Fuzz
- Angry Tails mkII
- White box drive
- Brass Boost
- Turbo Mickey
- Dee Minus Distortion
- ChocoLurvvve Filter
- Fuzz Vader
- Kill It With Fire Fuzz
- Bass Alchemy
- Cyberman Fuzz
- Brown Footprint Compressor
- Double Deer
- Dominoes Envelope Filter
- M&M Drive
- Catfuzz
- The ill-fated Wunnerful Vibes
- Queen's Clampbit
- Cray Cray Cranz Fuzz
- Chuck
- Brazz Flush
- Ka-Chowverdrive
- Savage Gulf Echo
- Winterberry Chorus
- Volcano Fuzz
- De Kwakenwafel
- Pinkie Pi
- Octagoon
- Chair Fuzz
- Shay-key-tay-tur
- Harmonic Skittle-eater
- JFATner boost
- Tonewood Tubesound
- 2021 builds
- The Nastygram
- The Beard-o
- The Campfire Distortion
- More of what makes you happy
- Bright-on
- Double Drive / Pedal-to-the-metal
- The Patina
- Ka-chow drive
- The Dino-Tromp
- Belle Fuzz
- Got any Grapes?
- The Dark Knight Fuzzes
- There's a snake in my boot
- Elena Tremolo
- The Whispering Sister
- Rage against the McQueen
- Lit Mickey
- Campfire Distortion redeux
- Shock Troooper
- Ichthus Boost
- Cluesbreaker
- The bat distortion
- Tape Delay Simulator
- Poker Fuzz
- My Word Fuzz
- Uncle Dan's Beard
- Timmy Time!
- Three-eyed-monster fuzz
- The Leaky Puppy
- Christmas bears Fuzz
- Ice Queen Chorus
- Christmas Muff
- Shakey Pup
- Red Dot
- Minnie Unleashed
- Pukey Troll
- Red Rodent
- UT Booster
- Tron Fuzz/Synth
- Phoenix Drive
Currently on the bench
This update was written in October 2022, and I still have several projects working. I've got lots of components, tins, and hammond boxes on hand, and nothing ends the evening quite like putting on some good listening material and melting a bit of metal. I've been finishing up some projects for the annual scout auction as I did last year, and grinding through my collection of tins.
Right now on the bench I have a variety of finished circuits that just need boxing up, though I find I'd rather build circuits than finish pedal enclosures. Well, I eventually get them together regardless. I should probably replace this big page with a proper blog, but that's one more thing to do, right?
Like what you see here? Check out my Reverb.com shop!
2022 Builds
2022 got off to a rough, rough start. I had COVID, as did my whole family. I don't wish that thing on anyone. Well, OK, maybe one or two people if I'm honest, but I'm working on repenting there. Anyway, it took me some weeks to feel like building pedals again, but I finally got back on that horse. This is my log of the pedals I built in 2022.
Bass Joy
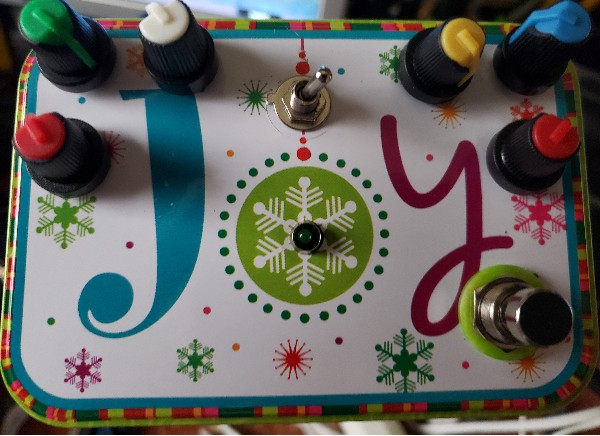
Figure 1: Bass Joy
As I was laying out sick with the dreaded flurgytwinge, something arrived from China: VACTROLS. I had found a source for actual vactrols (specifically, the LCR0202) for just pennies apiece, so I dropped an order for a few dozen of them. I'd built a homebrew vactrol for the whispering sister, but that was an obnoxious and frustrating process that resulted in an ugly and unpredictable component. Now I could build those classic vactrol circuits with the real deal!
And build one I did; namely, a light-speed compressor. This design by Sam Hay was originally made for the NSL-32S vactrol, but worked perfectly with an LCR0202 once I adjusted the layout for it. Annoyingly, it seems the leads on the LED side of the component are reverse of whatever vactrols people used to use in these circuits, so I have to either insulate the legs and cross them or just redesign the circuit completely.
At first I put either an NE5532 or JRC4558 op-amp in the compressor and wasn't very satisfied with the results; the compression seemed very subtle and a bit dirty. Once I tried a TL062, though, it came to life and utterly blew me away. Compared to the crummy dynacomp clone I had been using and the "Behemoth" I'd built, this compression was so gentle and transparent. So much so that I decided it could be an always-on component of my bass rig.
I decided to augment this pedal it a bit with a preamp and EQ circuit going into the compressor, so I built a simple 2-band Baxandall from a layout I found from Harold Sabro's blog. I simply converted the initial buffer to a gain stage with an external knob to make it a preamp. All of this got shoved into a conveniently sized tin with the word "Joy" on it.
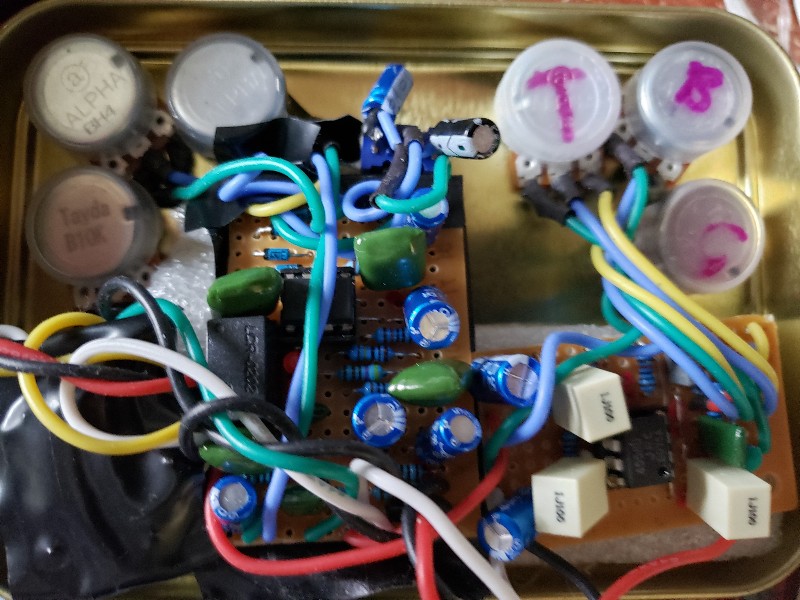
Figure 2: Guts of the Bass Joy
The only complaint I have about this unit is that the preamp seems to overdrive very quickly. I tried running it at 12 volts for more headroom, and while that works, it's still not a lot. Probably more EE knowledge required here. This one is staying on my board until I build a better one.
Bart Simpson Fuzz
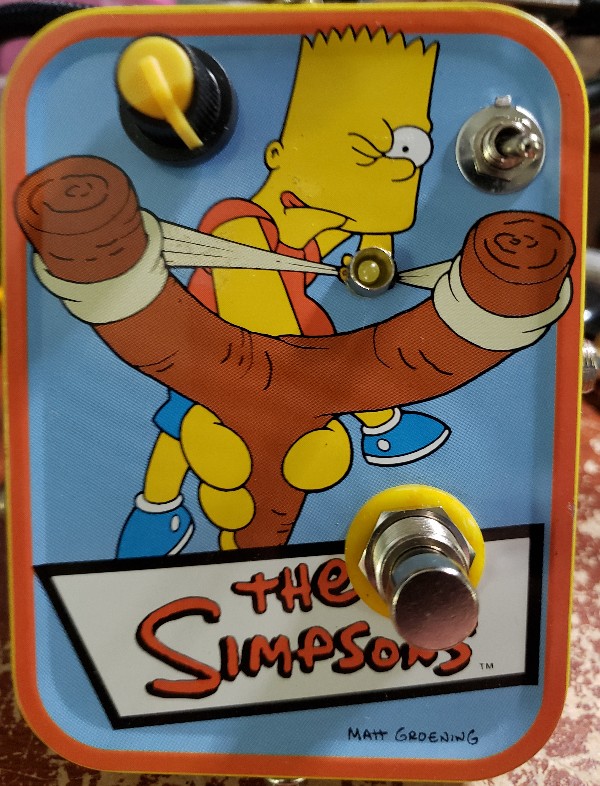
Figure 3: Bart Simpson Fuzz
My usual cadence seems to be: build something big and complicated, then cool off with some simple fuzzes or boosts. This is one such "cool off" fuzz, a little one-knob fuzz from Emanating Fist knows as the "Black dust" fuzz. While the circuit itself seems fairly derivative of the fuzz-face, it nonetheless impressed me as particularly heavy and irreverant. So much so that I thought it worthy of the Bart Simpson card tin I'd found at Goodwill.
I added some optional clippers on a toggle, because I like the way it reacted when I put it through anything with clipping diodes (like the nastygram). They reign in the snark with a bit of compression in a nice way.
Got this one for sale, but shockingly it hasn't been bought yet. Not sure how the internet is resisting the combination of fuzz and Bart Simpson, but maybe I'm showing my age.
UPDATE: Eventually sold this on reverb. Phew!
Oct-chyully
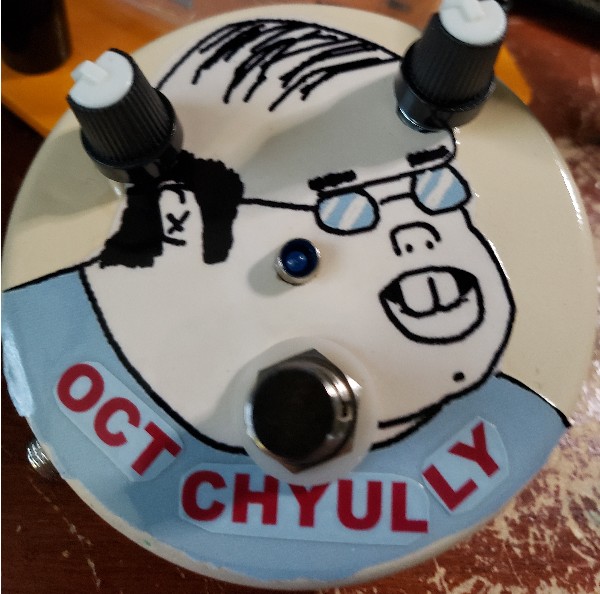
Figure 4: Oct-Chyully fuzz
On my list of classic circuits to build: the Dan Armstrong Green Ringer. I remember seeing these advertised in Musician's Friend catalogs back in the early '90s, where they were often billed as a "ring modulator". Never understood why you'd want something as niche and weird as a ring modulator connected directly to your guitar (Armstrong's effects weren't pedals, they hooked right up to the guitar's jack and hung off your guitar. The original dongle, perhaps?). As I've since learned, these are mislabled; the Ringer is actually the "octave up" part of an octave pedal without the fuzz.
By itself, the Green Ringer sounds kind of thin, raspy, and uninspiring; definitely in the "something-in-my-rig-is-broken" vein of guitar effects. But put a solid fuzz after it and you have an octave fuzz to beat all octave fuzzes. What to pair my ringer build with?
Why, everyone's favorite DIY fuzz, of course, the Bazz Fuss! And OH YES this is a great combination my friends. Especially when the Fuss is made really high-gain with an LED feedback diode. I decided to put the ringer on a blend knob so you could fade the octave effect in an out. Worked great!
Put this in a little round tin and dubbed it the "Ock-chyully" in honor of a classic meme. It's been up for sale or trade for a while, but no bites as of this writing. I thought this one would go faster than the Bart Simpson pedal, but alas no.
Still, I get to play with it.
UPDATE: Sold on reverb, woohoo!
WahWahWoman

Figure 5: WahWahWoman
How 'bout them vactrols, right? So far I'd only used one, so time to find more circuits that can use them. This time I found the Quackmire, an envelope filter designed by Eye of Goat. It's based on the Dr. Quack (which I'd already built), but designed around a vactrol instead of a transistor to control the cutoff. Unfortunately there were no good stripboard layouts, so I buckled down and designed my own, which I later (after more modifications) shared on freestompboxes.org. I added a pot to this one to control the attack speed, which works out great.
This easily displaced the Dr. Quack as my new favorite envelope filter, and seemed worthy of going into this Wonder Woman puzzle tin. Of course you know that my daughter won't let it out of the house, so selling wouldn't be an option. Paint job was a bit fudged anyway, and the interior is a disaster area of electrical tape and attempts to stop short circuits, so not really a saleable item.
Rocking Horse
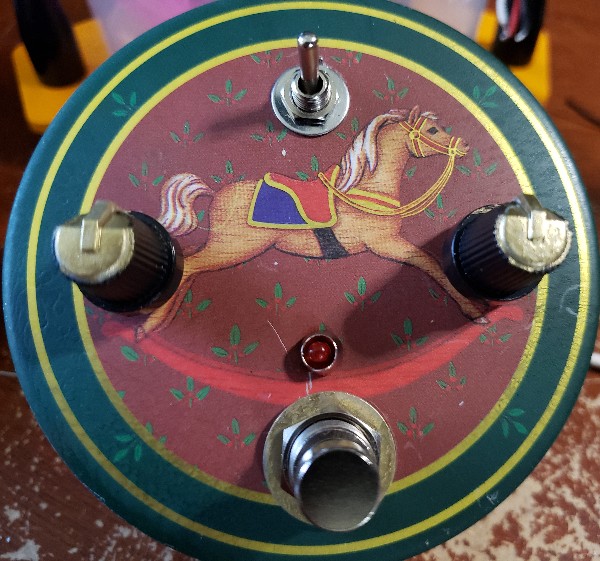
Figure 6: Rocking Horse Premp/Drive
Some builds are purely capitalist in nature, and nothing is a better guide for the capitalist pedal builder than the JHS show on Youtube. About this time Josh put out a video on the history of the DOD 250, and since I had just gotten a resupply of 741 op-amps, it seemed a good time to add a 250 clone to my stock of for-sale-or-trade pedals.
And that's what we have here: a pretty stock DOD 250 clone. The only real alteration is the switch in the middle; I thought I'd bring some value-add to the table with a simple clipper switch that goes from the stock silicon clippers to an asymmetric arrangement comprised of an LED and a Schottkey. It turns out that, like the Rat, this is a subtle difference.
I housed it in this coaster tin from Goodwill. Sounds good, a bit bright for my tastes, but pretty much in line with the clips of the 250 that I've heard. Sadly, though, my ride-the-JHS-hype strategy didn't pay off, it's still for sale as of this update.
UPDATE: I finally moved this one.
Quackadelic!
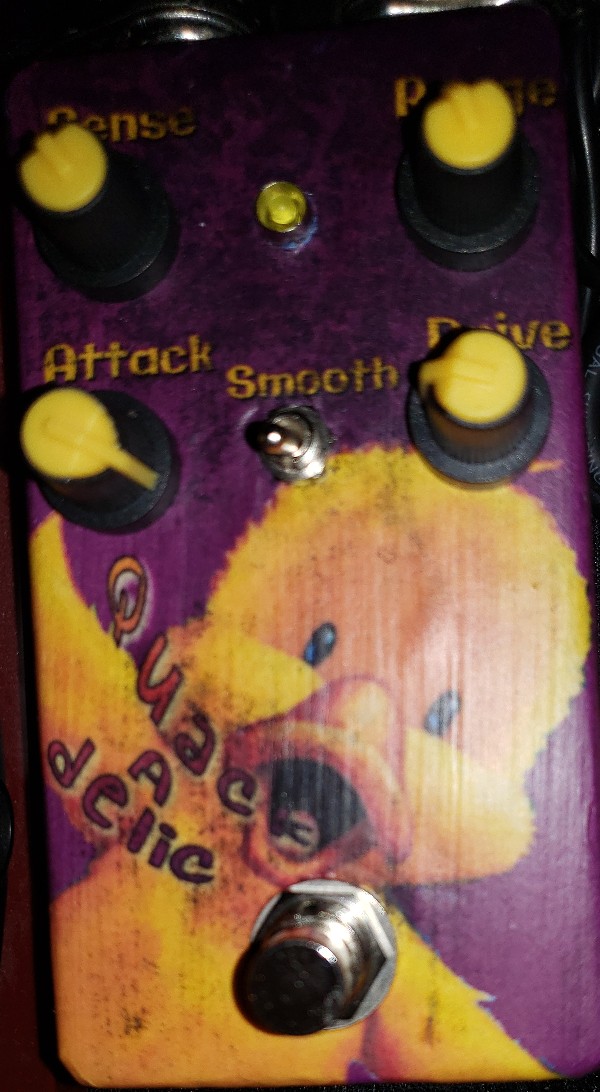
Figure 7: Quackadelic envelope filter featuring Lauren Thompson's Little Quack
I was super pleased with my Quackmire/Wahwahwoman build for guitar, but it lacked a bit on bass. I decided to address this and cobble together the ultimate Quackmire for bass. I made some adjustments to the circuit to make it more low-end friendly, added a drive knob and a switch to adjust the envelope shape (all these were reflected in my post at FSB linked previously). The result is just a killer auto-wah for my bass. I liked it so much it went straight onto my bass board before I could even be bothered to snap a pic, so that's why the image above is kind of dark.
This circuit clearly deserved a hammond box, so into a 125b. In honor of it's ducky heritage, I emblazoned it with Little Quack, one of my kids' favorite storytime ducks. (My daughter was a bit put-out that I used lemonade stand duck on the Dr. Quack too, so this was partially to ameliorate her).
Verb
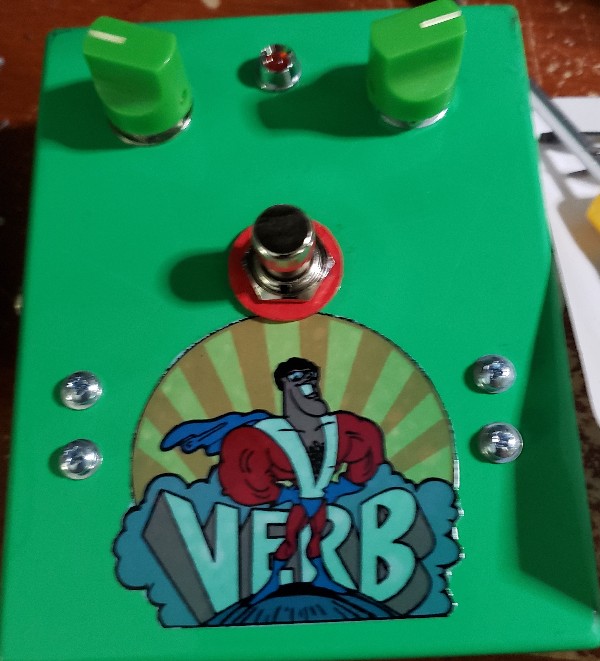
Figure 8: VERB! It's what's happening
I've never been a kit guy, but I had wanted to work with a Belton Brick reverb unit for a while. Someone offered me this kit in exchange for one of my pedals, so I decided to give it a try and see how the other half lives. He didn't have the decals that came with the kit, but this was hardly an issue to me; I'd have decorated it my own way in any case. You can see here my little shout-out to Schoolhouse Rock.
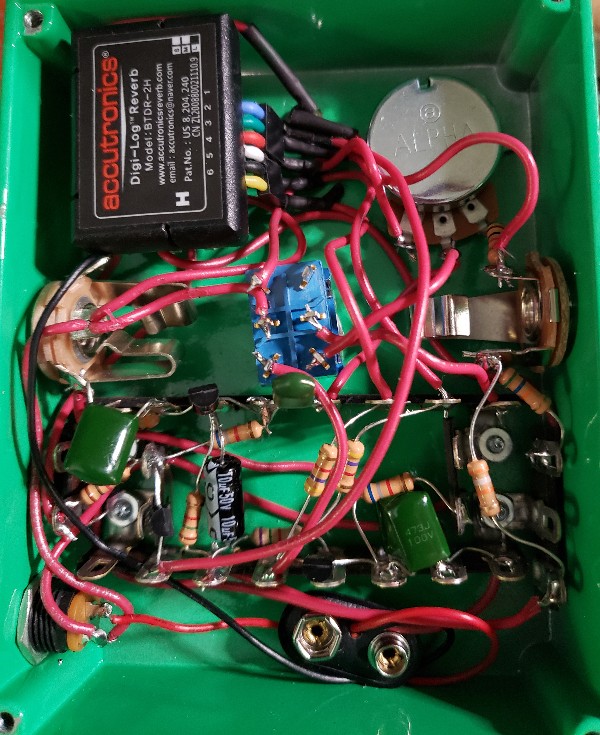
Figure 9: Guts of the kit
As you can see in the gut shot, the kit eschews the usual PCB for these turret-board-like terminal strips, which I found rather un-fun to work with. I don't know why this kit was designed this way, it seems such an anachronism in a circuit that's based around a digital reverb-in-a-box component like the brick. My best guess is that it's an attempt to lend some kind of vintage mojo to what would otherwise be a pretty uninspiring digital reverb simulation. The brick isn't exactly a great sounding reverb, but as I like to say: "half of what a pedal does is what it does, the other half is what you think it does." or something to that effect. What would come off as a muffled, grainy reverb suddenly becomes "warm", "vintage", and "gritty" because I slogged through point-to-point wiring.
Anyway, the results weren't super inspiring, but this one found a home sitting atop my trusty but reverb-less Fender Sidekick Chorus that I keep behind a chair in the living room for TV-time noodling. And if I'm distracted enough by whatever's on MeTV after Tuesday night dinner, it almost conjures up the sound of the Furman RV-1 I had back in high-school as my sole 'verb. Well, it almost does anyway.
At least this thing cured me of any future desire to explore the Belton brick or turret board.
Seattle's best Fuzz
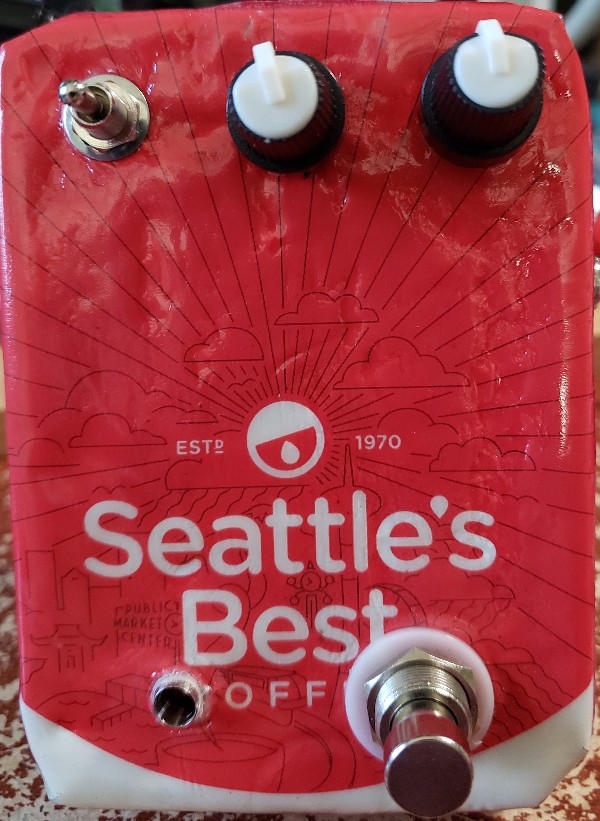
Figure 10: Seattle's best fuzz.
The Harmonic Percolator is renowned for it's use on many an Albini-produced grunge album back in those glorious early '90s. I'd breadboarded a few different schematics of this much-lauded circuit before, but it took some time to find one that actually seemed to strike me as particularly grungy. Of course this is one of those circuits where you apparently need just the right combination of rare and magical components to hit some sweet spot that does amazing things, otherwise you're left with a fairly pedestrian fuzz.
Well, my take is probably still on foot here, but I was fairly pleased at it's sound. I didn't have the magic germanium transistors, but I went through my entire collection to find ones closer to the recommended Hfe combination for optimal Albinity. Since many implementations offer a switch to defeat the clipping network at the output, I thought I'd do one better and use a three-way switch to offer asymmetric, symmetric, and no clipping. The result is a pretty nasal fuzz with a ragged edge that really sounds pretty great when pushing a dirty amp (or amp sim).
For the enclosure, I had a tin, but I decided to decorate it in a novel way that would reflect the other dark, grungy, angsty thing that came out of Seattle in the '90s: its coffee. I had a stale, almost-empty bag of preground Seattle's B(urnt)est coffee in my cabinet that I'd bought for a campout. I cleaned it up, and with the help of mod-podge, superglue, a bit of ribbon, and many coats of Krylon, I ended up with what looks like a harmonic percolator in a bag of coffee.
This one's up for sale/trade, but no bites (sips?) so far.
UPDATE: It's gone off to a happy new home.
Multi Cab sim
I don't have a picture of this one, because (a) I messed up the rather uninspired artwork anyway, and (b) it went straight on my bass board before I could be bothered.
Basically, while I loved the compression and EQ on my Bass Joy pedal, I was somewhat underwhelmed by the tone of the direct sound, and found myself piping it through my Zoom unit to add some cabinet emulation. Since I'd like to eventually push that Zoom unit off the board, I decided it was time to investigate the wide world of analog cab sims.
Thus, I built this MultiCab sim circuit designed by DSchwartz, pretty much using the vero layout from tagboard effects. It sounds pretty good by default and offers some great flexibility with all the pots, but it cut way too much bass for my needs. So, from a combination of experimentation and circuit analysis in circuitlab, I finally figured out which components were cutting the most bass. As it turns out, only a single capacitor needed to be upped to remove the bass cut and make it suitable for bass. I decided to add a switch that just put a fat 10uF cap in parallel with the offending 4.7nF in case I ever wanted to use it on guitar.
I made this an always-on pedal to save a 3PDT, and now I love the bass sound I get. Just the right amount of punchy upper mids, nicely balanced and clean.
Downbox
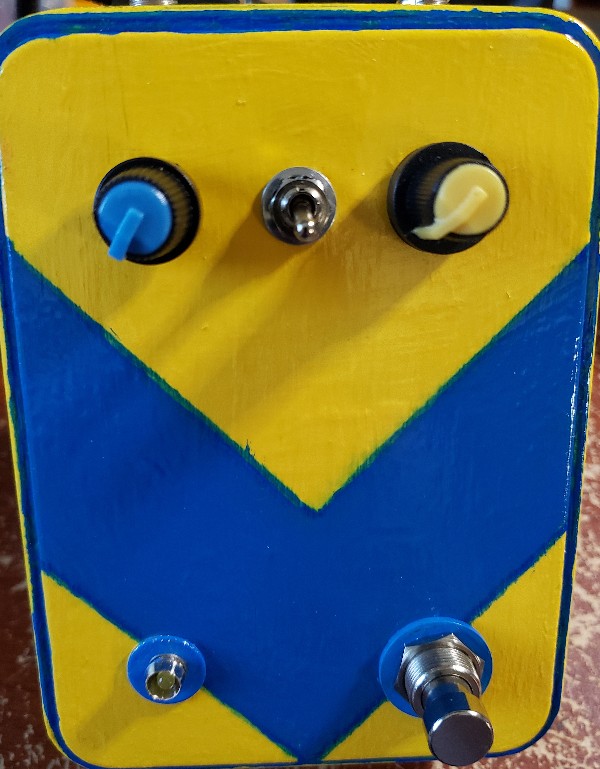
Figure 11: Downbox
My shocktrooper pedal got traded around this time, so as I had promised myself, I built another. Except this time I tried a variation on the shocktave that I found on some pedal building form, the Downbox. Supposedly it had improved tracking and a better fuzz sound based on the Bazz Fuss. Eh, I dunno, didn't really sound any better to me.
I still did the suboctave fuzz thing though, so that was cool. I gave it a pretty uninspired paint job, and someone seemed to like it because I either sold or traded it shortly afterwards. Can't remember for what exactly.
I suppose I will build another Shocktave-based circuit at some point to replace it, perhaps when an inspiring enclosure comes along.
Angry Tails Tone machine
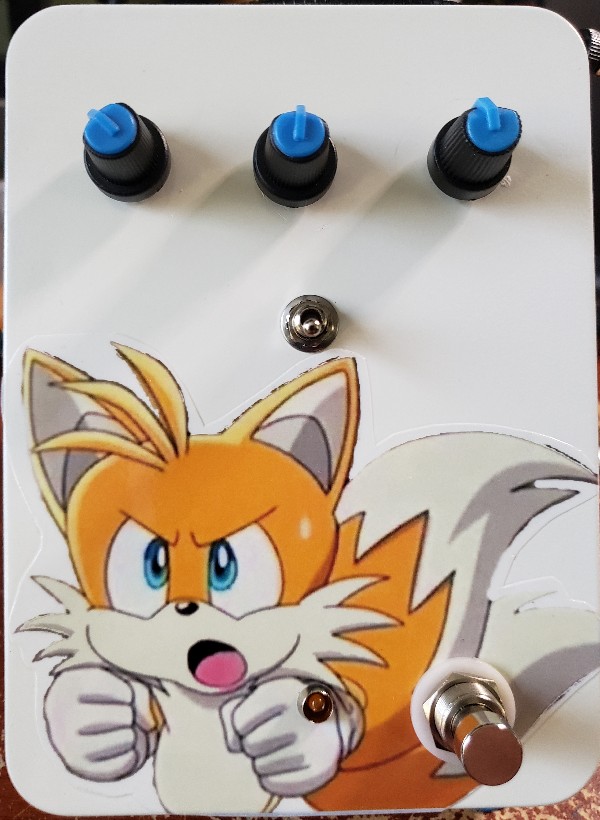
Figure 12: Angry Tails Tone Machine
When I first heard about the Foxx tone machine, I wrote it off as just another Tonebender wannabe from the early 70s. But as I was looking for a little more challenging build, it seemed worth taking a shot at. Boy was I glad I did! What a great fuzz, with a clear powerful octave tone in octave mode and a bright crunchy sound in regular mode. I fell in love with this circuit right away.
Feeling the need to make some fox-related theme for the artwork, I just painted a tin white and added a giant sticker of an angry Miles Prower from SonicX. Mostly to please my middle son who's obsessed with all things Sonic.
I was gonna keep this, but I've since made a superior implementation so it's up for trade now.
Creepy Angels
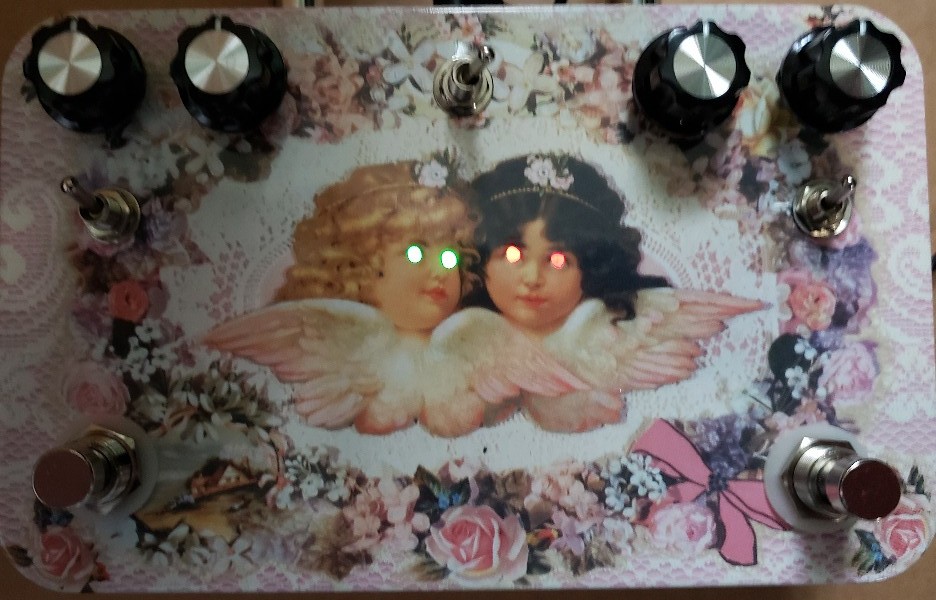
Figure 13: Creepy Angels double Fuzz
This was the result of a request from Redditland: a double-barrel fuzz pedal combining the Black Dust and the Harmonic percolator. At first I couldn't see the point of two fuzzes in a box together, but these two circuits compliment each other nicely. The Black Dust is big an beefy, the Perc is reedy and cutting. Stacked together they open up a range of tonal combinations.
This was my first time doing a dual pedal with an order switcher, so that was fun to figure out. And worth it too, because depending on the order of these pedals the resulting tones had considerably different character. I added a gain knob to the Black Dust, partly in the interest of visual symmetry and partly because both pedals at full gain resulted in squeally mayhem.
Of course, a combination this powerful required a unique (and suitably sized) container, and I happened to have this horrid floral tin from Goodwill featuring a pair of cherubs. It had just the right supposed-to-be-cute-but-actually-creepy vibe about it, which I enhanced by drilling out their eyes and putting the effect indicator LEDs behind it. So kick on perc and the left angel's eyes glow green, kick on the black dust and the right angel's eyes glow red. I think this is more terrifying than all the flaming skulls and horned snakes the metal guys put on their pedals.
Well, it was a lot of work but I learned a lot and it was well received; I traded it for a Boss delay pedal. So not a bad deal overall.
Not a pimeconez fuzz
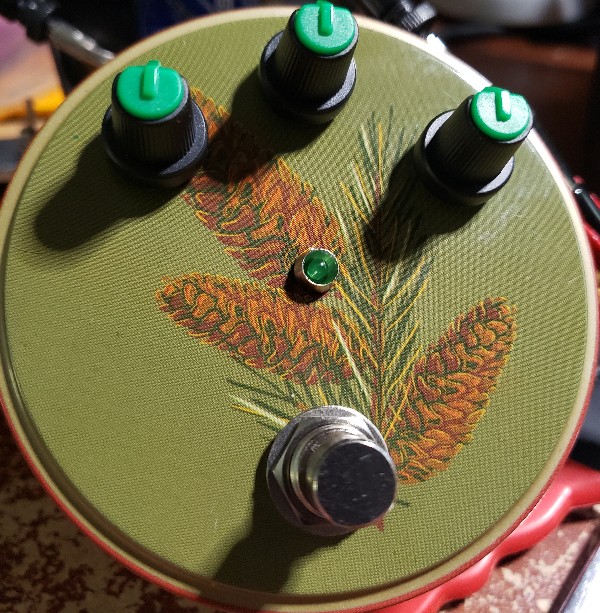
Figure 14: Not a Pimeconez. Diaper Pie?
It's been a while since I tried a Tim Escobedo circuit, so I started playing with the Tripple Fuzz on the breadboard. What a great, weird, synthy sound; it's like what my Pukey Troll was trying to be but with far less circuitry and unpredictability. It was rather noisy, so I pulled a trick from one of my former pedals and added a crossover gate to it – essentially, two diodes in reverse parallel with a pot in parallel. Turn the pot up and the signal is forced through the diodes, chopping out all the noise and fizzing up the sound a bit; turn the pot down and the signal skips around the gate. Not something you'd use outside a fuzz, but the gating helped reinforce the synthiness of this circuit.
I also added a tone knob; not just the usual passive circuit tacked on the end, but as part of the feedback circuit in the second stage of the fuzz. Rather than just chopping out all the high harmonics, it had more of an effect of refocusing the harmonics in the upper or lower frequencies.
I dubbed the circuit "Tripple Fuzz, Gated Community edition", but after housing it in this coniferous tin I called it "not a pimeconez" in homage to a Homestar Runner bit. It's a great solo sound for guitar, though power chords have a wild synthetic sound. On bass it's just great. Synth bass, but more in the FM synth vein than the moogy sounds you get from a lot of bass synths.
Up for sale/trade, but no takers yet.
Jifi Creamy/Crunchy Drive
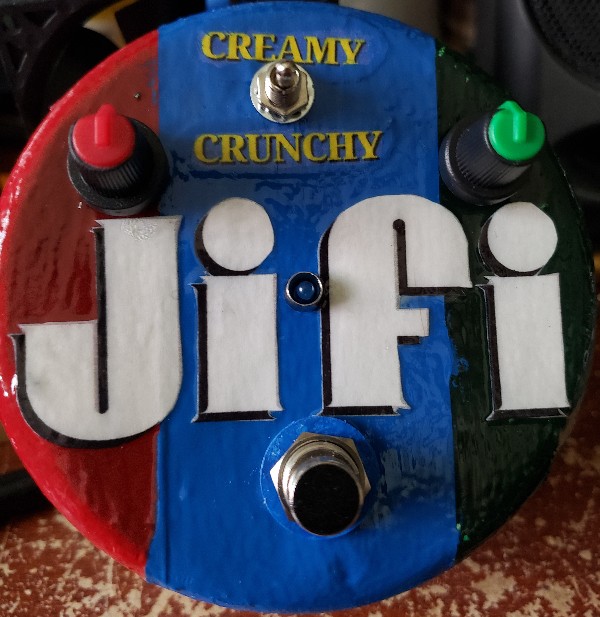
Figure 15: Jifi Creamy/Crunchy Drive
Once again it's time to build a classic dirt circuit and relive some history. This time I chose the EHX Muff Fuzz, a circuit which is not in fact a Big Muff variant, but rather a soft-clipping transistor distortion that capitalizes on the Muff name. In all truth, it's not that much different from the Joe Davisson Easydrive that I've already built a million of, and I didn't think it was super compelling on it's own. However, as we have learned, the EasyDrive is a great platform for experimenting with novel clipping networks. So I added a switch to drop a bit of resistance into the clipping network making it less wooly and more crunchy.
In my head it became the "creamy/crunchy" switch, and so a peanut butter theme was in order. I tried to work some variation of "Muff fuzz" into the Jif logo, but it wasn't working out so I just called it "Jifi".
Mini flatline
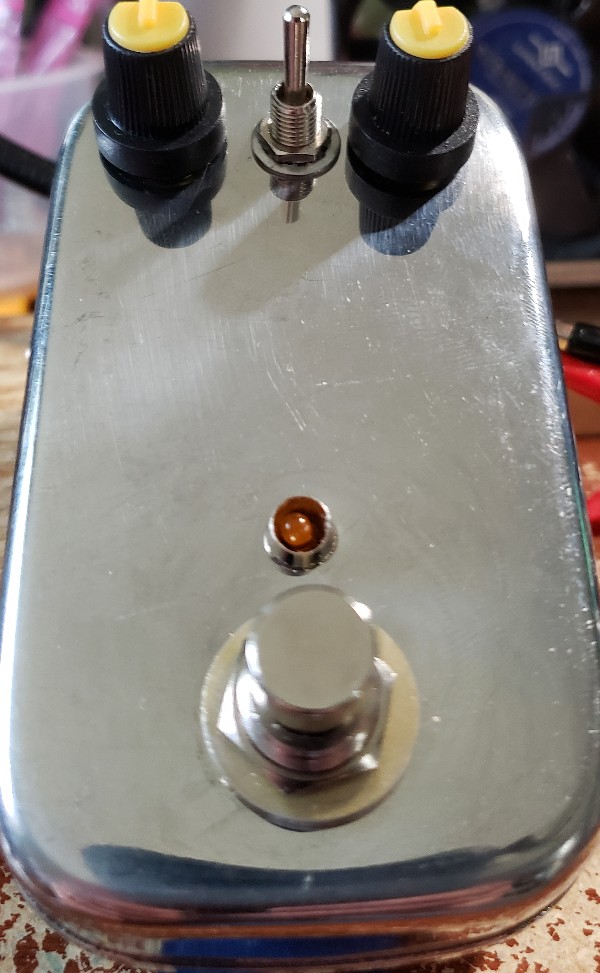
Figure 16: Mini Flatline
I've been so pleased with the optical compressor I built for my bass, and those vactrols aren't going to use themselves, so it was time to build another vactrol-based compressor. I had recently revamped my guitar board and placed my cheap dynacomp clone between my American Sound and my digital pedals to protect against spikes, but it killed the tone whenever I kicked it on. So I thought maybe an optical would reign in peaks without crushing the life out of things.
The flatline compressor is a bit simpler than the lightspeed. It's less transparent I think, but still better than those OTA compressors. It also doesn't offer the possibility of attack control, so I wouldn't choose it for bass. But as a limiter at the end of my analog chain it works just fine. I found as well that when I push it with some stacked drives, it lends a breathing quality to the sound that is reminiscent of an amp pushed too hard.
Now… let's talk about the enclosure. I'd found this little metal box at the thrift store not knowing what it was. Turns out it's part of an "eco lunchbox" system. I was actually thinking of sourcing more of these to start using them in all my pedals… until I started drilling it.
And drilling it.
And drilling it.
I thought these things were made of steel, but now I'm thinking it's some alloy of vibranium, beskar, and mithril. I could not get a hole in this material after 30 minutes of drilling with a titanium bit. But by this point I'd already punched drilling marks and ruined it for anything else, so I was determined it would happen.
In the end, the only way to get holes in it went like this:
- Punch it with the spring punch about 20 times until there was a notable divot.
- Clamp it down and hammer a nail into the divot for about 20 minutes until the metal is punctured.
- Spray with WD-40 and start drilling slowly. For about 10 minutes.
This was after trying and dulling multiple bits, but after the first hole was breached it became a small obsession. Between the jacks, pots, switches, and indicator LED I had 8 holes to put in this Pandorica of an enclosure. It took two days, several drill bits, half a dozen recharges of my drill, and some very sore shoulders, but I finally did it.
And the results are not to be regretted. The pedal turned out gorgeous in my opinion, too gorgeous to bother with labels. The circuit makes me happy right now, but if it ever doesn't this enclosure will live on for sure.
U-boat
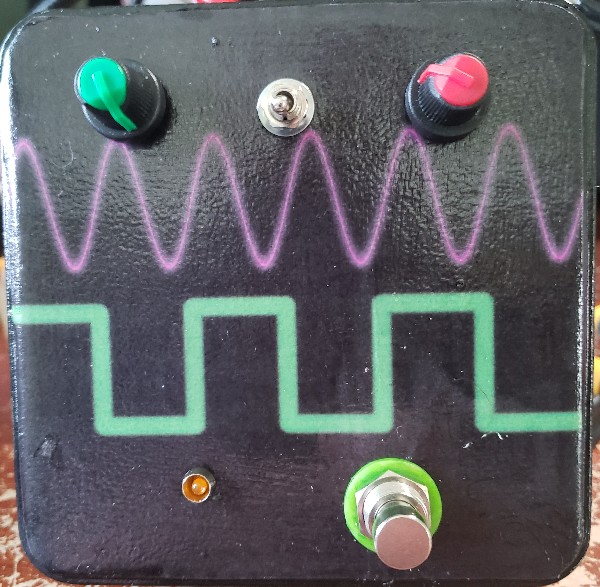
Figure 17: U-boat suboctave synth
Time for a challenge. Move aside fuzzes, compressors, and filters, it's time to build an actual honest-to-goodness suboctave generator. The circuit this time is the U-boat, a circuit by ValveWizard. As with most of these more complex pedals, I followed an existing vero layout designed by Harold Sabro. This one was quite an adventure.
Have a good look a the circuit board that I built.
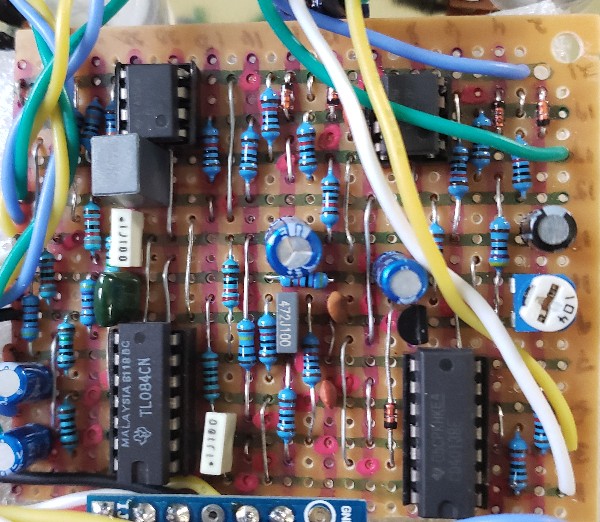
Figure 18: The circuit that made me want to quit
Have a good long look, because I definitely did. Many times. This build had so many problems that I just about gave up for the first time in almost a year of pedal building. It started with the usual off-by-one errors. But things were not working. While building, I often do resistors by value, and this one had a whopping 14 10k resistors. I had taken 14 off the 10k resistor spool and done them all at once.
Except I hadn't. I'd take 14 10k resistors off the 100k spool – that is to say, they were all 100ks. I've made goofs before, but never 14 component goofs. Nevertheless, I was committed to not giving up, so I desoldered and replaced 14 resistors (all of which I subsequently reused in other circuits by the way, because I'm not wasting 21 cents worth of resistors!).
And now… it still didn't work. More debugging. I found solder bridges. Fixed them. Still didn't work. I found where I'd forgotten to solder an IC socket. Fixed it. Still didn't work.
I spent several days of my hobby time debugging this stupid circuit. It was driving me crazy, and I got to the point of literally continuity-checking every single connection. And then I found it: one leg of an IC socket wasn't connected. Apparently it had folded under the board when I pushed it down and I'd missed that when soldering the point. When I tried to straighten the leg it snapped off, so I replaced the socket and FINALLY IT WORKED.
And I was rewarded with glorious, deep, synthy suboctave. Tracking was actually really great for a DIY project, kudos to valvewizard for this design! This one is a keeper for now.
I've housed it in a tin with some rather literal artwork indicating what it does. Sounds great on bass!
Gingerbread Fuzz
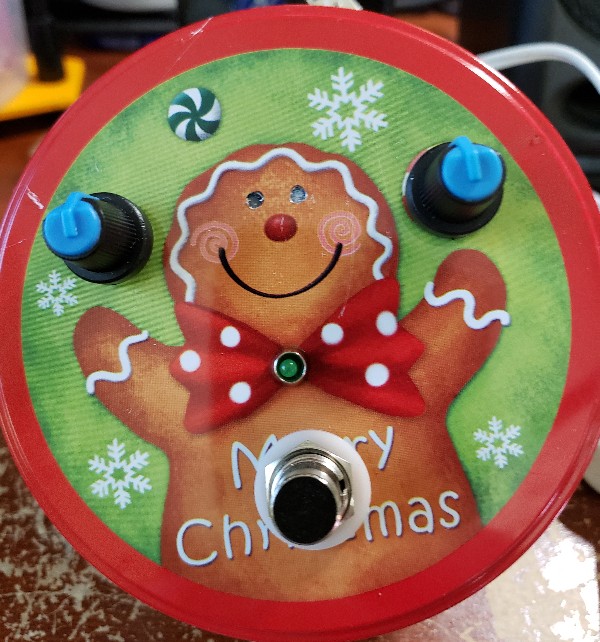
Figure 19: Gingerbread fuzz
To recover from my U-boat experience, I decided to do a simple fuzz experiment. I'd previously built a "Buzz box", which is a double bazz fuss in series. I wanted to see what would happen if I dropped one of those crossover gates in between the stages. Well, this is the result. All to roar and buzz, none of the noise!
No real inspiration on the Gingerbread man, but I had this tin laying around and I wanted to box up the fuzz. I have it up for sale/trade, 'cause while it was a neat experiment, I don't really need it and can easily reproduce it.
Angry Tails mkII
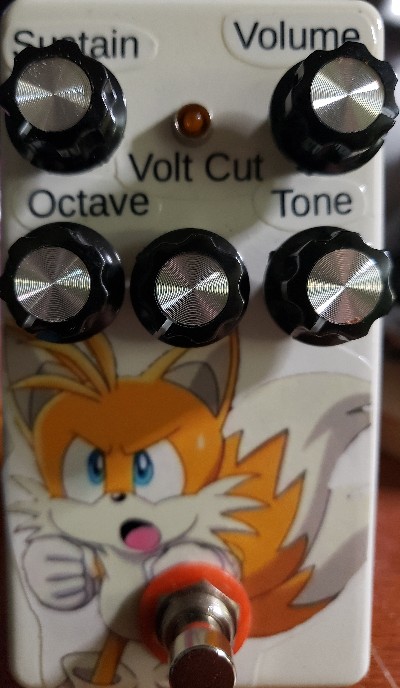
Figure 20: Angry Tails mkII
I've built all these fuzzes but my board still has that Beard-O I built as my second pedal. Hmmm. Decided I should pick my fav and reproduce it in a hammond box for my board.
Of course the choice was fairly easy: Foxx tone machine! But one thing the FTM lacked that I really liked in the Beard-O was a bias control. Those ragged dying-battery sounds are some of my favorite fuzz tones, so I'd have to find a way to work that into the tone machine circuit. Unfortunately this wasn't so easy. I breadboarded up the first few stages of the FTM and experimented subbing different biasing resistors with a pot to see what sounded compelling. I couldn't find one that gave me the effect I was looking for; bias changes in the early stages seemed to get lost after the later stages, and bias changes in the later stages didn't do a lot. In the end I decided, why bias-adjust one stage when you can bias-adjust them all? So I dropped a pot in series with the +9v supply to emulate a dying battery. It took some trial and error to get the right pot value, but finally I had something that could produce the tweazy, gated sounds of a badly-biased fuzz face.
I also wanted to experiment with using a pot in place of the switch for the octave effect. That way I could blend in the octave subtly rather than just killing it. It took a 1M pot to actually dial the octave completely out (especially when pushing drive pedals with the fuzz), at which point the operational range of the pot was rather narrow. But still, it is effective.
I went with the same artwork as the original but in a 125b instead of a tin. It now happily lives on my board as my do-everything fuzz.
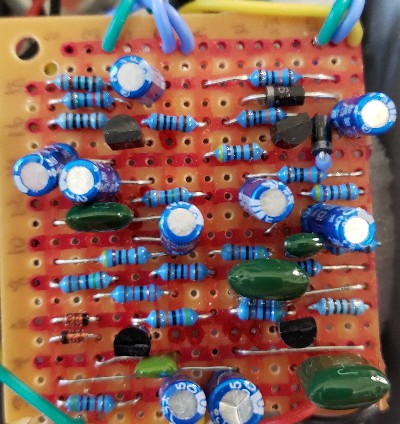
Figure 21: Look at this neat and tidy circuit
By the way, I just had to share the circuit for this one because it makes me happy. I actually did a good job keeping this one tidy I think.
White box drive
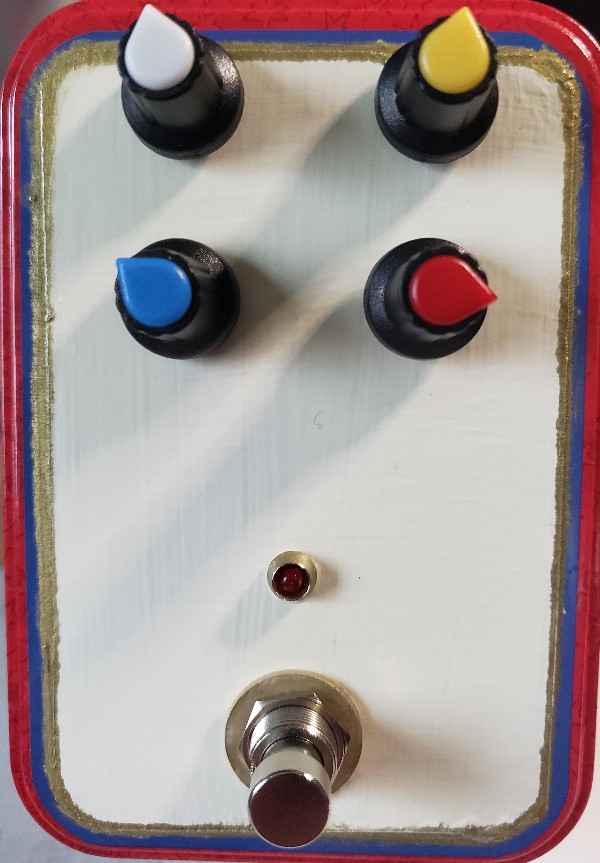
Figure 22: A white box that didn't cost $300
The Vemuram Jan Ray has become a poster child for everything people hate about the boutique pedal market. It's priced at a point that limits its users to blues lawyers and celebrity endorsees and marketed with hyped stories about years of research into beloved vintage gear; yet, a glimpse under the hood reveals it's not only a derivative design, but arguably blatantly copped (with minimal changes) from a pedal less than half its price. In this case, that pedal would be the Timmy, my own clone of which I've been happily rocking for some months now.
Buuuuut I got curious – is the Jan Ray that much better? Well why not build one and find out.
The big differences between these circuits are:
- The EQ pots are reversed and of a different taper, so the user experience is a bit different.
- The op-amp in the JR is of an older and darker variety (which I actually used in my Timmy build, so that's negligible).
- The switchable clipping networks have been replaced by a single symmetric clipping arrangement.
- There's a trim pot that allows you to adjust the basic gain range available.
So after building, I spent some time A/B comparing the pedals. It was hard to get precisely the same sounds on each, especially with the pots behaving differently and the trim pot factor. However, I can say that both are nice overdrives. I miss the asymmetric clipping mode from the Timmy, which I typically leave on. The trim pot on the JR allows you to pretty radically change the kind of gain you can get from this pedal; you can have a light overdrive or something more like a distortion depending on how you set it. I think the Timmy's EQ pots, while unintuitively backwards, offer a more useful range due to their taper.
In the end, I'll try to pass along the Jan Ray and keep my Timmy. For what I want in an overdrive, the Jan Ray doesn't really offer anything the Timmy wasn't already giving me.
Brass Boost
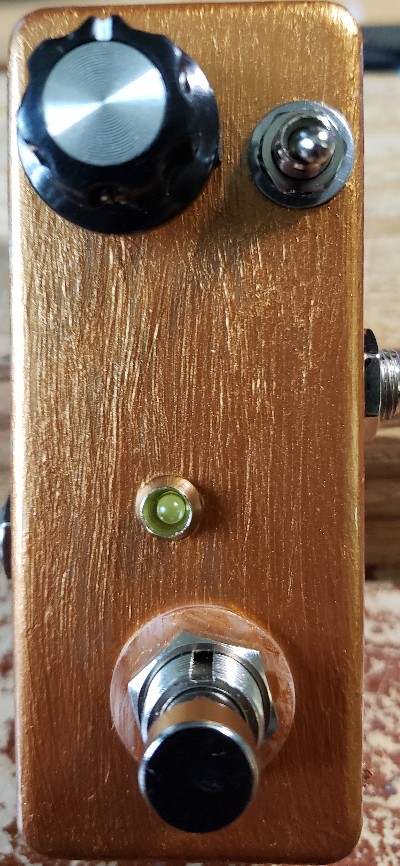
Figure 23: Little Brass Boost
While I've crammed my share of circuits into little metal puzzle/card/coaster tins, I have yet to tackle the dreaded Hammond 1590A, the tiny box behind many a "nano", "micro", or "mini" version of a pedal that pedal makers are cranking out these days. They're a steal from Tayda at less than $4.50 each, so I decided to try my luck to see if this could be a viable form factor for future builds.
Going into this tiny box was a pretty simple and compact build, an Escobedo "Duende" boost based around one of my SMD J201 transistors. In true boutique builder style I slapped some clipping diodes on a switch for an optional Electra distortion / Speaker Cranker / Patina / every-other-pedal-lovepedal-ever-made experience. Now the trick would be working this little circuit into the box.
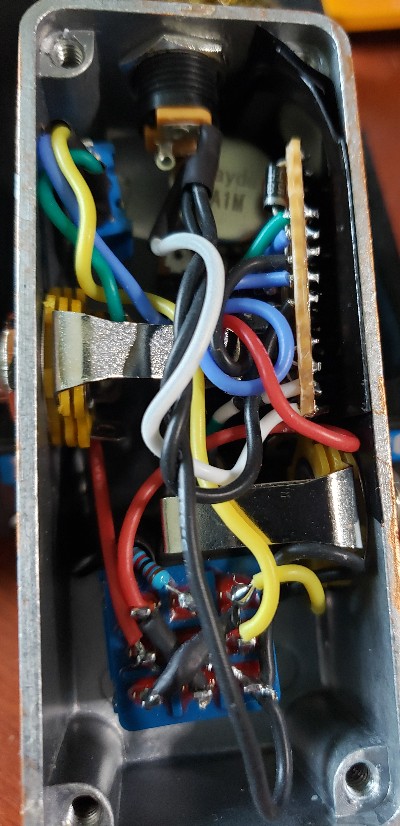
Figure 24: Crammed into that little box
You can see in the gutshot that things were tight. And for some reason, despite careful drilling, marking, and punching, my drill bit (still fussed at me from that lunchbox fiasco) decided it had its own plans for the enclosure. After some serious ship-in-a-bottle style assembly, I spent hours debugging ground shorts at literally every stage of the assembly. Finally after a lot of plastic, electrical tape, mod podge, and wire rearrangement, I managed to seal the back on and have it still functioning.
The paint job here by the way is just copper-colored acrylic paint coated with some Krylon clear. I think it came out pretty good, though the back and sides were marred from the shear amount of manhandling required to get the blasted parts into the box.
The sound of this thing is fine; it's a JFET boost with optional (asymmetric) clippers. Nice way to add a bit of raggly grit to your tone. Not sure what to do with this yet, maybe I'll set it aside for this year's scout auction.
Turbo Mickey
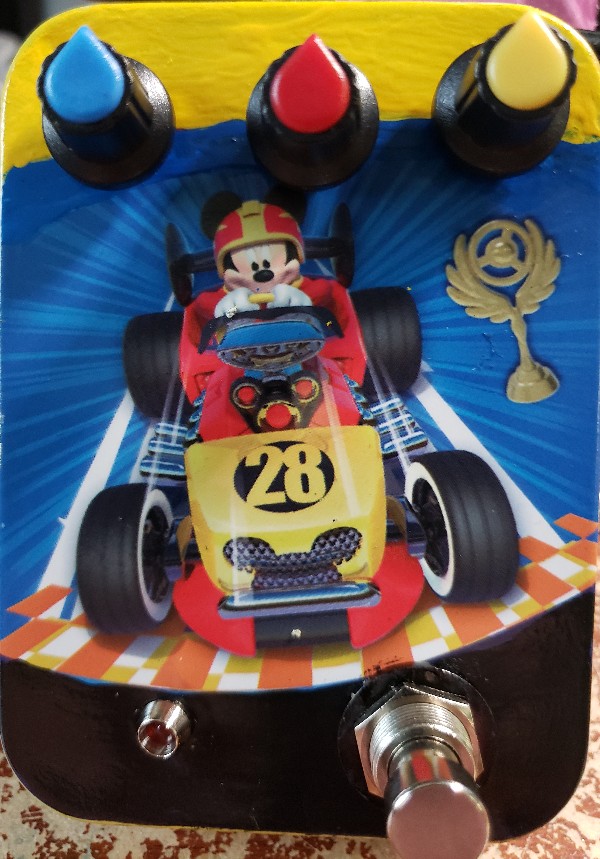
Figure 25: Turbo Mickey
You find a puzzle tin with Mickey Mouse in a race car on it, what do you do? Well, there's only one thing you can do: make a turbo rat. Or in my case, my own particular dual-op-amp subspecies of Distortus Rodentius known as the Lit Mickey.
In keeping with my findings from the Red Rodent, I decided not to waste time on a clipping switch and just hardwire in some LED clippers. I also went with the slightly over-potent NE5532 op-amp, which meant I had no end of trouble getting it not to squeal. By the time I'd tweaked the circuit to stop squealing I think it lacks some of the really fierce gain of the Rat.
Still, this is a quality circuit for the kind of person who doesn't crank their Rat to 11. Definitely some trade goods here, though, not a keeper for me.
Dee Minus Distortion
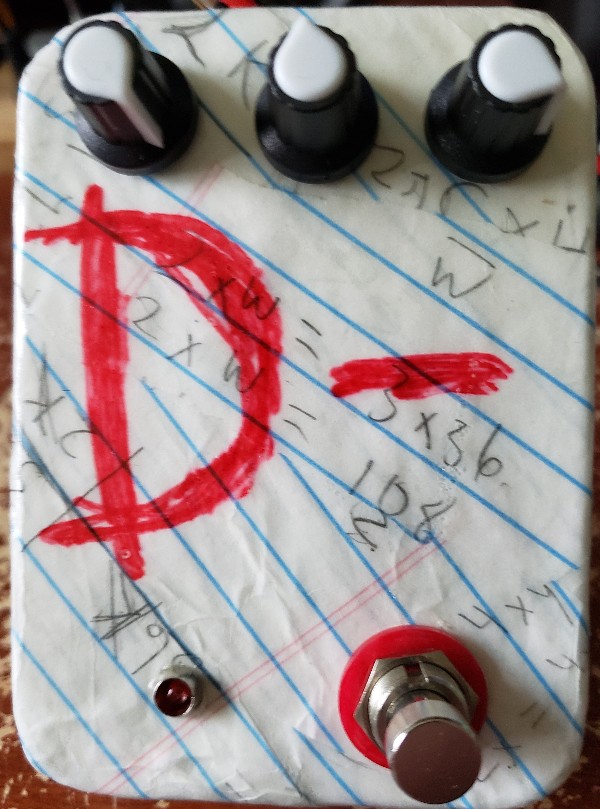
Figure 26: Dee Minus Distortion
One dull weekend I slapped together a Distortion + with Schottkey clippers and a passive tone stack. Sounded good, but sat in my unboxed bucket for several weeks while I contemplated what to do with it.
I found another puzzle tin at a garage sale, one without particularly useful graphics, so I decided to try an artwork approach I'd been contemplating for a distortion+ like circuit. Dubbing this one the "Dee Minus", I tore up some old notebook paper (including some actual homework) and layered it with mod-podge over the top of the tin. After the final layer, I scrawled the giant "D-" over the top like a bad grade.
I had to shave a bit of paper-podge off the bottom half of the tin to get it to close, but I think the result is very punk rock. Hopefully someone else agrees, because I am good on hard-clipping distortions and I'm putting this one up for sale/trade.
ChocoLurvvve Filter
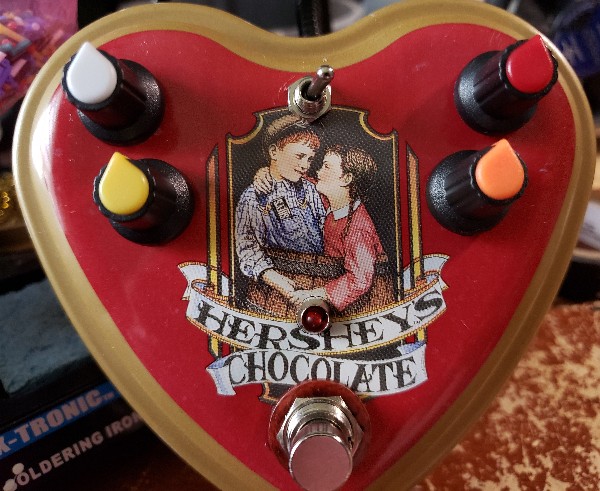
Figure 27: The Chocolurvvve envelope filter
Oh what to put in a heart-shaped tin? This one looked so cool and old-style, and was a little sturdier than your average cheap tin. The lobes on the heart suggest two knobs, but I'd built so many fuzzes lately I thought something more interesting could go in this. Hey, how about an envelope filter? I mean, the look that girl is giving him says "bow-chikka-wah-wah" to me.
So I built another modified Quackmire, improving a bit on my vero layout. Sounded killer as always. This one went up for trade and got traded away within a day or two. Guess I need to build more envelope filters! Didn't think I could fit four knobs on this tin, but it worked out fine.
Fuzz Vader
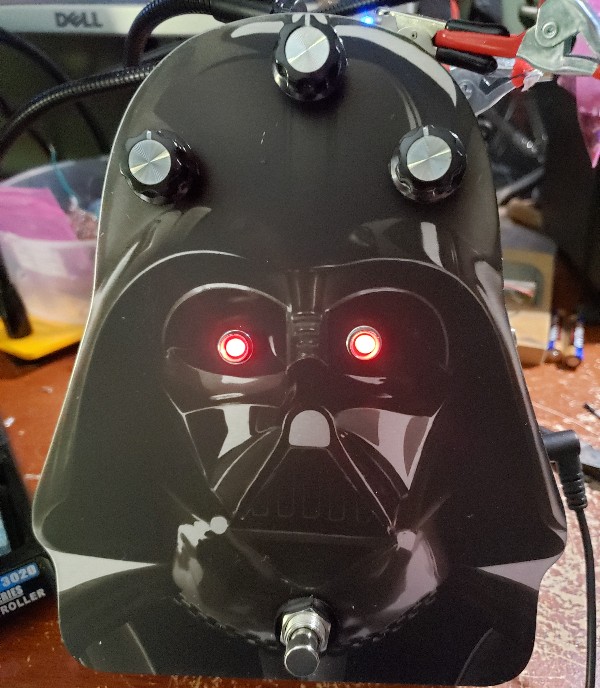
Figure 28: Fuzz Vader Fuzz pedal
I find your lack of fuzz disturbing. Or something like that. Anyway, when you find a tin shaped like Darth Vader's head, you buy it and put a really dark-side fuzz inside it. In this case, I had built another double-bazz-fuss with a crossover gate in the middle. More or less like the gingerbread fuzz, but in a Darth Vader tin for goodness sake! I also changed up the diode and transistor selection a bit, using LEDs in both stages this time. Seems to have a pretty potent effect, you can really get some wild sounds stacking bazz fusses.
This is a pretty huge tin, so it's going to take a special person to want this on their board. UPDATE: Special person found, hopefully they are enjoying it.
Kill It With Fire Fuzz
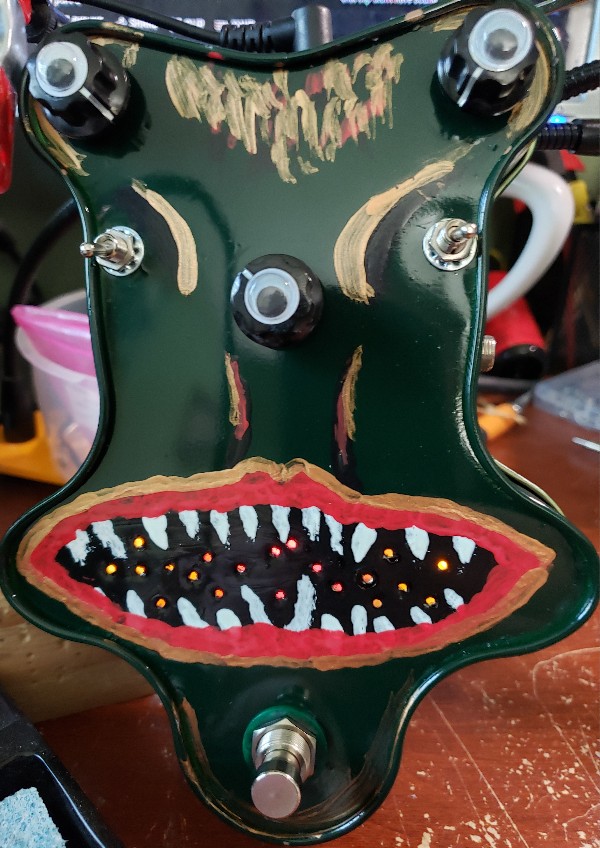
Figure 29: Kill it with Fire Fuzz
I had a whole lot of vero scraps laying around at this time, all like 10x10 or smaller pieces, which is why I'd been building things like bazz fusses. I wanted to expand a bit on the basic bazz fuss, so I built one with a switchable diode and a gain control. I was mulling over what to box it up in, but then decided if I was going to dedicate an enclosure, jacks, and footswitch to a circuit I might as well add a bit more value to it.
I had the idea to build a small static wah circuit and put it before the fuzz so that you could have a cocked-wah sound. I settled on the Escobedo Idiot Wah, which fit nicely onto my last vero scrap. The build features a switch for tightening the Q of the wah in addition to the frequency knob.
The resulting combination was worthwhile and very usable, though prone to oscillation at certain settings.
I had a gingerbread man-shaped tin left over from Christmas, but didn't want to make yet another Christmas-themed tin. So I realized the inverted tin would make a great monster-head shape. A bit of green paint, some detailing, and googly-eye knobs completed the effect. I called it "Kill-it-with-fire" because it looked like a lab experiment gone a bit wrong, which fairly accurately described the circuit as well.
Bass Alchemy
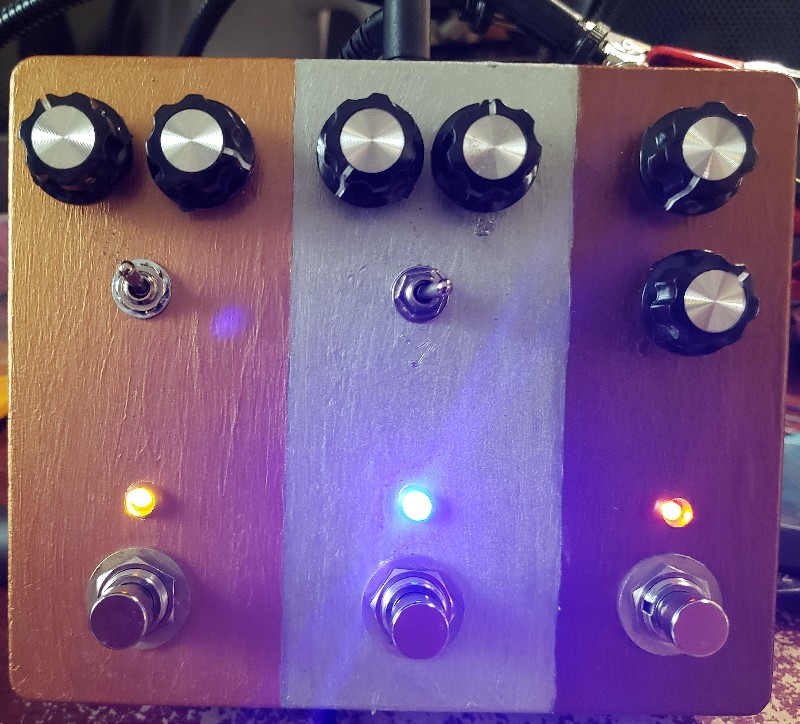
Figure 30: All-in-one bass alchemy pedal
I had been reasonably happy using my bass joy and multicab sim builds for a bass tone, but I wanted to do a bit better. I wanted a single all-in-one bass direct pedal that combined preamp, compressor, and cab sim. And I wanted it in a proper Hammond-style box rather than a tin, since it was for me.
For my preamp, I went with a simple tilt EQ I found from parasit studios. I modified it a bit for external gain control, as well as clipping LEDs on the input stage. This wouldn't make it a fuzz, but just ensure it clipped nicely if the gain was cranked. I limited the gain on this stage so it would only start clipping at about 75%. I set the tilt EQ pivot point pretty low, about 60Hz. I experimented some with this to find a setting that was good for bass, and in effect it acts more like a bass boost circuit when turned up.
For compressor, I turned once again to the lightspeed compressor, which I'd built before. Great transparent compression circuit, and having the ratio and threshold controls is awesome. Can get really thumpy on the slowest attack setting.
Finally, since the multicab sim was a little overkill controls-wise, I used a Runoffgroove Condor cab sim instead. It's not as satisfying on gainy guitar, but for bass it was just the right amount. I used some fatter caps for the lowend filter to make it bass-friendly as described in ROG's notes about the circuit. The scoop switch is pretty great for going between a clean R&B bass sound and a snarlier rock sound.
I thought running this pedal on 12v would be better, but it seems to mess with the compressor in some way. I ended up dropping back to 9v and it's great. Still plenty of headroom.
For boxing it up, I initially bought a 1590BB. However, it quickly became apparent I'd never be able to fit all the circuitry in there. Ended up purchasing a 1590XX instead. I painted each section its own color, using a 3-metal theme. I think I was initially thinking Olympic medals, but my wife suggested an alchemy theme since I was "purifying" my bass tone. This made sense as the stages went from copper to silver to gold. So, Bass Alchemy it is.
Cyberman Fuzz
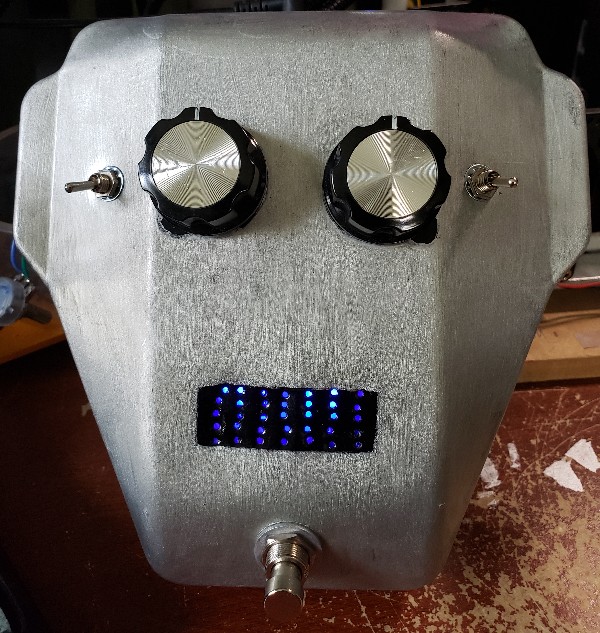
Figure 31: Cyberman Fuzz is here to upgrade you
My reddit post about this pedal:
Every circuit asks a question. That question can be intelligent, inspired, and insightful; reflecting a mature grasp of the principles of audio, electrical engineering, and music; advancing the state of the art and the collective wisdom of the whole world.
Other times, that question is "What happens if I stack 4 Bazz Fusses in series?".
What happens is a lot of squealing and noise, it turns out. So I hammered away adding things like a diode gate and miller caps until it was a tame, respectable fuzz. Then I added toggles to remove some of the safety bits and make it less respectable again.
The basic tone here is amazing. Like a flaming dump truck of sawblades being driven full speed off a cliff. It's synthy but not nasal, with random sub-octaves and super-octaves just popping out here and there as you play.
The two knobs are tone (BMP tonestack) and volume. The left switch disables the tonestack for a full-range fuzz. The right switch disables the final miller cap on the 4th stage to make it really nasty. Thought about adding a switch to disable the gate, but it pretty much just oscillates when you do that. Maybe I'll revisit this circuit sometime and do a momentary stomp for that.
So I had a long thin scrap of vero and I wanted to build a circuit. A long thin scrap suggests maybe a repeating pattern, and since 2 bazz fusses it pretty rad, why not 4? I think this circuit offers a lot of tinkering possibilities, so I may build some more variations on this. For diodes I went with LEDs in ascending order of Vf, not sure how much difference that made.
The enclosure was actually a rocket-shaped Buzz Lightyear puzzle tin, but to make it work as a pedal I'd have to turn it upside down. I realized that in this position it was vaguely head-shaped. I decided to go with a cyberman theme, though I didn't get too crazy about copping any particular iteration of the cyberman. Just the signature eyes and rectangular mouth. For an indicator I was going to dremel out slits in the mouth to put an LED behind, but that got rather sparky and I didn't want to start a fire. I decided on the "cheese grater" approach I used for the KIWF fuzz.
Turned out pretty good overall, and I think the tone of this fuzz is pretty appropriate for the enclosure. The world seems to agree since it sold on reverb within 24 hours of listing.
Brown Footprint Compressor
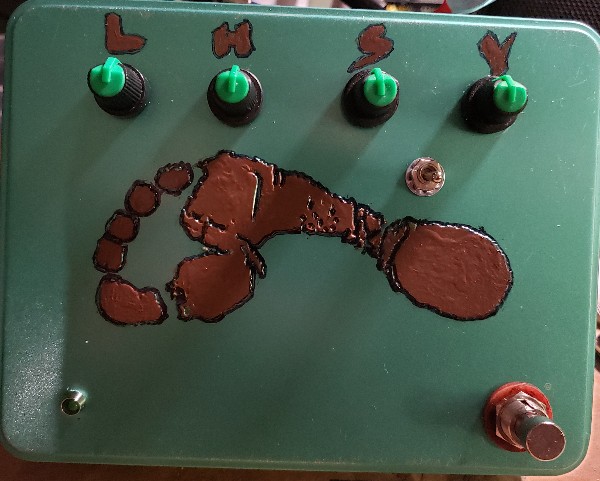
Figure 32: Squish down into the brown
Time for another non-dirt build. This time I started with another Hollis Flatline, but when hunting for a suitable enclosure I decided on a tin with an embossed footprint. However, it looked a little sparse with just the two knobs and a switch, so I decided to add a bit more value-add. That came in the form of a 2-band active Baxandall EQ that I put before the compression circuit. I used a similar arrangement in my Bass Joy pedal, though in this case I hardwired it to unity gain rather than adding another volume/gain knob.
This is the result. Not a bad little compressor+EQ combo. Putting it up for trade, though; I have this ground covered pretty well on my end. UPDATE: It's been sold off!
Double Deer
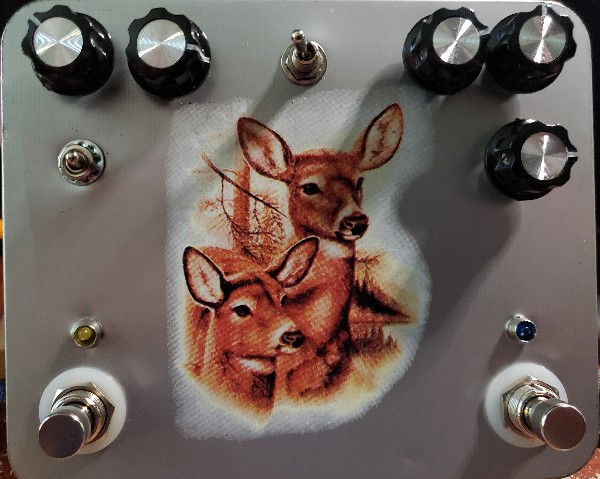
Figure 33: Double deers dirtin' it up
I have no idea why anyone had a tin with a pair of deer on it, or what might have originally been in it. But to me it suggested a double dirt pedal of some kind. So what combo should I do?
For one side I settled on a Fuzzhugger Phantom Octave. It's a pretty crazy untamed fuzz based on the LM386 amplifier chip. From a circuit perspective it's fairly simple, it starts with the LM386 pushing an asymmetric set of clippers. But the crazy bit is a feedback diode from the output of the chip to its input, which results in upper and lower octaves jumping out as a note decays. I decided to put that diode on a switch so it could be more of a conventional distortion as well as an insane fuzz. I also added a gain knob, and it turns out that this circuit can be nice with lower gains. This was the first time I've used the 386 in a distortion since my original campfire, and I'm warming up to its possibilities again.
Now for the other half of the double pedal… I decided to pander to the flavor of the month and build a Special Cranker. Well, what can I say, everyone's talking about it right now (that is, June '22). It turns out (at least according to schematics I've found) that it's just a speaker cranker with a "stupidly-wonderful tone control" and an output boost. Oh yeah, and a switch to select between Silicon and Germanium diodes. I skipped that bit and just hardwired 1n4148s because meh.
Well the end result came out pretty well, though the offboard wiring was a multi-day nightmare. I decided to save some pennies by skipping the 3PDT boards and just manually wiring everything, including the order-switcher. I need to swear off double pedals, or at least ones with order switchers. What a mess in there, despite my best efforts.
The combo of the two pedals is useful, you can kind of dial in your basic "just breaking up" sound with the cranker side, then get your lead tone from the fuzz. I was hoping for more exciting things from the interaction, but it's relatively predictable. Well, it's up for trade then. ( and it's gone! )
Dominoes Envelope Filter
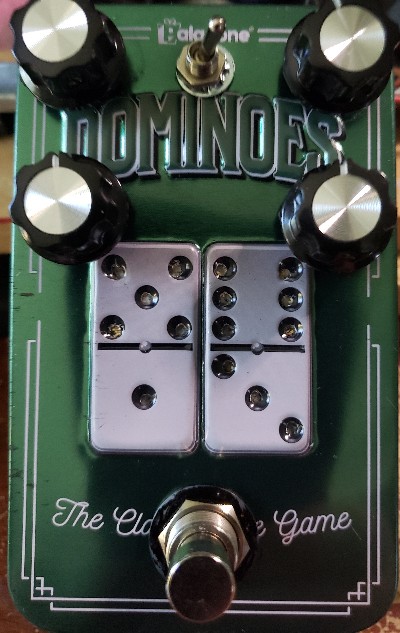
Figure 34: Dominoter? Dominautowah? The Domino Effect?
The world loves an envelope filter. Or at least, I think it does, based on how quickly that chocolurvve went. So I popped another of my 4-knob Quackmire implementation together and stuck it in this very conveniently pedal-sized dominoes tin. Came out great, though I broke an unprecedented two pots during the final assembly. One got over-tightened resulting in the threaded bit snapping off from the housing, the other cracked its board as I was installing it. Yeesh. Well, there was a bit of serendipity going on though; the cracked pot was my last 100k on hand, so I had to find a different value for the range pot. Turns out 250k works a treat and gives a bit more flexibility. Who knew?
Immediately started getting trade offers on reddit, so I guess I'm right about envelope filters. Gonna have to be a routine build for me, maybe.
M&M Drive
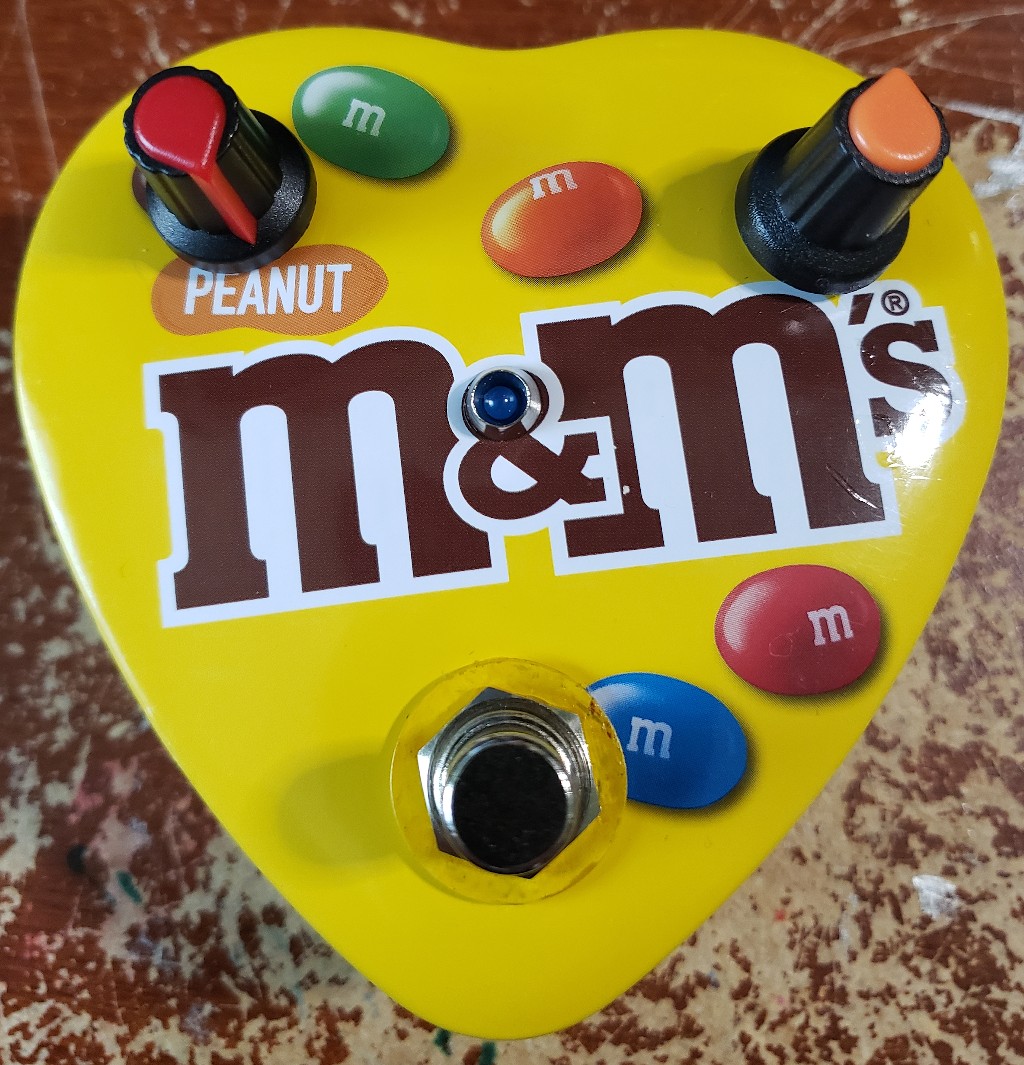
Figure 35: Overdrive that melts in your ears, not in your amp
Sometimes I have this obsession with using up parts that I have, especially PNP transistors. Enter the Willmott Differential distortion. This is a circuit published in Popular Electronics way back in 1995 whose schematic has been floating around the web ever since, so I decided to build it. It's a nice drive sound, definitely ampy in character. The original had no gain control, just output volume, so I followed suit; I did, however, have some room left on the vero scrap I was building on to add a tone control.
The two-knob circuit fit nicely in a heart-shaped candy tin from the thrift store, and thus the M&M drive was born. I ended up selling it off rather quickly.
Catfuzz
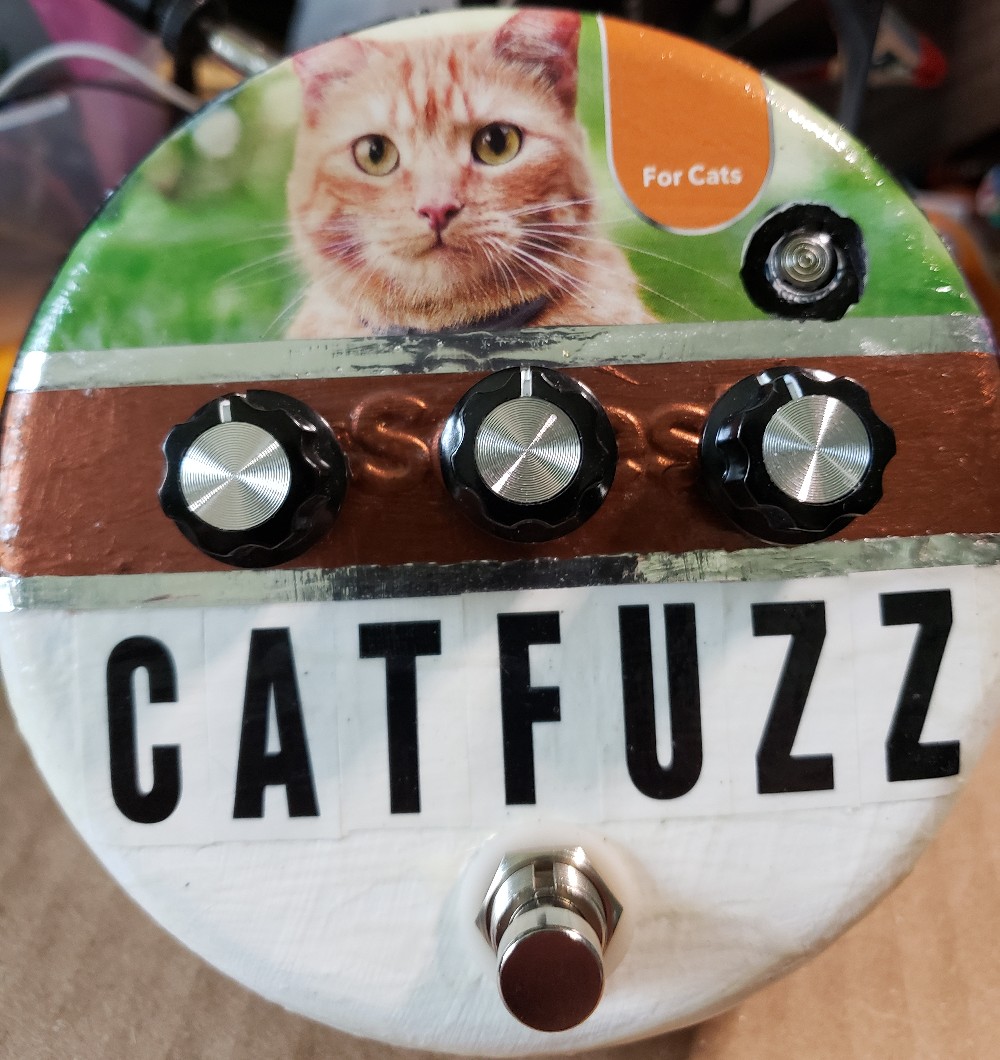
Figure 36: Catfuzz, catfuzz, catfuzz AGAIN
After filling another odd bit of vero board with a green ringer, I decided to pair it with a fuzz to make a nice octave fuzz. I'd done this before but found that there was a volume drop with the blend control due to the fact that the ringer kinda-sorta inverts the signal (I mean, it does invert the signal, but it also messes it up significantly so it's not just a straight phase flip). To combat that, i built a small phase inverter buffer on a second piece of vero along with a bazz fuss, so that I could invert the ringer signal before blending it. It seemed to work pretty well.
I also added a gain control to the bazz fuss and tightened up the low end with some smaller coupling caps. The end result is a bit feline in quality, and I had picked up a flea collar tin from my in-laws. So this all went together in a slightly trashy-looking build as the "cat fuzz".
The ill-fated Wunnerful Vibes
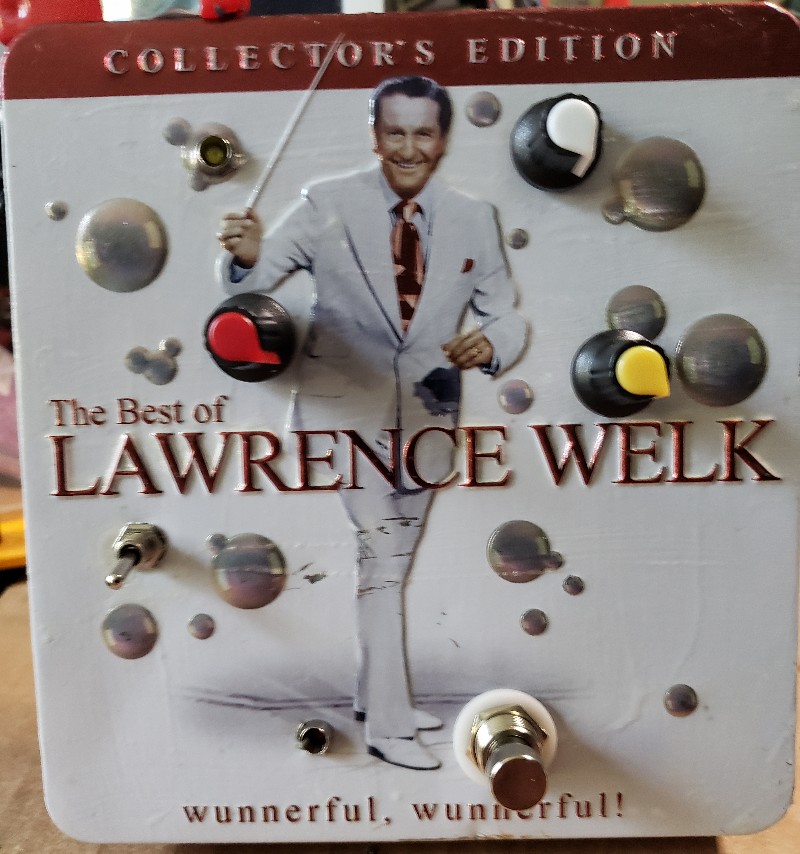
Figure 37: We got some really wunnerful vibes tonight… or not
A friend on reddit had sent me a schematic for the Nielsen Vibe, a magnavibe-like circuit with an improved LFO. I decided to build it myself with a few modifications. The problem with vibe circuits is that they can be incredibly subtle, especially at slower speeds. This one was the same; apparently it depends somewhat on the choice of LED for the vactrol, but I was dead set on using my supply of LCR0202s rather than cobbling one together by hand. At some point I got the circuit working well enough to be boxed up, so I put it into this Lawrence Welk CD tin. Seemed fitting with its "bubbly" sound.
A few people online commented that the effect seemed very subtle in the demos, so shelved it for a while and decided to improve it. I cobbled together a second stage to try to make it less subtle. This worked, but the LFO started thumping. Somewhere in trying to fix this I think I fried the vactrols. So this poor pedal is currently back on the shelf waiting for me to decide if I want to make it work or just gut it and put a PT2399 chorus in there or something.
We'll see, I suppose.
Queen's Clampbit
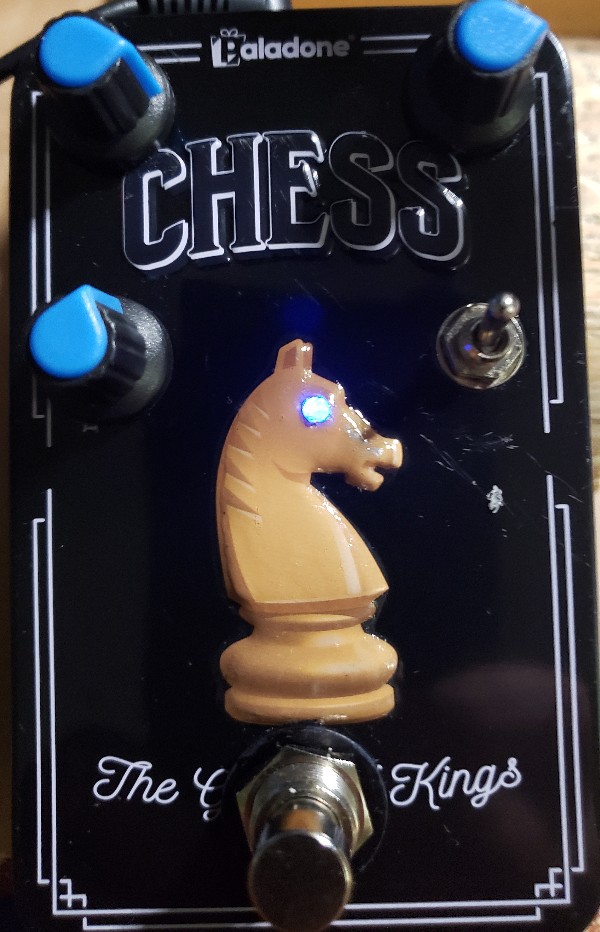
Figure 38: Or perhaps the "chess compressor"? I dunno
Ever since I got this chess tin I intended to put a compressor in it; I guess I had in mind some name like "compchessor" or something like that. I built a flatline compressor circuit, but since I like to shake things up a bit each time I added a decay knob. It's a subtle setting, but sometimes you need subtlety.
Someone on reddit suggested the name "Queen's Clampbit", and it go the most upvotes, so I decided to go with that.
Cray Cray Cranz Fuzz
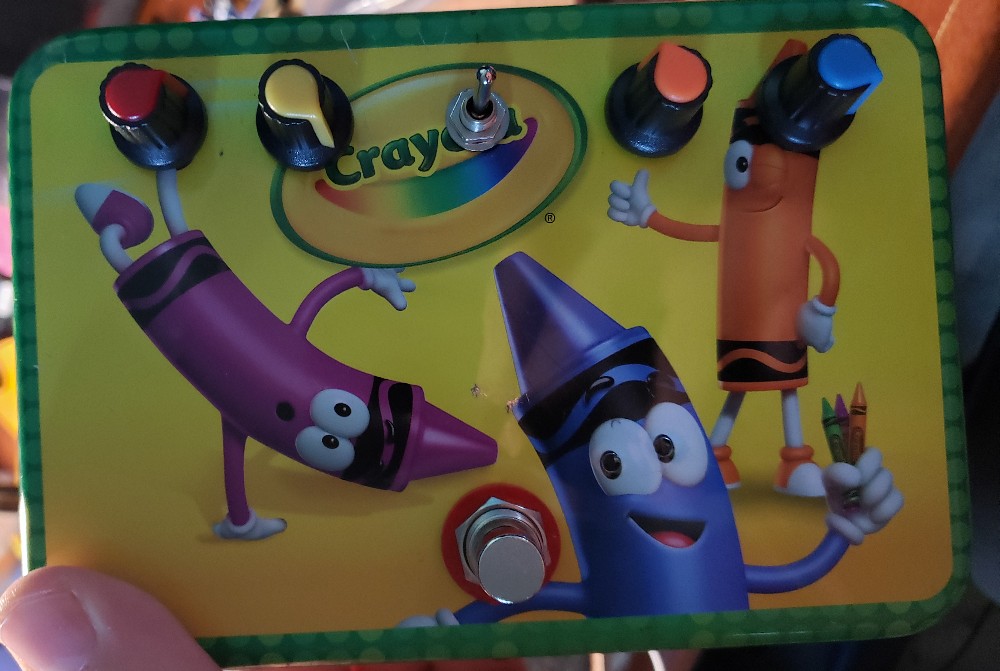
Figure 39: Deez Cranz is CRAZY!
Every so many pedals I have to do a stupid fuzz experiment. When I made the "kill it with fire" fuzz I routed an idiot wah circuit into a bazz fuss; this time, I had the idea of doing the same thing, but with two idiot wahs in parallel. The idea was that I might be able to get formant-like sounds with two wah peaks. After playing with it, I found that actually the more interesting sounds came from putting the fuzz first and the parallel wahs second, since there was more harmonic content for the wahs to work with. I then tacked some optional clipping diodes on the end just to bring back some upper harmonics after the wahs.
The final sound isn't quite as vocal as I'd hoped, but it's got quite the tonal range nonetheless. For the curios, there is a demo posted at my soundcloud page.
Chuck
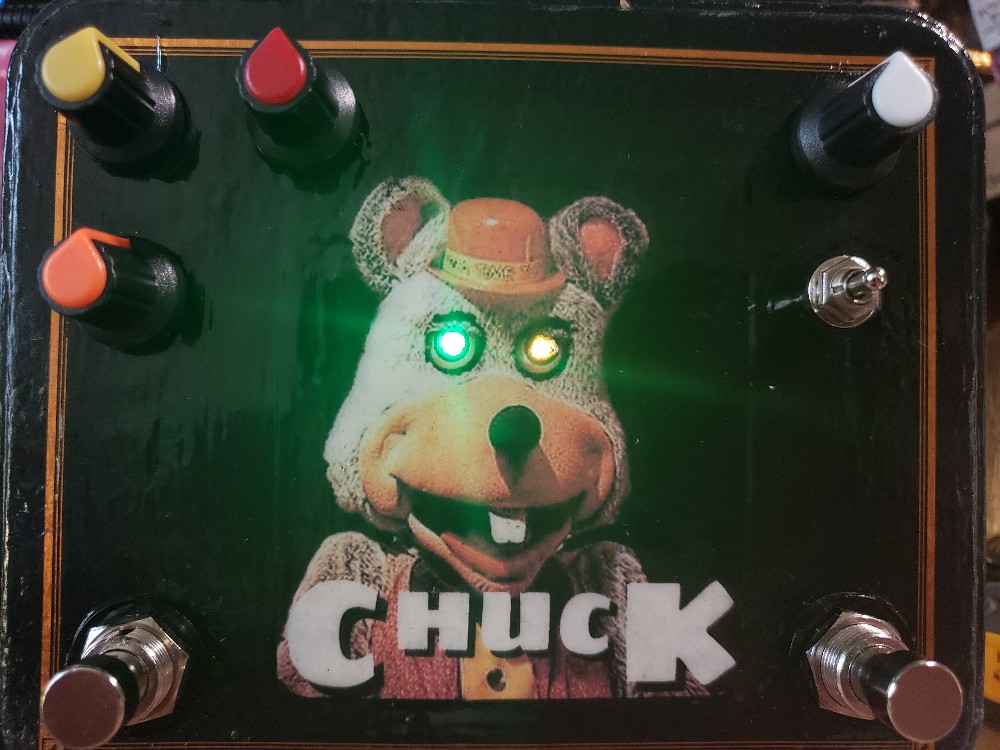
Figure 40: Fear Him, he is Chuck.
I've been frustrated with my rat builds being so prone to oscillation, mostly because I've been using dual op-amps like the 4558 and 5532. I decided to invest in some OP07 op-amps (the same used in current Rats from ProCo) to see if it would work better. Turns it, it does. Lower slew rates help to avoid that high squealing.
Of course, when I had successfully built a stock Rat, I had a stock Rat circuit. Whoop-dee-doo. Kind of want to give the public more than just a clone, so I decded a dual pedal was in order.
On my own board I like to push my rat (clone) with a treble boost, so I built a little Brian May treble boost and started testing them together. Welll… THAT caused some squealing. However, a simple JFET buffer after the boost fixed the squeal. To make the controls balance out a bit, I added a switch to make the treble boost more of a mids boost by swapping out the coupling cap.
Well, now I have a scary Rat circuit, so time to find a scary rat to theme the pedal art around. And what Rat is more terrifying that Chuck E. Cheese? No, not the modern Chuck that looks like he stepped out of a Pixar movie; rather, the old-school animatronic Chuck that was the stuff of nightmares for young Gen Xers across America.
I sold off Chuck pretty fast; even sitting on the shelf he was frightening me.
Brazz Flush
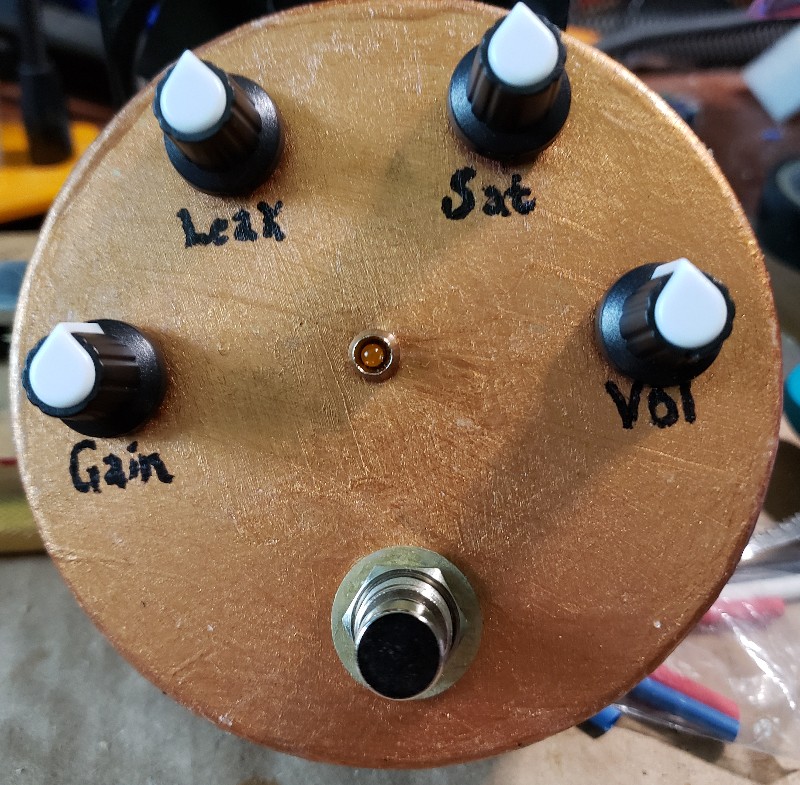
Figure 41: The Brazz Flush, in the Flush
The bazz fuss is just an ever-recurring theme in my fuzz experiments; something about its simplicity of design just captivates me. I got wondering what the effect of some resistance in parallel with the feedback diode would do, if it would introduce some "clean leak" the way it does in soft-clipping circuits. Turns out, it does. A 500k pot did the job just about right, bringing back the crunch and punch to the fuzzy hash of the bazz fuss.
Normally I use an LED in the fuss, but for this circuit a smaller Vf diode sounded better, so I went with a 1n60p.
To finish off this experiment, I added a gain knob for the main fuzz circuit and some asymmetric hard clippers on the output with a saturation control. The end result is a pretty respectable and versatile fuzz. I didn't have any super creative ideas for artwork or theming here, so I just put it in a little round tin painted a brassy color.
Ka-Chowverdrive
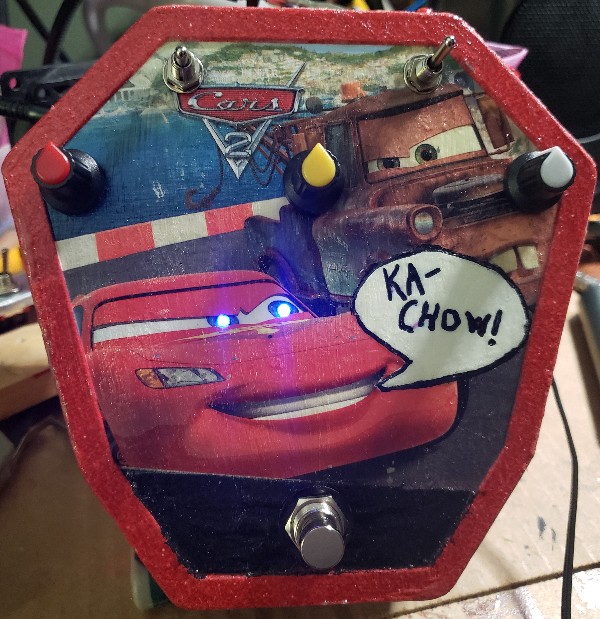
Figure 42: Vroom Vroom
Previously I'd built the original Willmott Differential Distortion from 1995, but Mr. Willmott has since released a schematic for an improved version of drive that includes gain and bias controls and some other optional niceties. Since I'd sold off my first build, I decided to give the improved version a crack. I also decided to try socketing the transistors to play around with some different options. After doing a few swaps, I couldn't really detect a meaningful difference between different transistor sets, so I picked the one I had the most of and soldered them in.
Like the original, this circuit has a "fluffy", ampy character of distortion, though the bias control can dial in a bit of ragged edge to it. The output of this circuit was disappointingly low, however, unity being at about 3/4 up. I whipped up a simple boost circuit and tacked it on the end, and this pedal truly rips now. I added the optional toggles for altering the low cut on the input and the high cut on the output.
I happened to have acquired this odd diamond-shaped Cars puzzle tin; I'm not stranger to Cars-themed pedals, and they just easily lend themselves to overdrive circuits for obvious reasons. Add a bit of sparkly red paint to cover the instructions and copyright logos and we're ready to roll.
Savage Gulf Echo
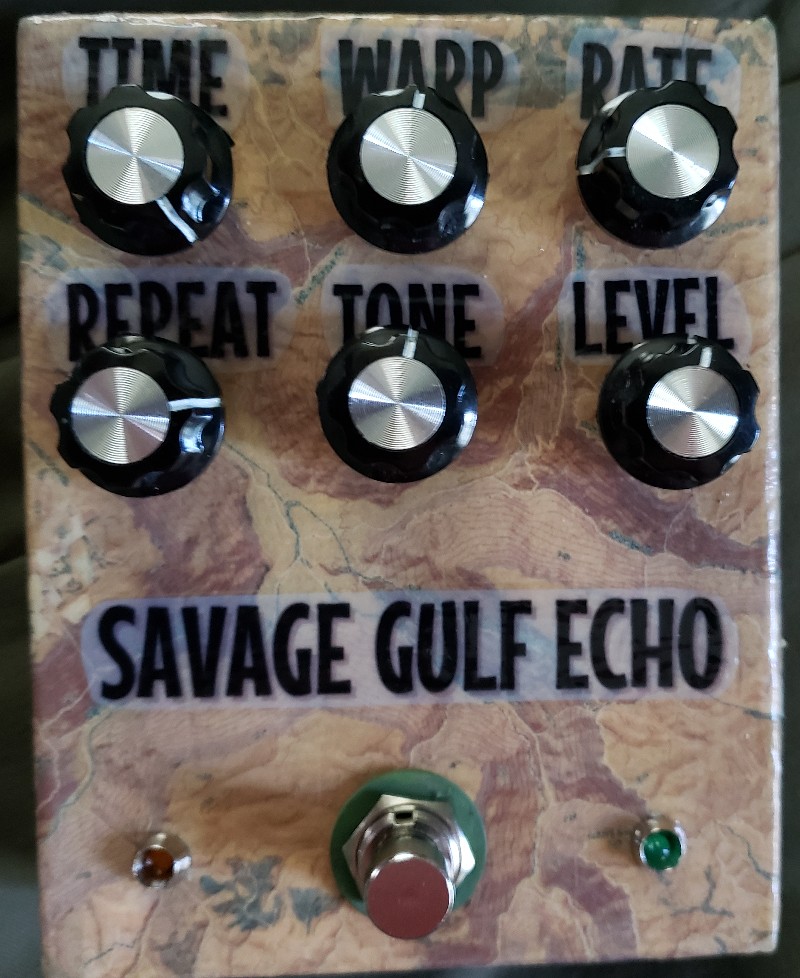
Figure 43: Savage Gulf Echo
Getting towards the end of summer, it was time to start thinking about building something for the Boy Scout silent auction in December. This is my first contribution, which is essentially a Keeley Mag echo but with an added tone control in the feedback loop (and a few modifications to make that work right). It's the same circuit I made for myself last year in the blue tool box, but I'd redesigned the vero layout to fit all on one piece.
Savage gulf, just a couple hours away, is a popular hiking and camping destination for our troop, so I decided to decorate the 1590BB case with a topographical map of the gulf. Turned out pretty well, I think.
Winterberry Chorus
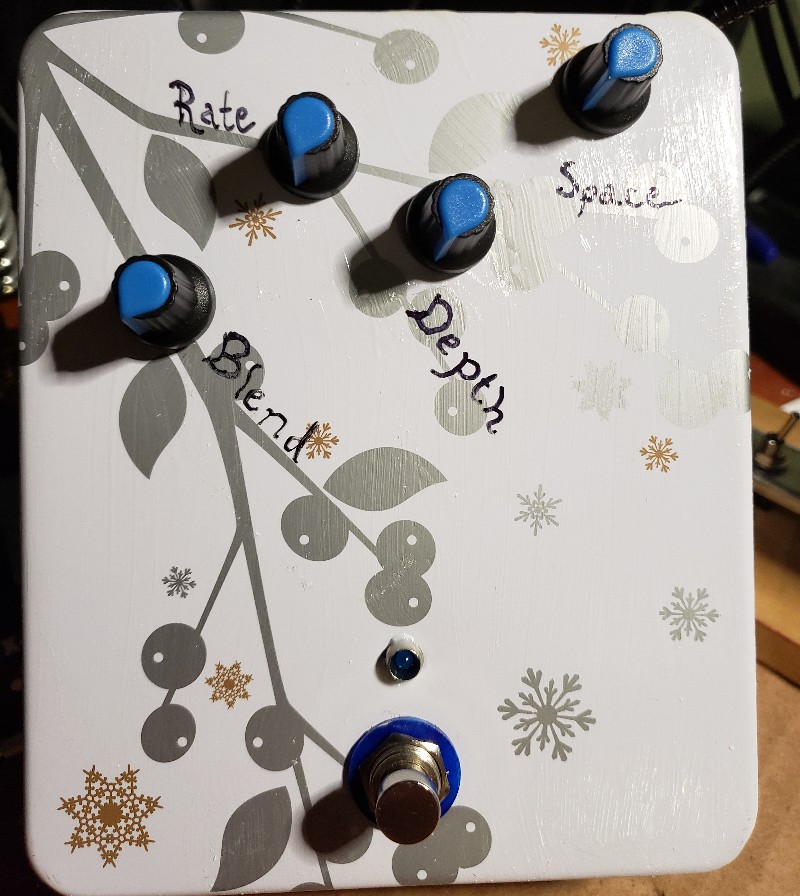
Figure 44: Winterberry Chorus
It's been too long since I've made a chorus, and fresh off another PT2399 build, I decided to put together a little angel. I've built the vero layout from Tagboard Effects before, and I mostly followed it this time, but I wanted to play with a blend control and also add in a delay time pot. Just putting wet and dry to either side of a pot wasn't terribly satisfying and had some volume dip in the middle. I planned to build a daughterboard for the anti-latchup circuit anyway, so I did that and added in an inverting transistor amp for the wet signal. This seemed to really enhance the presence of the effect in a great way.
I needed a good sized tin for this one, and I had this one from the thrift store that apparently held cosmetics at one point. I washed the tin a few times but never got the "middle-aged auntie" smell out of it, but maybe that enhances the experience?
I ended up trading this one away for a new soldering iron, so that worked out well.
Volcano Fuzz
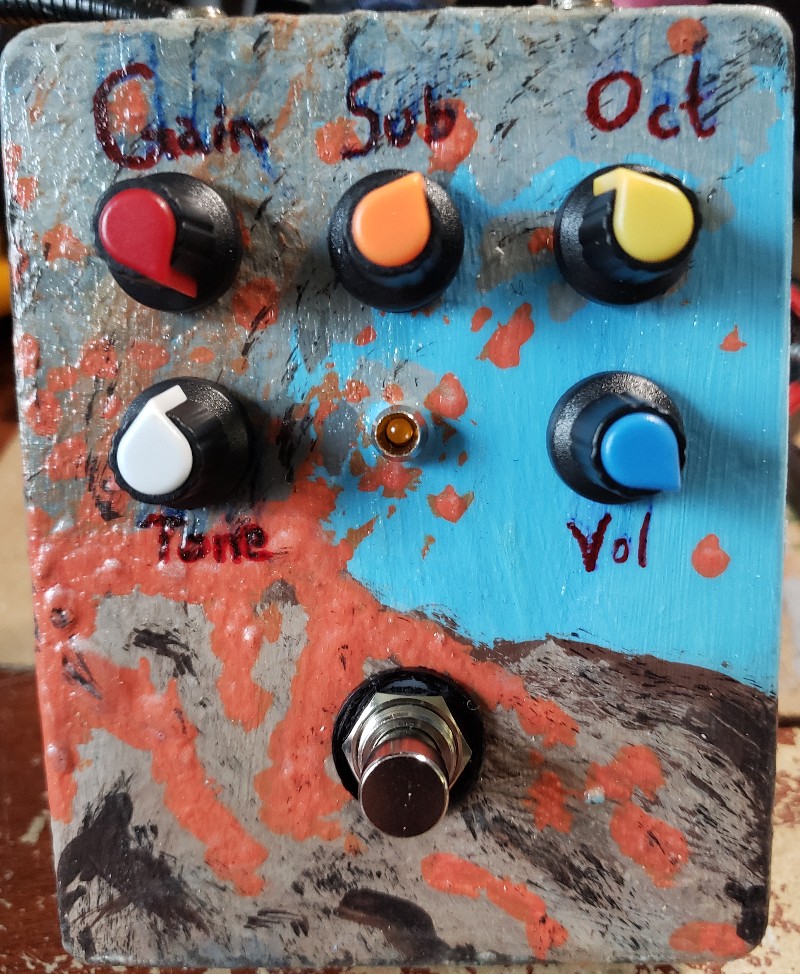
Figure 45: It's supposed to be a volcano. Don't judge me.
I've built a lot of octaver fuzzes, and I've built a couple versions of the Shocktave sub-octave fuzz, so I thought, what if I could bring it all together? A single fuzz that could give you a sub-octave and an upper octave? Well, after a good deal of breadboard experimentation, the result was this fuzz. It's essentially a Davisson Shocktave, but with a green ringer feeding off the first stage which can be blended in at the end. It took a while (and some assistance from people who actually know what they're doing) to get the blending circuit just right, but the results were pretty awesome, as you can hear here.
I got hold of some 1590BB boxes cheap from Small Bear and decided this circuit deserved one. I originally intended to do some dinosaur-themed artwork, but got as far as a volcano before I decided my art skills weren't up to it. So volcano fuzz it was.
This pedal ended up getting traded away for a pretty decent trade, so more pedals for me to build I guess!
De Kwakenwafel
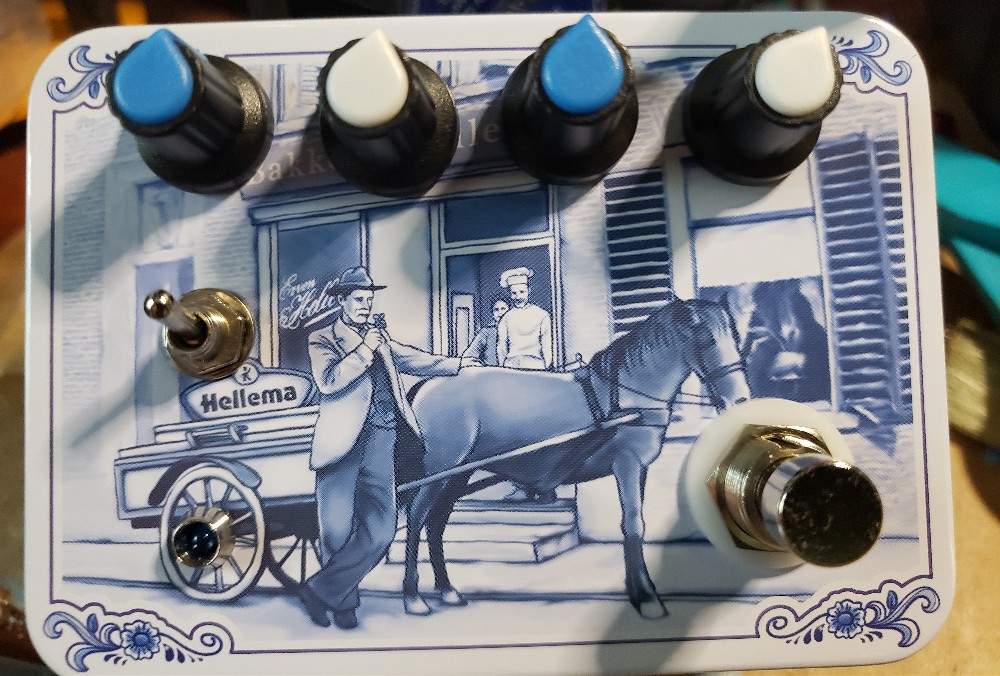
Figure 46: Het is een envelopfilter in een koektrommel
My mother, after learning of my strange little hobby, has been keeping an eye out for interesting tins on her travels; this little faux-Delft cookie tin came from Holland, Michigan, and I felt like it deserved a more interesting circuit than a drive or fuzz. Since I didn't currently have an envelope filter on hand for trade or sale, I decided it was a good time for another Quackmire build.
Nothing really new circuit-wise here, of course, just the same build I've been doing. The end result turned out quite nice, though, I think.
Pinkie Pi
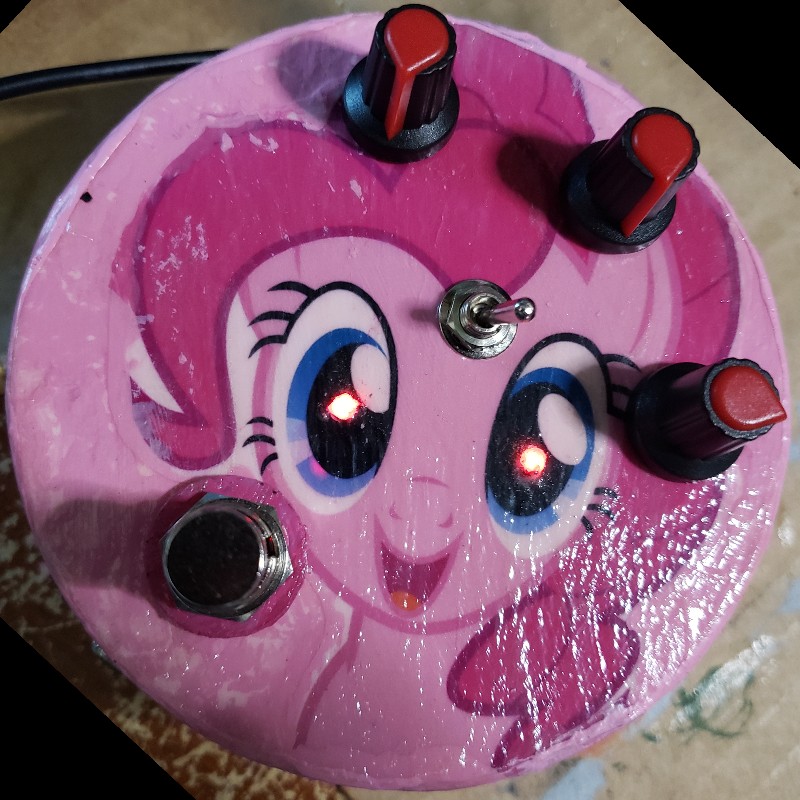
Figure 47: Fuzzship is magic
It's been a hot minute since I've built a Big Muff Pi, and about this time the pedal community online was all fired up about the J Mascis muff that just got released. So I decided I'd better have one on hand. This one is more or less a "Green Russian" clone, though to be honest I can't bring myself to stock all the exact resistor values for these. Still, it sounds like a BMP to me. Also included it a 3-way switch for the mids control, though that was just part of the Tagboardeffects layout I used, not my own innovation.
I had a round pink tin from the thrift store on hand, so "pinkie pi" just kind of dictated some obvious artwork. Fuzz is magic, y'all. The only question is whether my daughter will let this one leave the house or not.
Octagoon
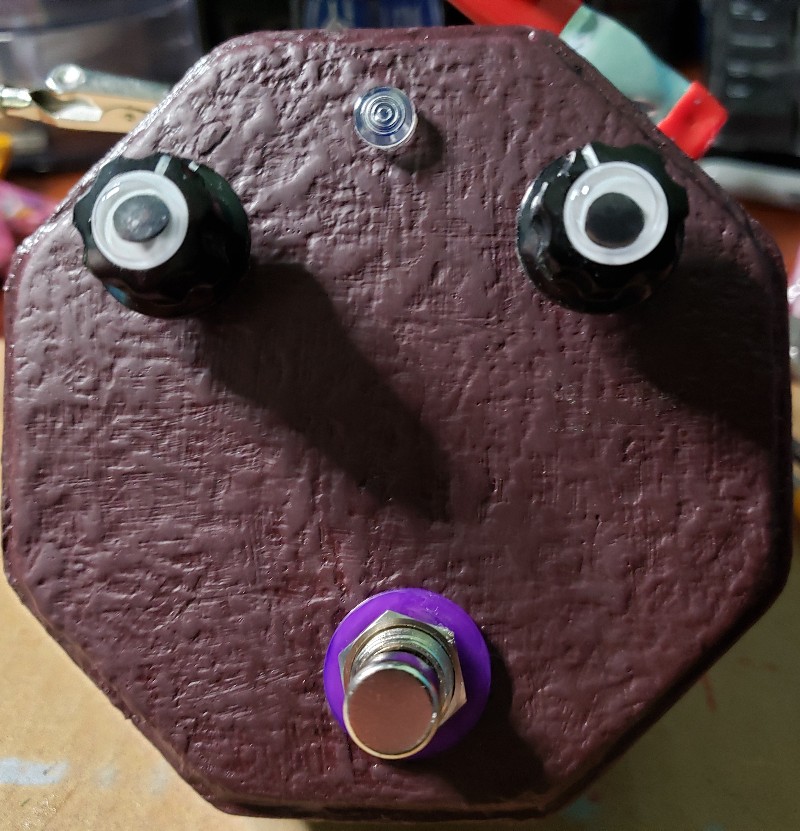
Figure 48: The octagoon
Alright, alright, too many clones and rebuilds here, it's time to get back to the fuzz lab and use up some transistors. I had never made an Escobedo Push-me-pully-you before, so I decided to make one on the breadboard one night. The octave-up was fine, but it was kind of a weak fuzz. Well, that's nothing that a bazz fuss can't fix, right? Except I had a crazy idea: instead of tacking an additional circuit on to this one, what if I "bazz-fussified" it? That is, turn each gain stage in the circuit into a bazz fuss circuit. I did a full write-up here about all the changes I made, including adding a pot to dial out the octave if desired, but this really turned out to be a good circuit. Every bit as satisfying as my green-ringer/bazz-fuss combos but with far fewer components and phase considerations.
The tin was another one from my dear mother, this time an octagonal christmas tin (which just demanded something involving octaves, no?). I initially thought about decorating it to look like a GiddyGoon from the Dragon's Lair game/cartoon, but kind of gave out artistically. Still, I got a leathery-purple-skin finish and googly eyes, so that's something.
Chair Fuzz
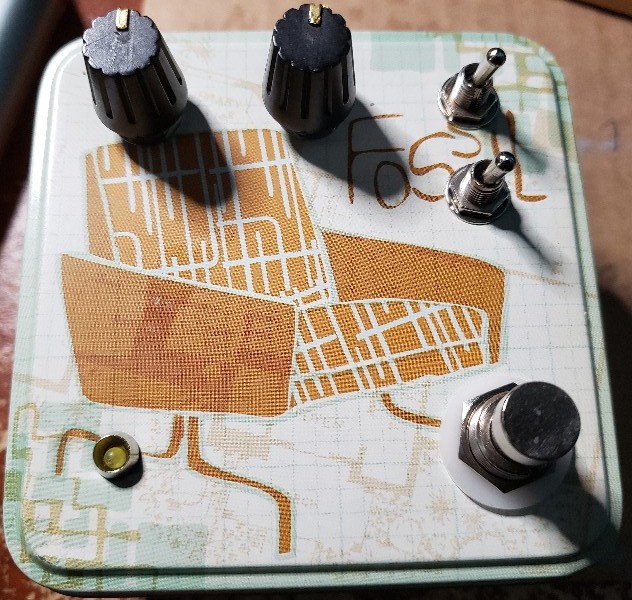
Figure 49: Kick back in the chair fuzz
Following up on my success at bazz-fussifying the push-me-pull-you, I decided to try a similar feat on the Escobedo Tripple fuzz. The results weren't as awesome of an improvement, but then Tripple Fuzz is pretty cool on its own. After a lot of experimentation on the breadboard, I found that feedback components on the frequency tripler circuit really didn't impact the sound in very meaningful ways. The original design has a resistor and capacitor, but pulling these out made no difference that was audible to me. I put in some feedback diodes (LEDs, actually) just to say I'd bazz-fussified the whole thing, but they really weren't significant to the sound.
Another trick that DID work from the PMPY experiments was to introduce a resistance at the base of the PNP resistor to "dial out" the octave if desired. In retrospect this would probably be better as a switch, since even with a log pot the change is pretty abrupt.
To finish this thing off with maximal options, I added a couple more bits from my bag of tricks: a crossover distortion gate and a lowpass filter, both right after the initial fuzz stage. The former killed all the excess noise of the pedal (at the expense of the cleanup factor), and the latter allowed for a smoother tone (my thinking was that a purer tone going into the frequency tripler might result in a clearer 2nd harmonic, but it didn't really work out. It did make a musically useful difference, though, so I kept it).
Not really sure what enclosure to put this little monster in, I ended up using a little fossil watch tin from the thrift store. Seemed the right size.
Shay-key-tay-tur
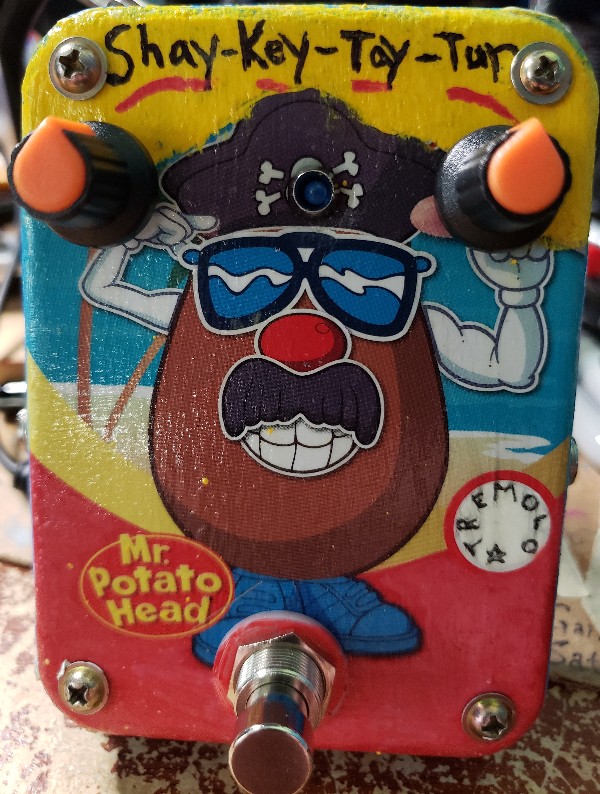
Figure 50: What's tay-turz precious?
Trying to clear up some space in my workspace, I had this little Mr Potato Head tin laying around that was too thin for jacks initially, but I'd propped it up with some dowels so that the sides were just closed. Wanted to use it for something, but I was feeling a bit fuzzed-out after the last several builds. Hadn't made a colorsound tremolo in a while, and I had no trems on hand for trade, so I ripped out a build in an evening and dropped it in.
This build came out on the trashier side of things I've built, but hey that's part of the cool factor. Hopefully someone wants this thing.
Harmonic Skittle-eater

Figure 51: Harmonic Skittle-eater
I've just been in a use-up-the-oddball-transistors mood lately, as I still have a bunch of mostly-the-same BJTs in my collection from that initial components kit I got back in '21. So I thought I'd give the harmonic percolator another try. And I did, but quite frankly the HP is such a noisy little thing it just bothered me. So I started going at the finished vero build with my soldering iron and sucker until I'd Frankenstein'ed it into something quite different.
For starters, I dropped the gain (a.k.a. Harmonics) knob, because the under-max settings on this build were just not that inspiring (and besides, a voltage-divider-to-ground on the input as a gain control just seems like a copout. My guitar already has a volume knob, you know). I then threw in my diode crossover gate and re-used my gain pot as a gate bypass control. I also added in switchable clipping diodes, though unlike the original I offset the symmetry with different diode values rather than a resistor. Just saving space on the vero.
I had this skittles tin that I bought about the same time as the M&M tin, and it seemed a good fit for the circuit. Harmonic Skittle-eater it is.
JFATner boost
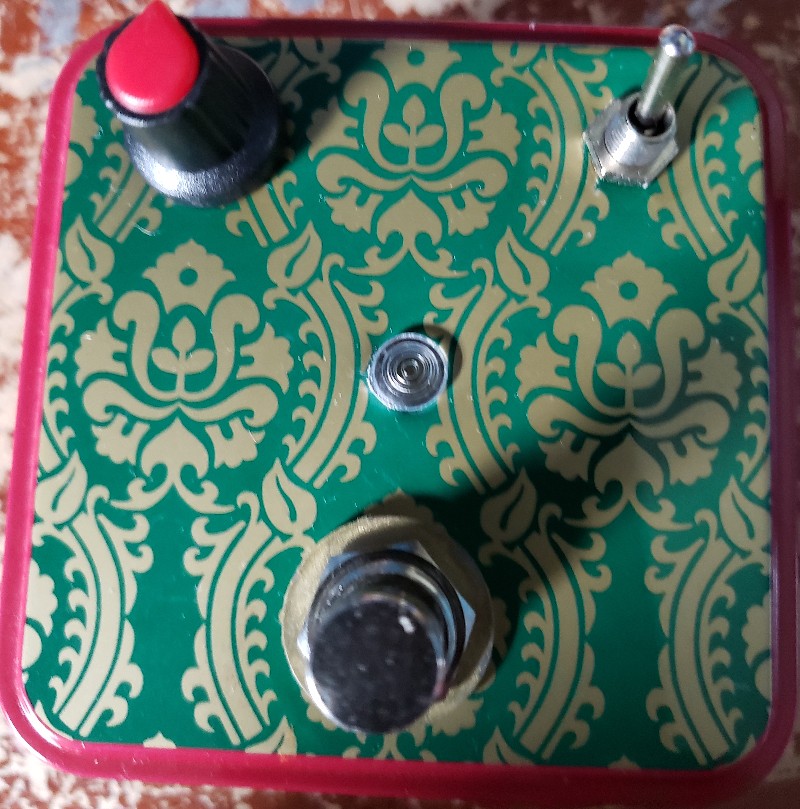
Figure 52: The jfatner boost in a christmas tin
Decades ago, before I actually learned how to build useful electronic devices, I enjoyed taking said devices apart. I once disassembled a big component stereo amplifier and painstakingly sorted all its resistors, transistors, caps, diodes, pots, and switches into a tackle box. While the box is occasionally useful for supplying an oddball component that I lack, for the most part it's just a waste of space that I should just chuck.
However, I had an odd scrap of vero and I thought it'd be a fun challenge to build a circuit just with these old salvaged components. I found a little JFET and cobbled together this boost. Some smallish coupling caps made it a treble boost, and the addition of some clipping diodes made for an optional drive component. It's a little noisier than I'd like, but still very usable.
This tiny sliver of a circuit went into a small square Christmas tin from the thrift store. Overall, a decent little package, and there's some charm to it being made from old stereo parts.
Tonewood Tubesound
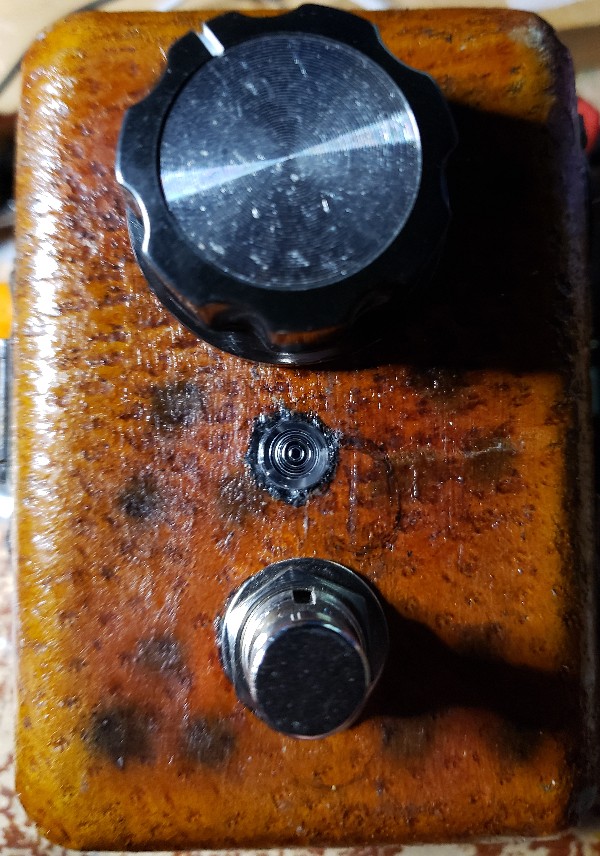
Figure 53: Tonewood Tubesound. No that's not human skin.
Still using up those transistors, I decided to give the Arsenio Novo Tubesound drive a crack. It's pretty similar to the Willmott differential distortion, but drops the initial gain stage. It also has a biasing trim pot, which I blew up the first time by turning it too far (apparently too much current across the pot). Note to self, be careful adjusting bias trim pots.
In any case, like the Willmott it's a nice ampy sounding distortion; I used fairly small coupling caps giving it a crispy flavor. I'd say it's pretty much 70's rock in a box.
I had some wooden boxes from the thrift store, and hadn't worked with wood before. This one was tiny, so the tubesound was a good fit for it with one knob and a pretty small vero build. Drilling and finishing the wood presented new challenges; I had to counter-sink the holes on the side because the wood was too thick for the threaded shafts of the jacks. Also, it turned out the interesting finish on the outside of this (which some people think looks like something made of human skin, eek) was just a cardboard veneer that fuzzed out when I drilled it.
Of course I shielded the inside, then had to coat the shielding to avoid shorts. It came out pretty good overall, and I learned a good bit about boxing up pedals in wood. I've got a bigger version of the same box, as well as some other wooden boxes, so we'll see if I do more wooden pedals in the future.
2021 builds
In 2021 I started a hobby of building guitar effects pedals. This page is a gallery of the things I've created so far, and documents some of my experiences designing and building pedals.
The Nastygram
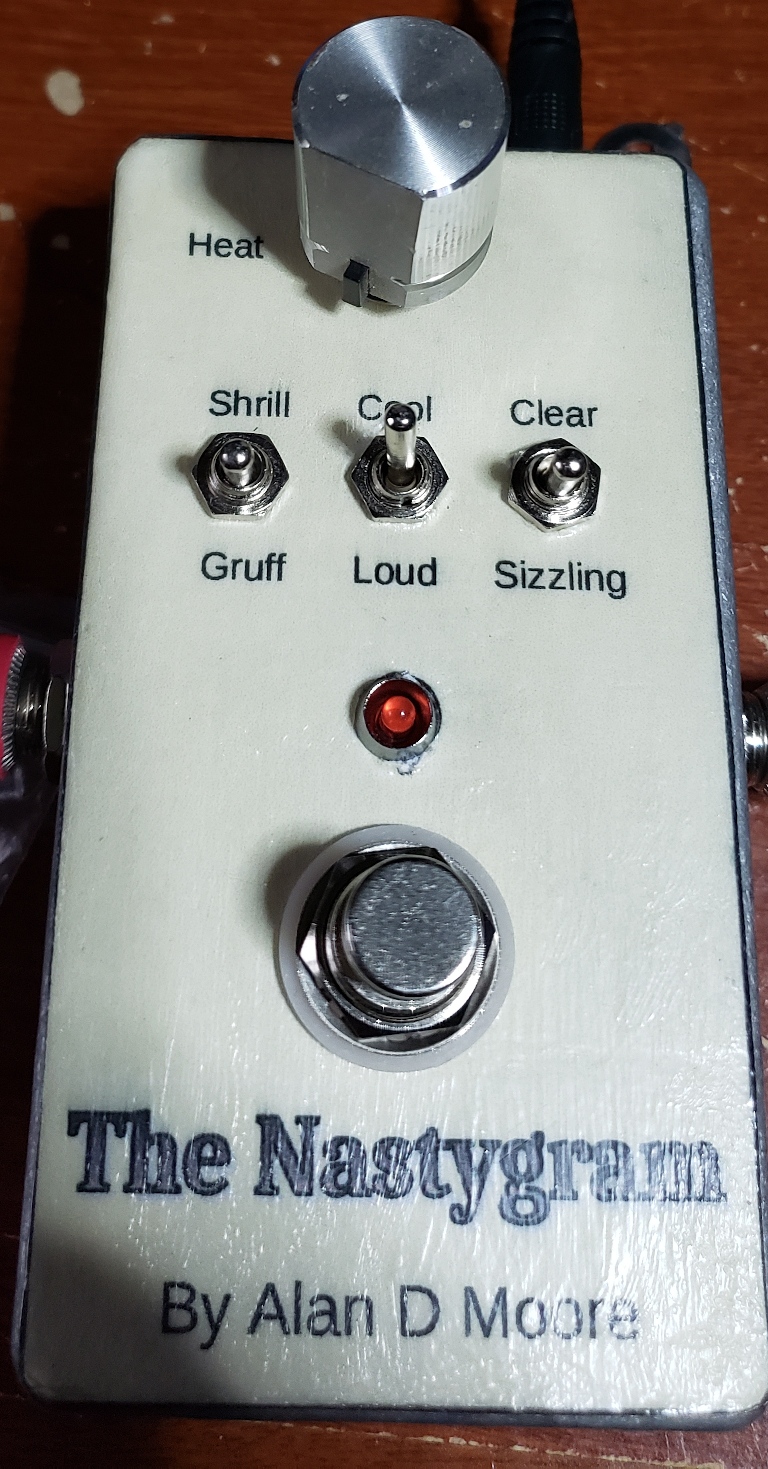
Figure 54: The Nastygram treble booster / distortion
This is the first pedal I ever built. It started with me buying a kit from Tayda for a screaming bird treble booster, but while I was waiting the long weeks for my parts to arrive from China, I cobbled together a breadboarding kit and started experimenting with the screaming bird circuit. By the time the parts arrived, I wanted to create a significantly modified circuit, with several switches to accommodate new features. I admittedly went a bit overboard, but when you name a pedal "Nastygram", you can get away with it sounding kind of bad.
The knob obviously increases the boost amount. The shrill/gruff switch drops the low-cut frequency, making the sound bassier as well as introducing some drive in the gain stage. The cool/loud switch increases the gain of the circuit, though not tremendously. It's a questionable modification at best. The clear/sizzling switch introduces clipping diodes, which I had learned about just prior to my parts arriving. So it's a pretty dirty boost.
The artwork is just an inkjet printout attached with mod-podge, which is how I've done graphics on a lot of my pedals so far.
The internals of the nastygram are a complete mess. I way over-estimated how much wire would be required between components and soldered it all up before mounting them. I also lacked proper wire and resorted to silly things like using breadboard jumpers, not to mention all the mods that just hang off the board (bolstered with a little hot glue).
The shrill/gruff switch went a bit flaky on me after a few months, so I hope one day to work up the courage to open the Nastygram again and replace it. Until then, it just adds to the nastyness.
The Beard-o
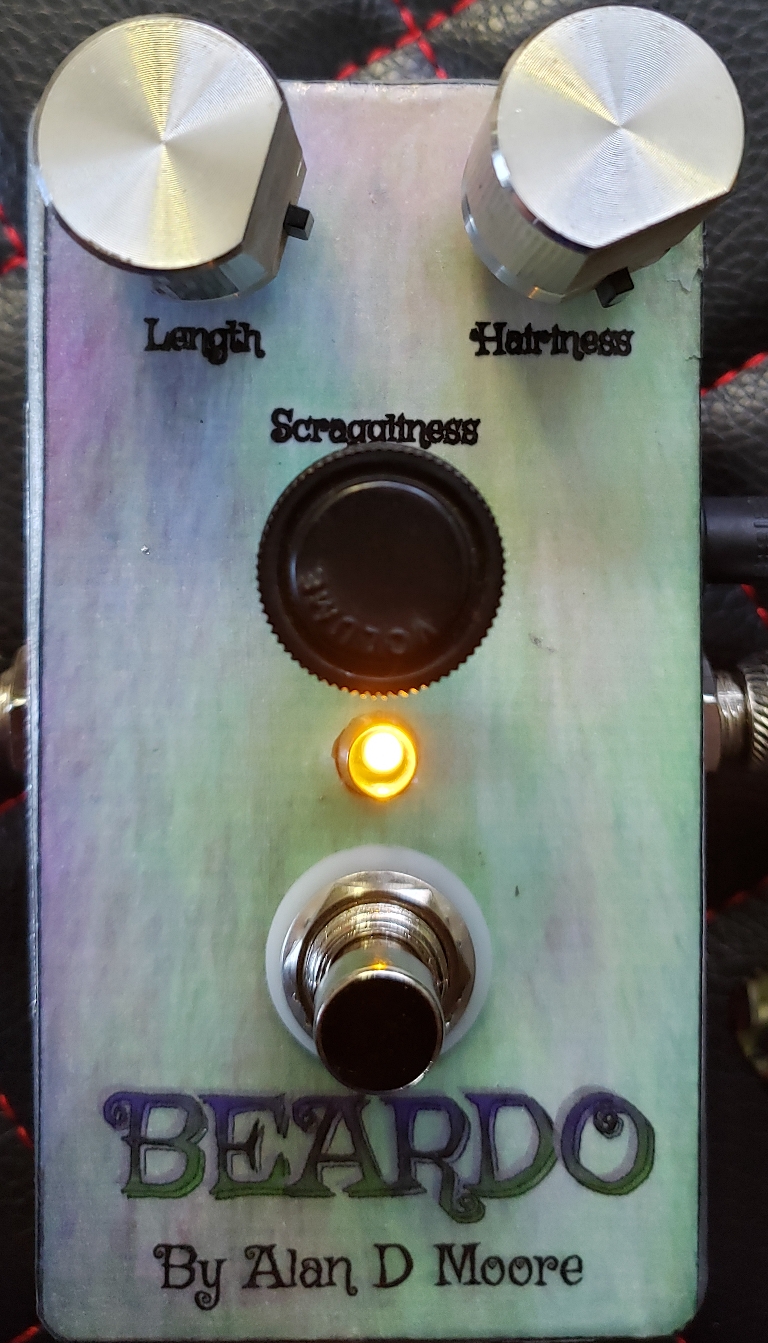
Figure 55: My first Beardo build. I have since replaced the knobs with something less goofy looking, those were all I had at the time.
My second pedal, the Beardo, is a fuzz based on the classic Fuzz Face (but with NPN silicon transistors, because I don't have time for finicky germanium or reverse polarity power supplies). Once again, I started with buying a PCB and kit from Tayda, but by the time things arrived I had decided on several modifications that I'd come up with on the breadboard. Originally I was going to use a switch to go from "full mode" to "scraggly mode", the latter of which would drop the circuit bias to the point where the sound was gating nicely. This did not work out in practice for whatever reason. I also broke the trim pot for setting the bias, and had to add a lot of mods to prevent squealing and RF noise. Ultimately I ended up just slapping a 25k potentiometer in place of the BIAS pot and called it "cragginess".
Overall building the Beardo was quite educational. The original model is an unholy mess inside, just like the Nastygram; however, I redeemed myself a few months later by building a much tidier duplicate for my friend Jason McKinney.
Beardo is still a bit "untamed"; at certain settings it squeals like a stuck pig, at others it just kind of crackles and passes no sound. But in between you can get some magical and decidedly un-guitarlike noises from it, not to mention traditional fuzz distortions.
The case is once again a printed graphic attached with mod-podge. Although it's hard to see, it does feature a heavily-edited image of my own beard.
The Campfire Distortion
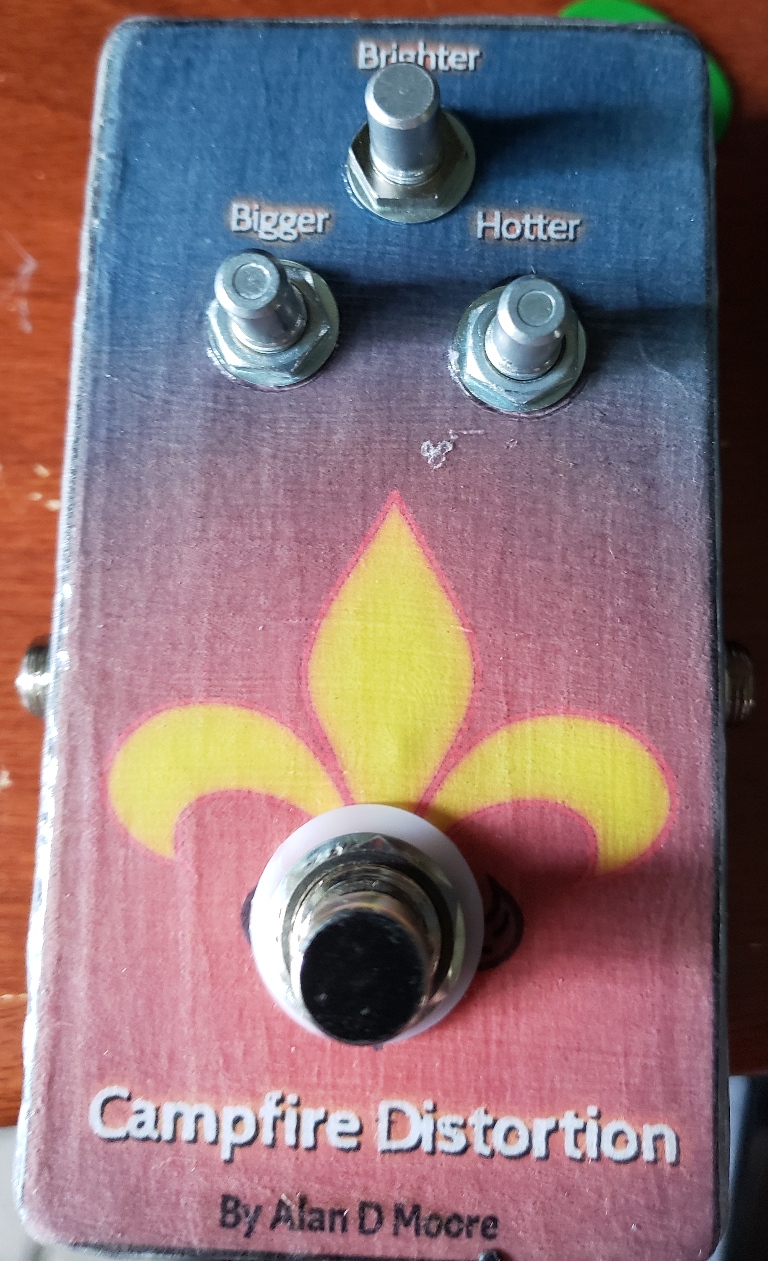
Figure 56: Botched Campfire distortion prototype. It doesn't deserve knobs! (actually I bought 6.35mm pots by mistake, so I had none to fit it).
Every year my sons' Scout troop has a silent auction fundraiser consisting of donated or hand-made items. Part of my goal was to be able to create some scouting-oriented guitar pedals to contribute to the auction, so I made a prototype: the Campfire Distortion.
This time, though, I decided that I was through buying ready-made PCBs since I just modded the snot out of the circuits anyway and made a mess of them. So this one is built on protoboard. I didn't base this pedal on anything existing anyway. I had bought some LM386 chips with the intention of building a mini amp, but my initial attempts were buggy and uninspiring, so I decided to try out the LM386 as a distortion driver instead. The campfire uses the LM386 to drive some clipping LEDs, which light up proportional to the strength of the signal. This "flickering" effect inspired the campfire theme, and you'll note the lack of a status LED on this pedal. Under the fire graphic is a hole where the red status LED and the red and yellow clipping LEDs are all squashed in with a blob of hot glue.
The visual effect is sadly rather subtle, and I botched the drilling of the holes for the knobs and somehow managed to mislabel all three knobs, so the initial campfire distortion is just a prototype for now. The sound of it is OK; it's a rather bright distortion, especially at high gains, owing the fact that I designed the LM386 circuit to boost highs as the gain increased. The chip itself clips in a crackly way that has a bit of fluffle on the release. I tried to eliminate this, but eventually just gave in and lived with it. It's a very 80's sounding distortion, though with some tone adjustments it could be useful in other contexts.
More of what makes you happy
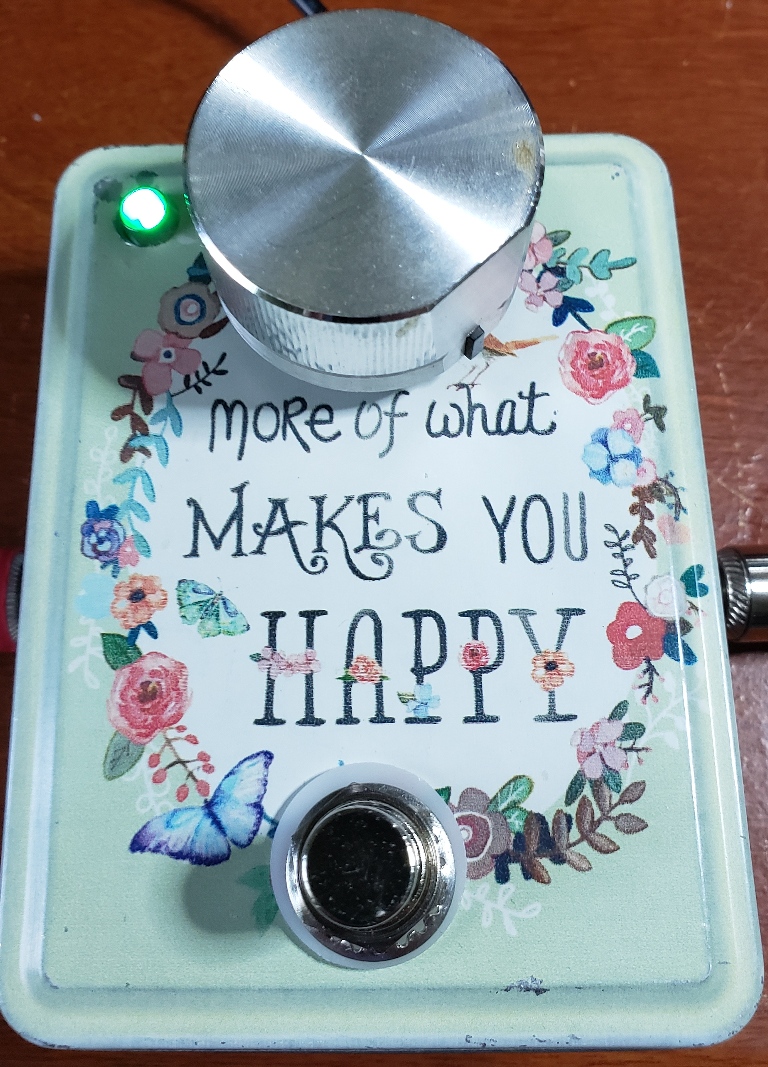
Figure 57: It just gives you more of what makes you happy.
Running low on 1590b boxes, and realizing that a lot of my circuits were not really worth the trouble of them at this point, I got inspired to start using tins. I found a small pedal-sized tin during one of my thrift store outings that read "Do more of what makes you happy". This inspired me. I built a small clean boost on a scrap of protoboard and mounted a big knob right over the "Do". That's what you get in this pedal: just more of what makes you happy.
The circuit is a FolkUrban "boost-o-rama B" design, which I found to be quite nice and clean. It's also kind of boring, so I don't use this one much, but it was fun to do something mildly clever with a found enclosure, and I learned a few things about power filtering with this one. I also learned the ups and downs of working with the thinner metal of a tin. Easier to drill than a 1590b, but also easier to mess up if you're not careful. Fortunately this one came out pretty clean.
Bright-on
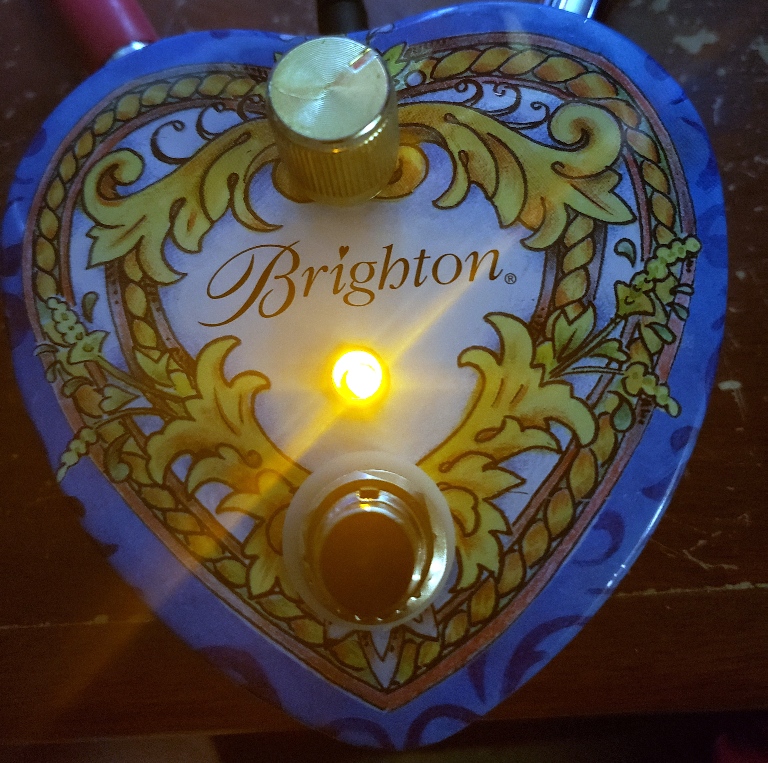
Figure 58: Sing it with me: Bright-on (Clap-Clap) Bright-Off (Clap-Clap) Bright-On, Bright-off, the Bright-on.
Another thrift-store find that inspired a pedal. "Brighton" is apparently a company that makes some kind of doodads for women and delivers them in heart-shaped tins, so these show up at the thrift store now and then. Of course it immediately suggested to me a treble booster ("Bright On"), so I got to work on it.
I had a tiny scrap of stripboard, 2x20, from building my second Beardo, so I challenged myself to fitting a simple treble boost on it. I started with another screaming-bird style boost, but there was space left on the board. There was also the fact that Queen had a song called "Brighton Rock", so I felt guilty not making this a Brian May treble boost. After some fiddling, I was able to come up with a 2x20 stripboard layout for a Brian May treble boost. Thus my "Bright-on" Brian May treble boost was born. Someone suggested I write "Rock" under the Brighton, using the LED for the O. I may do this, but I don't have the best handwriting, so…yeah.
Double Drive / Pedal-to-the-metal

Figure 59: My double drive in its pedal-to-the-metal pencil case.
My wife found this pencil tin at the dollar store and knew I'd want it for a pedal. I had played around with the MXR Distortion+ circuit for a while, but hadn't yet built a pedal based on it. The double-drive started as a D+, but I made a lot of changes. Most notably, I moved the clipping into the op-amp feedback loop and provided a switch to go between diode and LED clipping. I knew I wanted switchable clipping options, but I did a lot of auditioning to find two sets of diodes that sounded significantly different enough to warrant switching. Nothing worse than a switch that makes only a subtle difference (looking at you, Nastygram!). I finally settled on two combinations:
- First option is 2 1n4148s on one side and a 1n4148 and 1n5819 on the other. This made for a squishy, warm, almost-symmetrical drive reminiscent of the Tubescreamer.
- A white and blue LED. This is a more open, chunkier sound with less fizzle, though at the highest gains it sounds really asymmetric and almost fuzz-like (think "Spirit in the Sky"). At first I thought my white LED was blown, and I replaced it. It's possible I screwed up the circuit in some way, but ultimately I don't care because this option sounds awesome.
I added a tone control as well, which while somewhat subtle can at least take the edge off certain rather shrill settings. The circuit was built on stripboard and hangs unceremoniously inside the case, which precipitated the liberal use of splatter-pattern duct tape inside the case to deal with short circuits.
This things turns out to be one of my favorite distortion pedals so far. It can deliver a pretty standard rock drive and crunch tone, but the cranked LED distortion is just gorgeously nasty for riff-rocking.
Build-wise, this is a good example of the problems you get working with tins. The clearance on the lid was not quite enough to fit the quarter-inch jacks and power jacks, so at first the lid sat at a crazy angle on top and fell off easily. It looked bad and came apart easily. I eventually sawed some dowel risers, attaching them to the bottom with wood screws and to the top with velcro. They do a good job of keeping the lid on and supporting the controls, but taking the lid off is just a matter of ripping velcro. Not something I'd be confident selling, but for my own needs sufficient.
The Patina
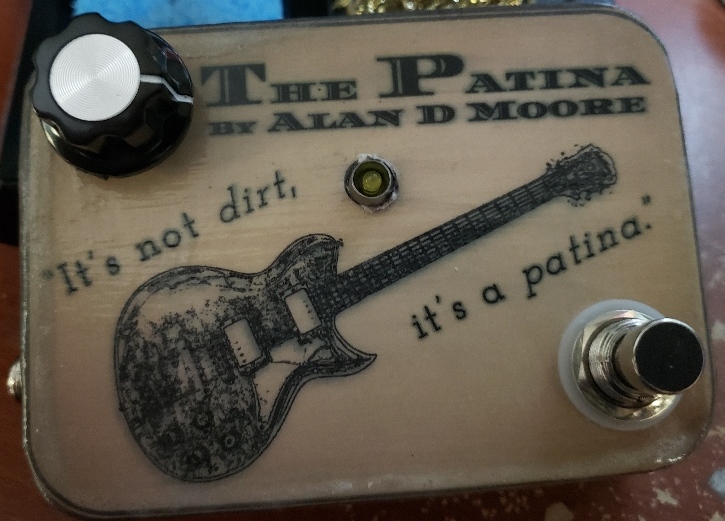
With my tin craze in full force, I had the idea that I could create a small, simple circuit with minimal components and house it in antique tins as a way to drum up a little scratch to "support the habit". This is how the patina was born.
My initial thought was to build a simple transistor boost and shove it through some germanium diodes for that vintage goodness, but the result wasn't that good or vintage. I did a lot of tweaking and testing, adding filtering caps and trying different clipping components until I settled on a simple 1n4148/1n5819 combination. I added some low-end and high-end cut so that the circuit boosted the mid-range.
The resulting pedal wasn't quite a dirt pedal, nor a boost, so I called it "The Patina". At minimum it thins out your clean tone, at maximum you get a cutting "just breaking up" tone. The clipping limits the boost capabilities, so it doesn't really need a volume knob. It's pretty much a "blues tone in a box" with no nonsense, but it also wakes up my duller drive pedals with some snarl and aggression.
I built the first one in an Altoids tin using a 3x16 flake of stripboard.
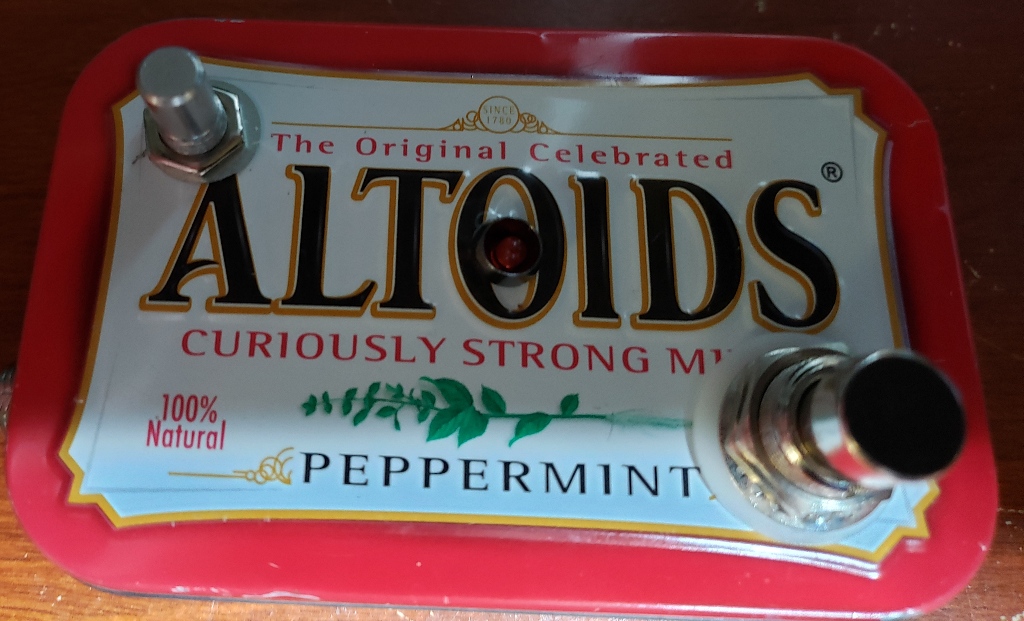
Figure 60: The patina prototype in an Altoids tin.
My initial idea of building these in vintage tins didn't work out to be practical; it turns out vintage tins are in demand for various collecting, crafting, and home decor reasons, so I couldn't find a good cost-effective source. Altoids tins are readily available, but they're a touch small and tend to get warped and unreliable during drilling. A standard 3PDT switch just barely even fits in one.
In the end, I am doing a first run of these using puzzle tins from the dollar store, spray painted and adorned with a printed/mod-podged label, as you see in the first picture. I was able to assemble something much more robust; the circuit is attached to the LED, firmly implanted in its bezel, so it doesn't roam around the case looking for trouble. I've also coated the inside with mod-podge to discourage short circuits, and kept my wiring tight and neat.
No idea if they'll sell, or for what I'll sell them yet. Want one? (Update 7/4/2021: Sold one!) (Update 2022: Sold the last one, and since I don't want to be a one-man factory, I'm not making any more. Moved on to more interesting circuits…)
Ka-chow drive
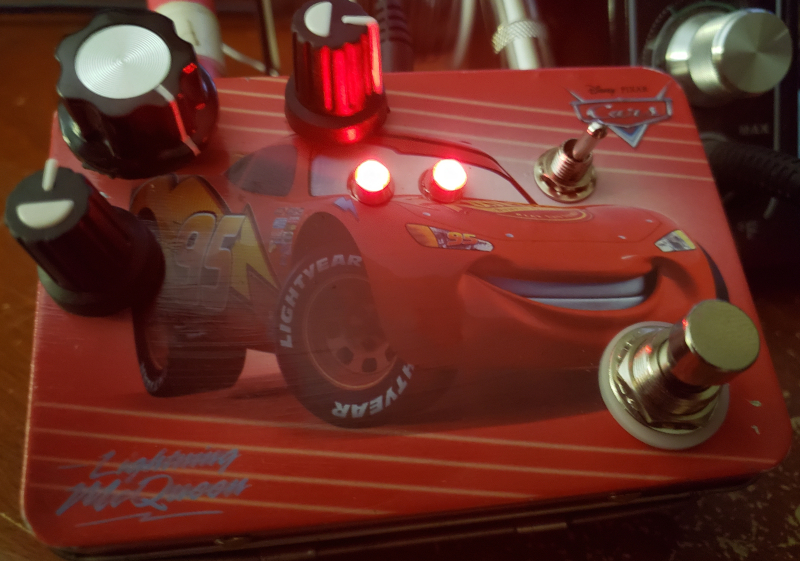
Figure 61: The ka-chow drive.
I had been spending time with a PT2399 chip trying to build a delay or chorus that didn't sound like garbage, but it wasn't happening. Frustrated, I cleared the breadboard and decided to make up an distortion pedal just to rebuild my confidence in pedal building. The result was a simple dual-distortion circuit: two common-emitter transistor gain stages each pushing a different set of clipping diodes with an optional crossover distortion stage in-between. Topped that off with a big muff pi style tone control to counteract the midrange push of the circuit. My kids had given me an old Lightning McQueen mini-lunchbox to pedalize, so this seemed a good fit.
The controls, clockwise from the big knob at the top left, are:
- Distortion, which adjusts the gain in the second stage. At minimum the first stage still gives a bit of distortion, so there is no clean with this circuit.
- Volume, which does what you'd expect.
- Crossover (the switch), which turns on crossover distortion. Crossover distortion basically silences your waveform until it reaches a certain threshold (~170 mV, in this case), resulting in some gnarly harmonics and some gating to the sound so it gives a tight chop-off.
- Tone, for which I used a center-detent w-taper pot for no good reason, but it seemed to work out well. Seems to give a good range of tonal variety without being too dull on the bass side or too thin on the treble.
The build turned out nicely on this one, though the kids are a bit freaked out by McQueen's glowing terminator eyes. The circuit gives a great crunchy rhythm tone, especially with the crossover engaged. The lead tone isn't quite soaring and it doesn't clean up too nicely, but who wants a clean distortion?
The Dino-Tromp

Figure 62: The Dino-tromp compressor.
Still wanting to move past distortion and boost circuits, I played around with a lot of different effects on the breadboard, but nothing really came together well. Finally, I managed to assemble a decent-sounding compressor based on a modernized Dynacomp circuit (using a modern LM13700 IC instead of the original CA3080). Playtime! I explored different mods available, and came up with a few improvements of my own. For example, most dynacomp builds require 5 transistors, but I knocked that down to 3 by making use of the otherwise-unused buffers on the LM13700 IC.
The controls on this compressor are:
- Weight: Controls the bass boost/filtering going into the envelope detector. To the left it gives a thin and jangly sound, to the right a huge beefy low-end.
- Crush: The compression amount.
- Roar: The output volume. Mostly has to stay pretty high, though with the other controls cranked you gotta bring it down some.
- Thump: The amount of attack.
- Dino: Turned on, this boosts the input going to the envelope detector for much harder compression.
All this was built on stripboard and squashed into another dollar-store pencil case. I was a little more careful than with my previous pencil-case pedal so it feels sturdier, but still a bit janky.
This pedal sounds great on bass or guitar, depending on how you set the weight knob. It's not a clean, transparent comp but definitely a bit dirty and colored. Sometimes there's a fuzzed sound that bleeds through subtly too, not sure where that comes from (the envelope generator, probably). It brings the funk for either instrument, for sure.
Belle Fuzz
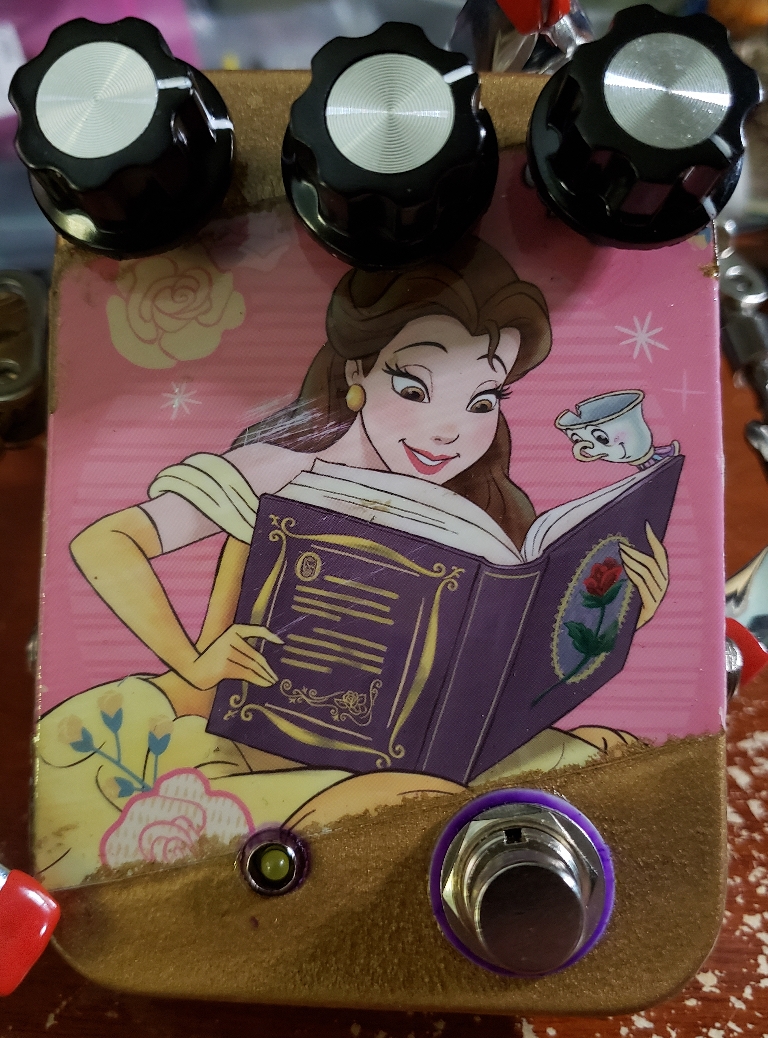
Figure 63: The Belle Fuzz
After painting over a few puzzle tins to build the Patina, and finding that they weren't a terribly in-demand item, it occurred to me that these tins have perfectly good artwork already on them and I should stop trying to make them look like something vintage and just go with what they are. Thus, the Belle Fuzz.
The circuit in this one is a four-transistor fuzz I found when trying to answer a question on Reddit, I believe it was a schematic for a clone of something but not sure what. It's a nasty, spitty, gated fuzz, though. I added a tone knob to the usual gain and volume.
This one isn't my favorite fuzz, but my daughter demanded that I keep it due to the picture. She wins, of course.
This pedal really began establishing a template for using these puzzle tins that I've continued to develop. I seem to be able to find an endless supply of them, so there may be many more in the future.
Got any Grapes?
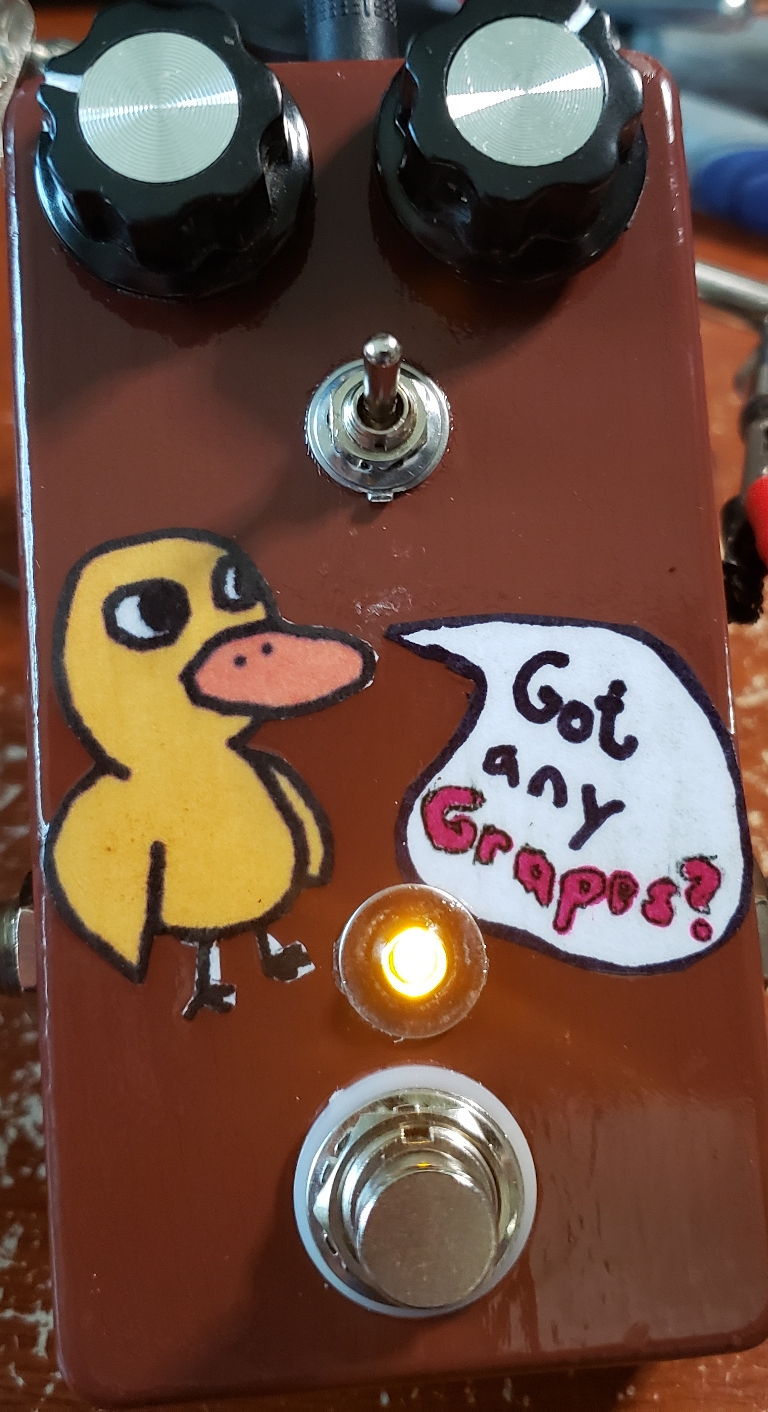
Figure 64: Got any Grapes auto-wah
Well, I finally managed to get a cool circuit working that wasn't dirt, so it got the honor of a real 1590b case. This is the "Got any Grapes" auto-wah, basically a Dr. Quack with a few mods from the Nurse Quacky. I retained the LPF/BPF switch. Many don't like the BPF mode, since it thins out the instrument too much at the attack. However, if you put it before a fuzz, the sound is magical – like oscillator sync but nastier.
This circuit was a tight squeeze into a 1590b, but with careful planning I managed to fit it in. Despite its simplicity it's a pretty fun auto-wah. I sometimes wish it had a resonance control, but I've yet to figure out how to create one despite a good amount of breadboard experimentation with the circuit.
The Dark Knight Fuzzes

Figure 65: The Dark Knight Fuzzes
Back to my puzzle tins, I made this one pretty purely to see how these things would sell. The circuit is a buzz-box, which is basically a stacked bazz fuss. It's a pretty intense fuzz that takes no prisoners, so pretty perfect for a batman tin.
I'm not sure which transistors I used, but I chose a white LED for at least one of the feedback diodes, making this thing pretty roaring and intense. The whole thing was built on a minute scrap of stripboard which I had left-over from previous builds. Amazing circuit given the tiny amount of components needed.
The single knob is just for volume, as this fuzz is 100% gain all the time. Plenty of low end for bass, while midsy enough for a guitar.
It took a while but the pedal eventually sold, and it's new owner reports that it "totally RIIIIPS". I am genuinely elated, because honestly sometimes you get used to hearing these circuits and never know what other people would think of them.
There's a snake in my boot
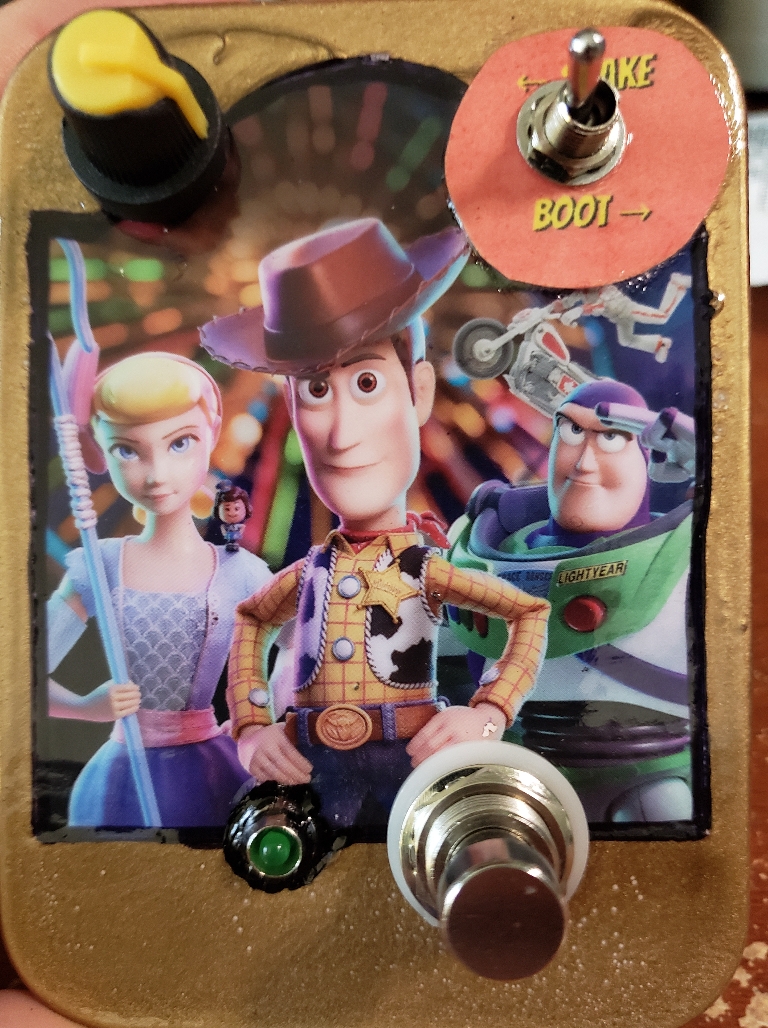
Figure 66: There's a snake in my boot
As I build these pedals in tins, I find that the image starts driving my decision of what to put in it. For this Toy Story tin with Woody front-and-center, it seemed somehow fitting to put the next evolution of the Patina in here. I should have called this "There's a snake in my boost", but the clearcoat was already on when I thought of that gem.
Essentially this is just a Patina boost, but with an added switch to use matched LEDs (boot mode) instead of the original clipping diodes (snake mode). The LEDs made for a louder, rounder tone with less fizz that could push an amp harder.
I put this pedal up for trade on Reddit and swapped it for a Joy American sound. Not a bad deal considering the tiny circuit, and the new owner seems to be happy with it.
Elena Tremolo
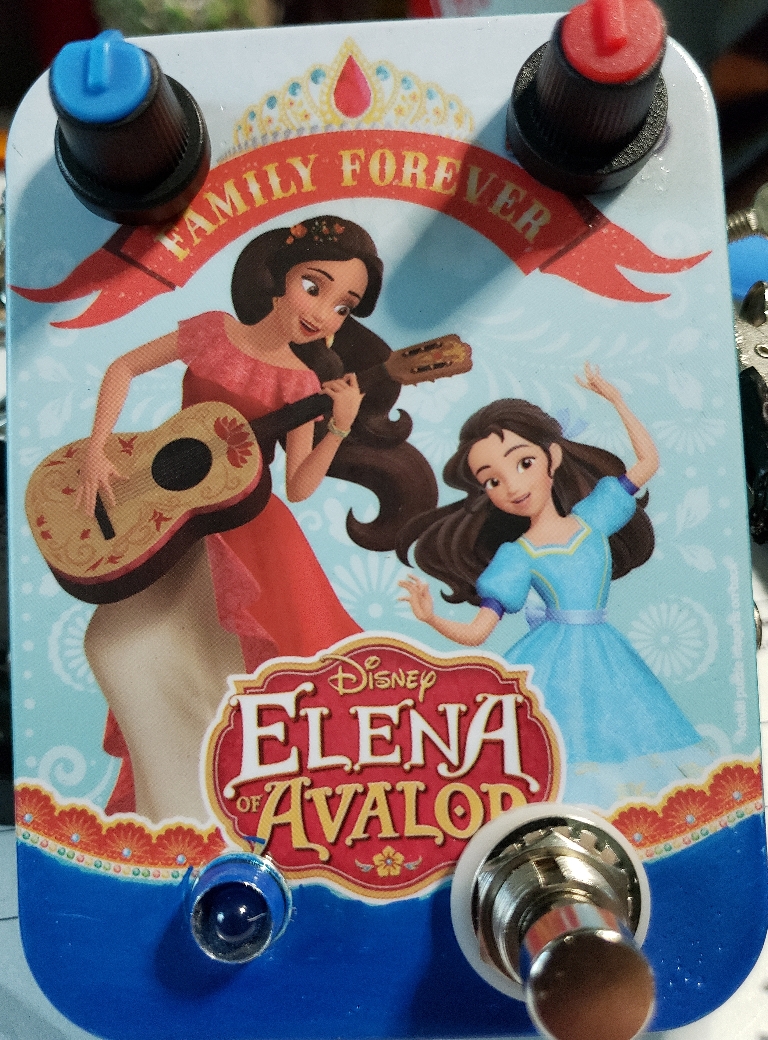
Figure 67: Elena Tremolo
A puzzle tin with a girl playing guitar on it? How could I not make this a pedal? I once again wanted a break from dirt/gain pedals so managed to build a simple Colorsound tremolo clone on stripboard for this project. The Colorsound circuit is OK, though no amount of playing with capacitor and resistor values quite got me the speed range I wanted, and I couldn't figure out a way to change the shape of the tremolo effectively, so this just has speed and depth. The depth knob is could probably be smaller, since the trem is only audible in about the last quarter of the range. Will probably swap that out at some point.
As with any pedal featuring female Disney characters, this one was claimed by my daughter before it was even built.
The Whispering Sister
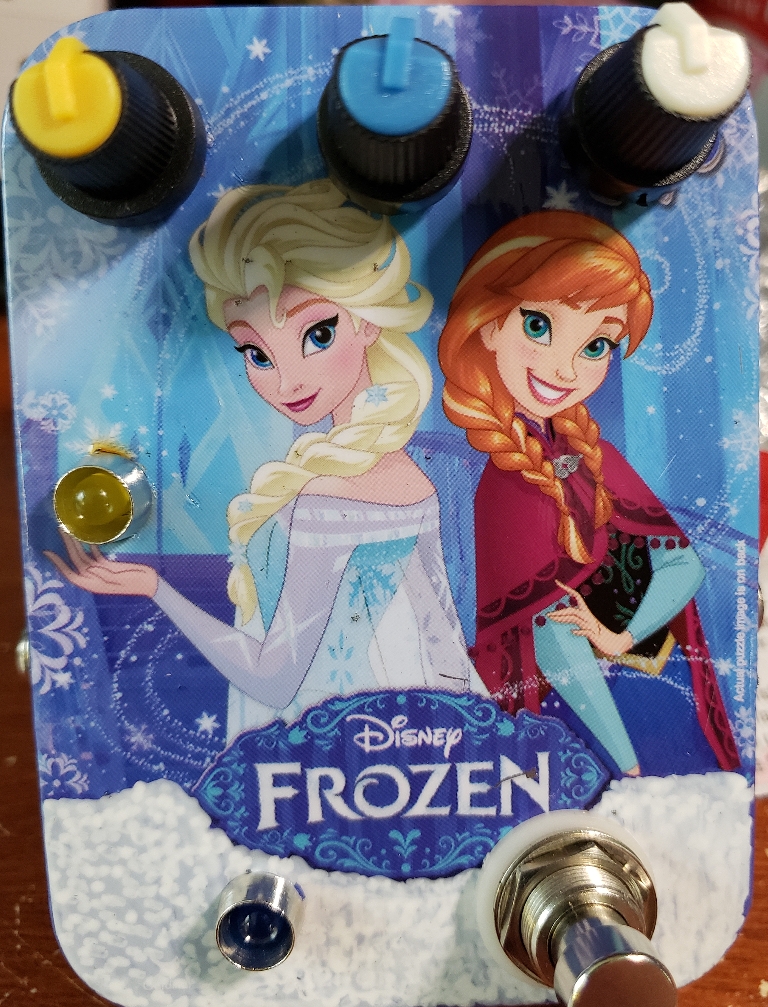
Figure 68: The Whispering Sister
This is a circuit I'm somewhat proud of, as I cobbled together bits of circuits from the Folkurban schematics with a lot of customization to create a modulated notch filter. The result is somewhere between an auto-wah and a very subtle phaser. I dubbed it the Whispering sister because of its somewhat sibilant sound, like little girls whispering to each other. And of course, the Frozen tin with Anna and Elsa was the perfect enclosure.
The three knobs are for speed, tone, and depth. I think the tone knob basically sets the frequency of the bottom half of the notch, so turned up you get a very thin and whispery sound; turned down, you get a heavier, phasery sound. The LFO is a decent sine-wave oscillator I swiped from the Folkurban wobbletron, tied to the notch filter using a hand-made vactrol (Yes, I painstakingly sawed the tip off an LED and glued it to a photoresistor. Not something I want to do very often, let me tell you. Oh why do manufactured vactrols have to be so rare and expensive?). I tried using a JFET to connect them, but the results were not quite as satisfactory, so – sawing LEDs, here we go.
Like the tremolo, I could wish for an LFO that had more range. If I learned anything from these pedals, it's that LFO design is not so simple as you'd think, and quite often it's more complex than the circuit you're actually modulating with it.
Naturally, my daughter claims this one, though she'll have to get it off my board first!
Rage against the McQueen
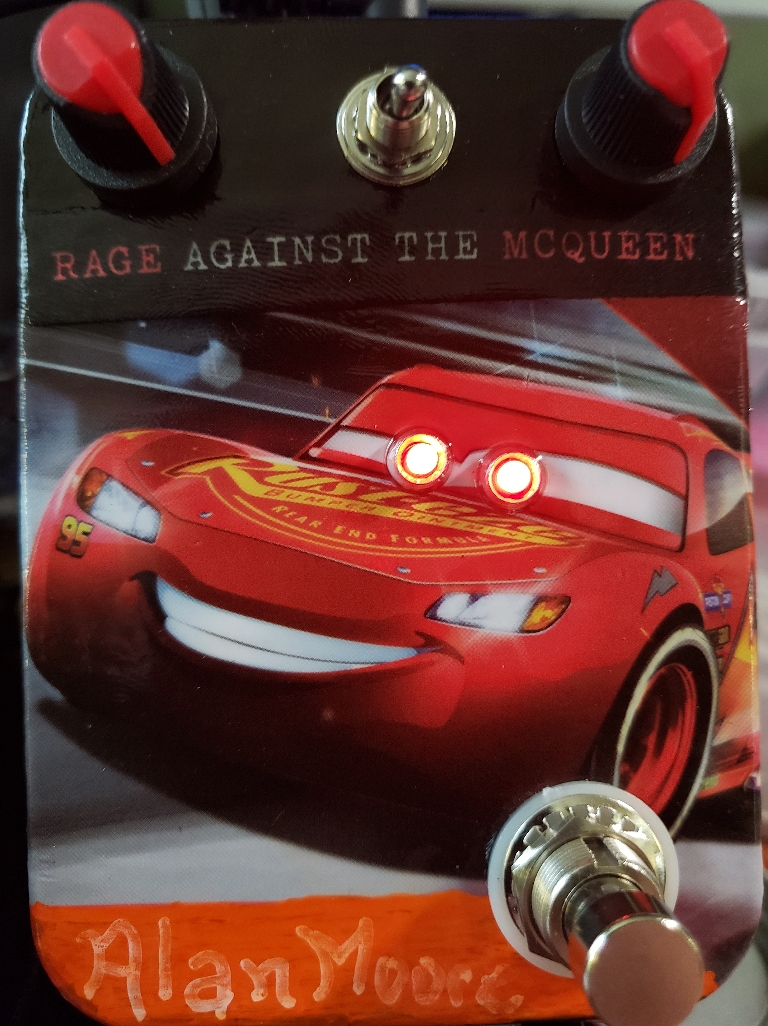
Figure 69: Rage against the McQueen
Time for more dirt, and since this puzzle tin is Disney-princess-free, I wanted to make something I could sell. I went hunting for a distortion circuit off the beaten path and discovered Joe Davisson's EasyDrive. This little wonder is just a single transistor stage with a huge and tasty distortion sound, rather like a big muff. Plus, it lends itself to all kinds of modification and experimentation with transistors, diodes, and feedback loop additions. For this pedal, I had gain and volume knobs, as well as a diode lift switch to make the clippers asymmetrical. This basically gives you two very different distortion sounds in one.
This time I was inspired for the name BEFORE the clearcoat went on, and "Rage against the McQueen" was just too awesome not to do.
I made this to sell, and sell it did! Within hours of putting it on Reverb.com it was gone. The new owner is quite happy with it.
Lit Mickey
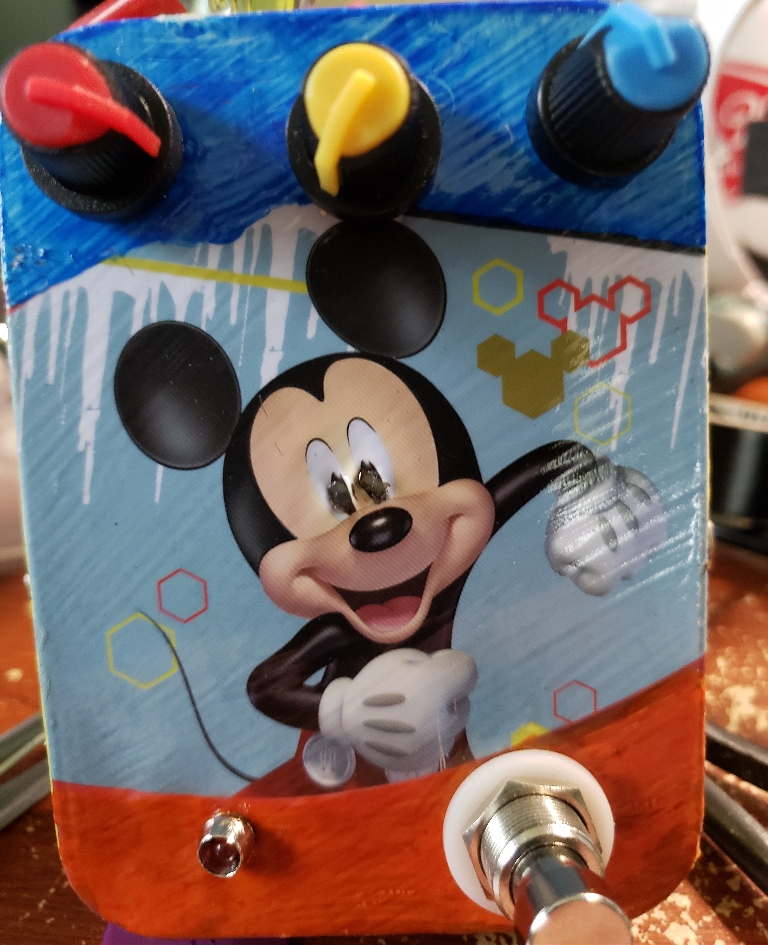
Figure 70: Lit Mickey, ready to get Lit
What do you put in a Micky Mouse puzzle tin? A RAT of course! I hadn't built a Rat clone yet, so I figured it was time to try my hand at it. Only two problems: I don't have any LM308 op-amps, or any decent JFETs for the output buffer. What I did have was some JRC4558 chips, and I had become rather enamored of the way they drove distortion circuits on the breadboard. Since the 4558 is a dual op-amp, and the traditional Rat only needs 1, I figured it made sense to use the second op-amp for the output buffer in place of the JFET. Breadboard experiments verified that this sounds pretty great.
(Tech note: I did find that I needed to adjust the values of the feedback filters with the 4558; the default 47ohm/2.2uF filter caused oscillation. Upping this to a higher R value with a C value that still came to ~1.5kHz made the squealing stop without changing the basic tone).
One simply can't build a distortion pedal without experimenting with different clipping diodes, and after trying a swath of them I settled on green LEDs. As a bonus, the LEDs lit up brightly when they clipped. Since everyone loves the LEDs-in-the-eyes thing I did with the ka-chow and RatMcQ pedals, why not put those clipping LEDs in Mickey's eyes?
It was a little fiddly to get everything positioned right on this pedal, but once I managed it the results were just killer. The pedal sounds like the beefiest Rat you ever played, and Mickey is terrifying with his flashing green rodent eyes.
This one also sold within hours of putting it on Reverb.com, and the new owner is quite happy.
Campfire Distortion redeux
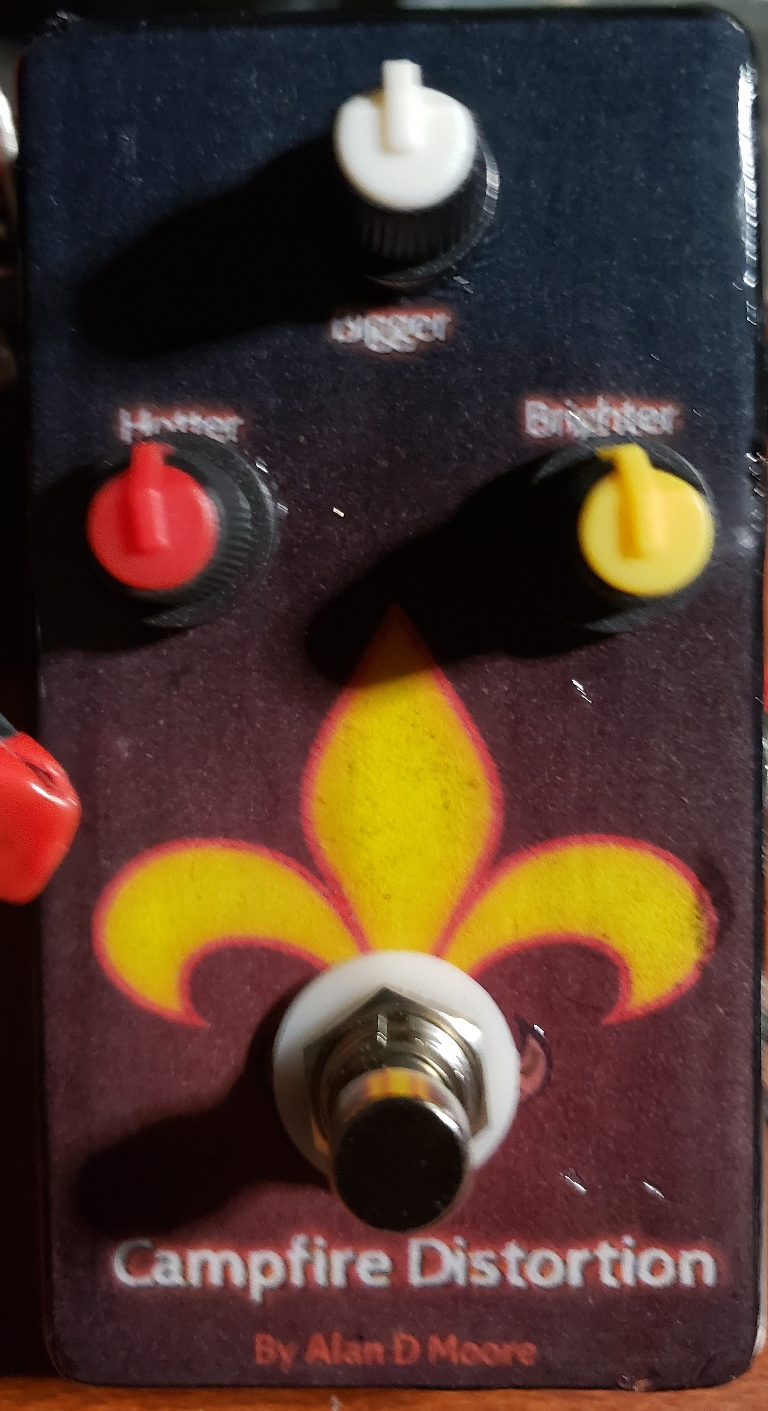
Figure 71: Campfire distortion, do-over style
I got into this hobby with a goal of producing pedals for my sons' Scout troop's silent auction at the end of the year. Well, I'd made a lot of pedals, but so far my scout-themed pedal was pretty sad. The Campfire drive was poorly built, incorrectly labeled, and sounded rather crummy compared to things I'd built since. I originally settled on the lm386-based drive because it could light up LEDs for the "flame effect". Well, after building the Lit Mickey I had another circuit that could do the same thing.
So, time for a do-over. I gutted the case, stripped off the original artwork, filled in the badly-drilled holes with epoxy, and started from (almost) scratch. This time, black paint all over, with improved artwork. I drilled out a larger, pear-shaped hole behind the fire graphics and mounted the clipping LEDs behind the side flames. This time I used yellow LEDs for the clippers. Still sounds killer!
The rebuild turned out light-years better than the first attempt. I'm still not happy with the subtlety of the glowing effect; the yellow LEDs don't shine enough through the coated paper label. Still, it sold at the annual Boy Scout auction and is being enjoyed by a young guitar player, I'm told.
Shock Troooper
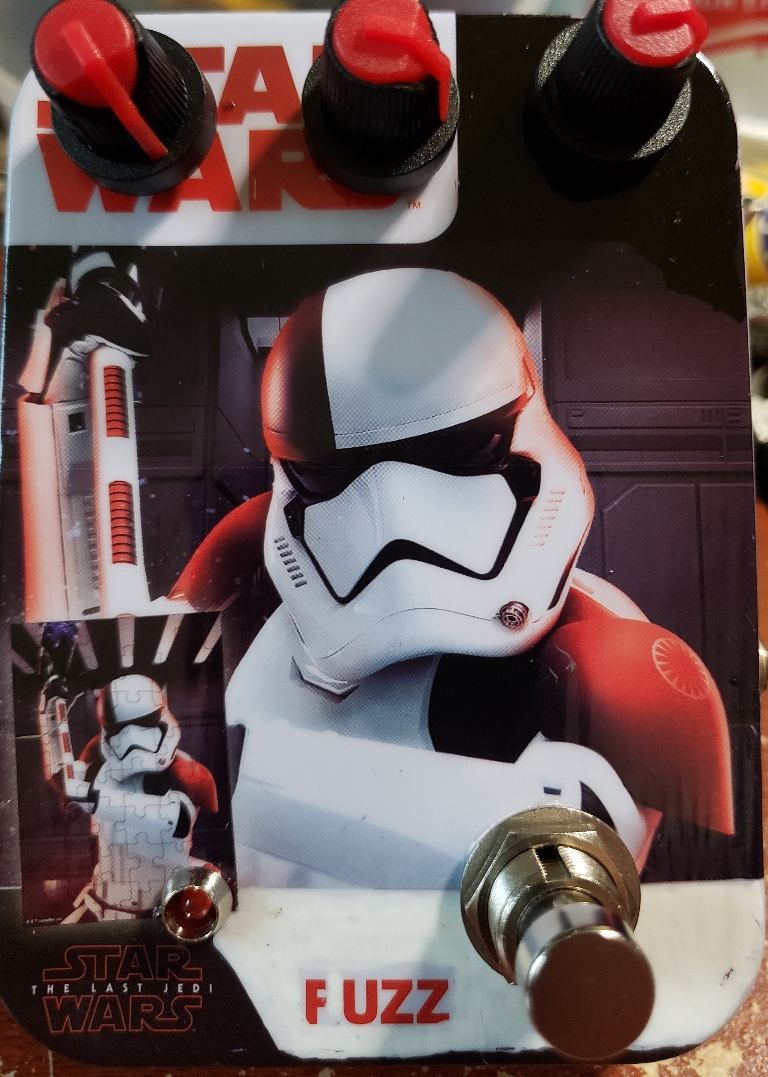
Figure 72: The shock trooper
Joe Davisson designed some really cool circuits, and the Shocktave is one of them. He says he named it that because he was shocked at how well it works. Essentially, it's a fuzz with a sub-octave generator, but unlike other sub-octave circuits there are no flip-flop ICs involved. Instead, a simple transistor oscillator set to ~70Hz gets powered by a rectified version of the input signal. The result is that the oscillator gets "reset" with every cycle of the input wave. The oscillator's latency makes it unable to keep up, so you end up with a synthy-sounding sub-octave wave. When I read on this, I had to try it, and I found myself just as shocked as Joe at how well it works! Granted, it's still pretty glitchy, but when it hits it hits hard and sounds awesome!
So, what do you do with a circuit that is hard, heavy, and not very accurate? You put it in a storm-trooper tin, of course!
The knobs here are for gain, octave blend, and volume. Without the sub-octave it's a pretty nice fuzz in its own right, though blending in the octave takes it to the next level. I decided to see if I could sell this one. I think it was actually bought by a sax player, who says it's monstrous on his sax.
Ichthus Boost
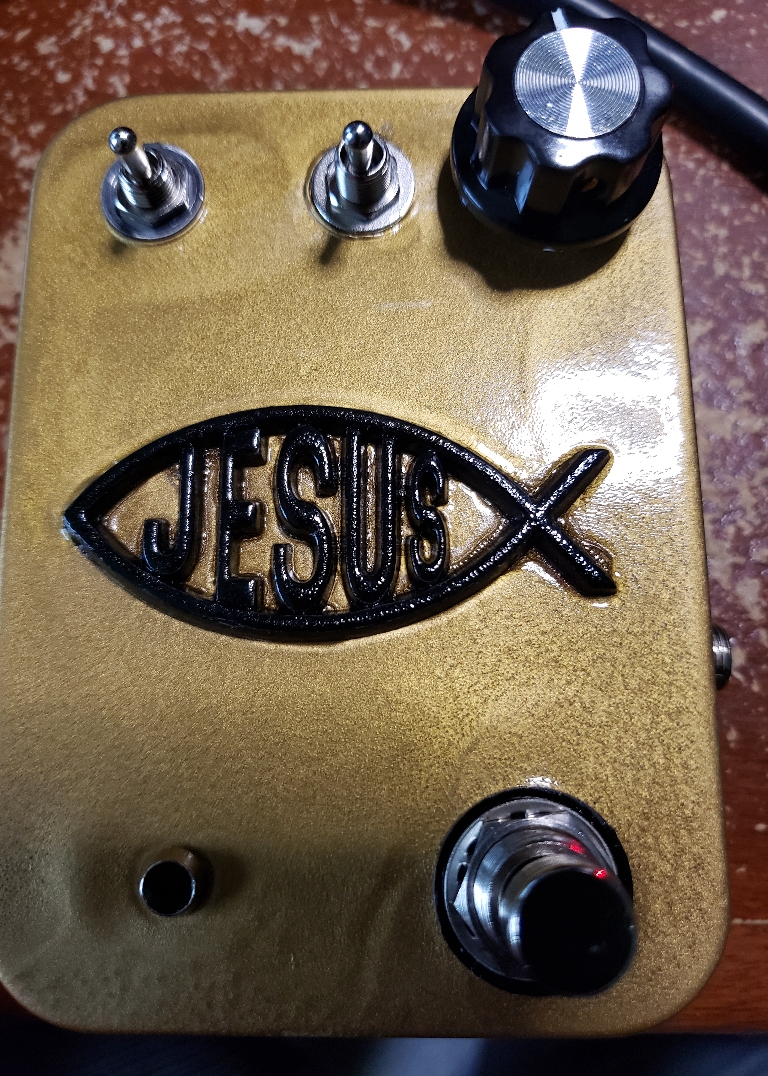
Figure 73: Ichthus Boost
I found a metal Ichthus bumper ornament in a parking lot one day, beat up and pitted from who-knows-how-many-months of being run over and weathered. Looked cool, and I grabbed it with the intention of maybe putting it on my own bumper. One of my kids spied it sitting in the car one day and made a comment about me using it on a pedal. GENIUS!
I happened to have a puzzle tin that was less-than-inspiring, so I painted it solid gold. I cleaned up the Ichthus and painted it black for contrast, then glued it to the lid. Sweet looking enclosure, now what to put in it?
Trying to think through the needs of praise & worship guitar players (which spans a wide swath of musical ground here in the Nashville area), I decided a boost would be the simplest way to utilize this. Time for another iteration on the Patina, methinks….
I tweaked the Snake-in-my-boot circuit a bit more and this time added a switch to make it a full-range boost rather than the treble/mids focus of the Patina. This actually took several attempts and a circuit simulation to figure out, since I had assumed the input capacitor was doing most of the filtering. Turns out the output cap was doing much more bass cutting, so I ended utilizing a dual-throw switch to up the capacitance of both.
This circuit turned out really nice in the end, kind of a boost-for-all-occasions. Someone bought it at the Boy Scout auction, so hope it's boosting on a worship board somewhere.
Cluesbreaker
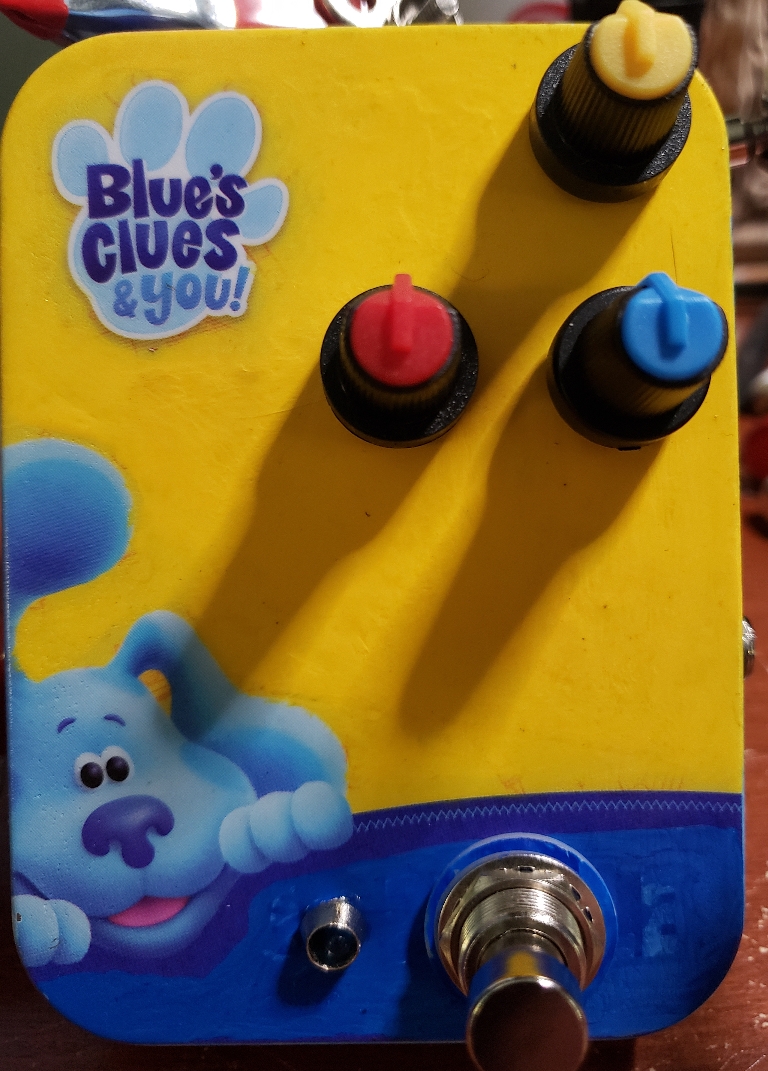
Figure 74: The Cluesbreaker
I found a Blues-clues tin at the dollar store, and since Steve from Blues Clues was lighting up the internet for the 25th anniversary, it seemed an apt time to put something in it. Naturally, I needed a good blues circuit!
I looked at doing a BD-1 clone, but Boss pedals are so darn complicated, and the BD-1 is chock full of hard-to-find JFETs to boot. So I settled on another classic: the bluesbreaker.
I managed to create a tiny little layout for a blues breaker on stripboard so I could squeeze this into a puzzle tin, and used my beloved 4558 op-amp instead of the traditional tl072. Sounds fine to me. I'd never really messed with a bluesbreaker circuit before, but this one turned out pleasing enough. I don't think I'm a fan of the sound personally, but you can certainly play the blues with it.
Ended up trading this one away, can't remember what for.
The bat distortion
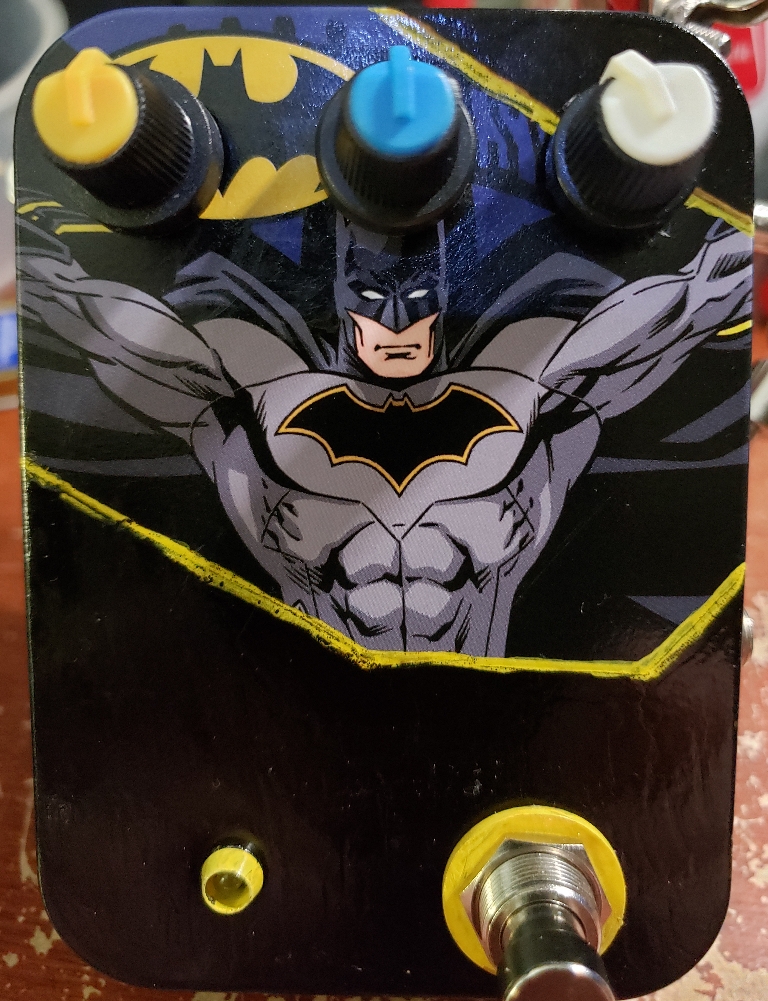
Figure 75: Bat distortion
Another batman tin? I suppose I could have made another buzz box like I did before, though I hate doing repeats. Life's too short to be a human assembly line. This time, I went back to play some more with the EasyDrive circuit, as I had several ideas about places to put potentiometers for a more versatile drive. Ultimately, I settled on a "Warp" control that adjusts the symmetry of the clipping, in the place of the diode lift switch I'd done with RatMcQ. (At this point I've kind of settled on a limit of 3 knobs/switches on these puzzle tins, as anything more gets too crowded inside. Otherwise, I might have added a tone circuit). On the symmetric end of the knob, it's a fizzy, fluffy distortion rather like the big muff or distortion plus. On the asymmetric side, it's got a lot of beefy clean sound with a subtle octavia-like effect. Sounds pretty killer on bass, too.
This one eventually sold on Reverb.
Tape Delay Simulator
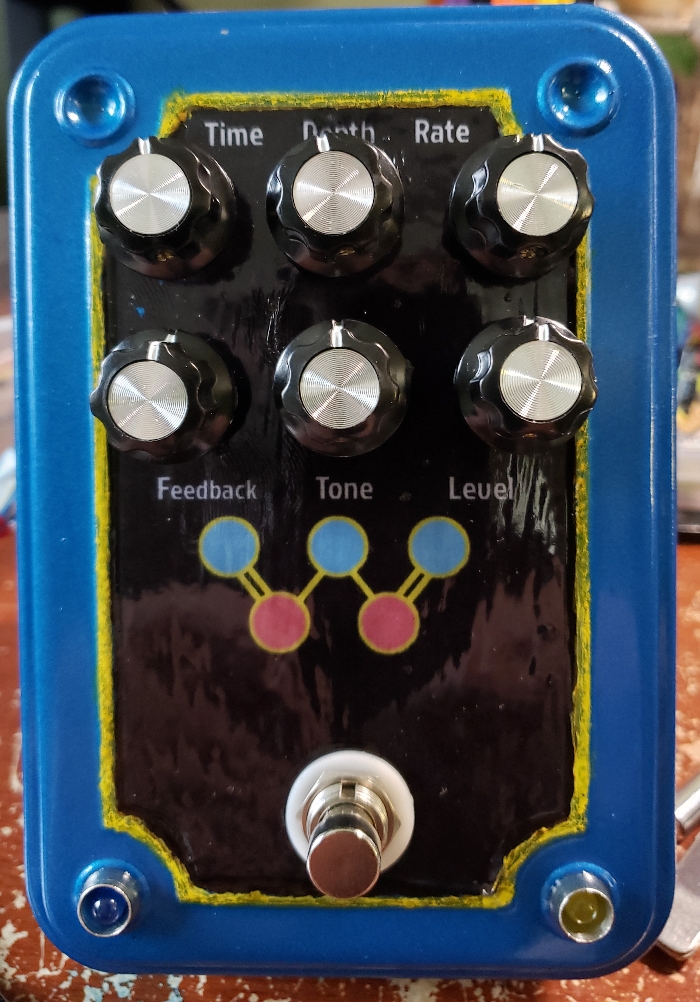
Figure 76: That's an iron oxide molecure there. Because tape.
This one has to be my crowning achievement to date; it's a PT2399-based tape-delay simulator. It's based on the Keeley mag echo, and I started out with a layout from the TagboardEffects blog. I wanted to be able to adjust the filtering, though, so with a bit of refactoring and an extra little circuit board I was able to put a tone knob in the feedback loop. This things sounds gorgeous! Dark, filtery, with just the right amount of modulation control. I can kick this thing on and just have instant atmosphere. It went straight on my pedalboard and there it will stay.
The enclosure for this one was a steel toolbox I found at the thrift store for about $5. Really did the trick nicely. This was quite a build, not sure I'd want to venture into this one again any time soon, but it gave me a lot more confidence for doing PT2399 circuits.
Poker Fuzz
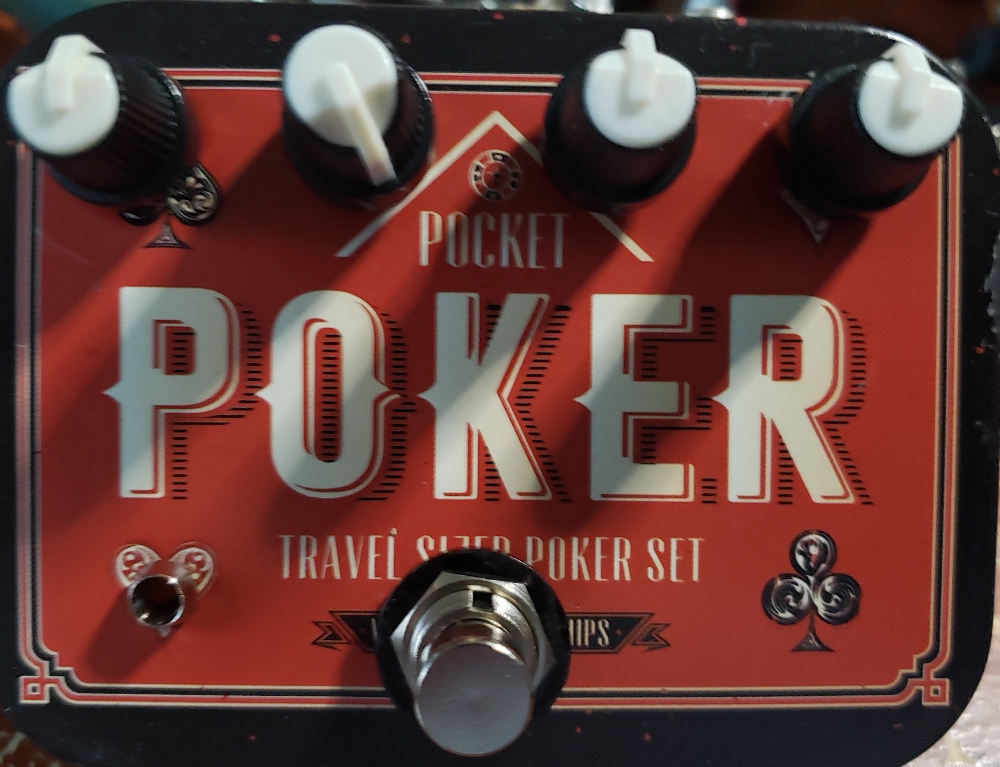
Figure 77: Taking a gamble on a poker fuzz
Coming off that complex delay build, I wanted to do some simple fuzzes. First up was a Sam Ash Fuzzstainer, which I did pretty much off the TagboardEffects layout with only a few minor value tweaks. I played with the transistor selection a bit too to get the right gain staging. There's something I just find interesting about swapping out different transistors in a fuzz circuit and listening to the subtle (or not-so-subtle) differences that result.
This fuzz sounds pretty good, thought at some settings it does a weird compressy/gatey thing where it goes quiet for a few seconds and then the noise swells back in. Not sure if this is a problem on the circuit or how it's meant to work.
I decided to house this in a poker card tin I got from the thrift store. Came out nice, I think?
Traded this away at some point, can't remember for what.
My Word Fuzz
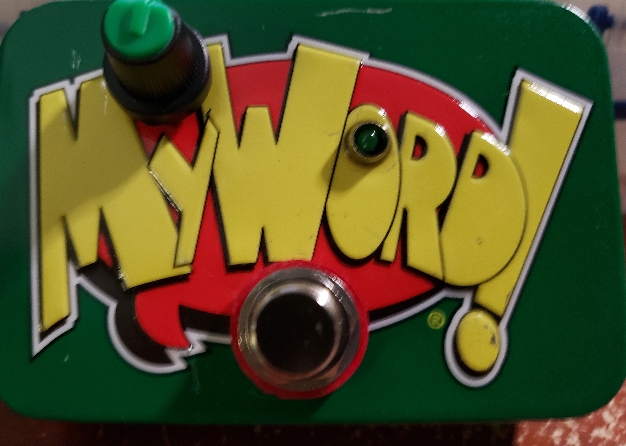
Figure 78: My Word! It's a fuzz!
Simple dirt circuits are just so fun to play with, and still reeling from the tape delay project and wanting to restock my inventory of pedals for trade, I thought I'd throw a Bazz Fuss together. The fun thing about this circuit is just picking out the right combination of transistor and diode to get a great sound. I tend to favor high-gain transistors and LEDs, which give just a monsterous sound in this circuit.
Since this is a one-knob fuzz, I used this little game card tin, on which I could only reasonably fit one knob without messing up the graphics. Fun little fuzz, I got it for sale on reverb.com.
Uncle Dan's Beard
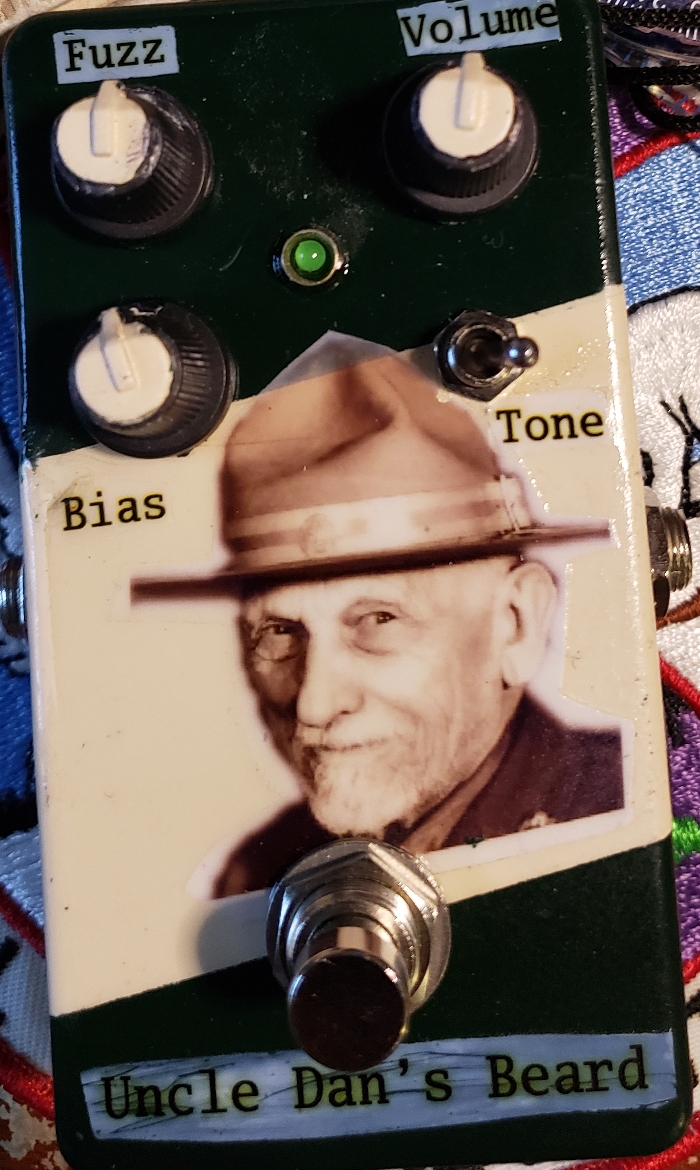
Figure 79: Uncle Daniel Carter Beard, and his beard.
I have mentioned before that my goal when getting into pedals was to make some for the annual Boy Scout auction; I had two ready, but wanted a third. And since I was on a fuzz kick, why not go with that? The circuit in this is based around a fuzz called "If 6 was 9" from Solid Gold FX; fairly stock but of course a handful of things were tweaked to my ears. It's really a great circuit as fuzzes go; very well behaved (no oscillations or crazy RF noises) as fuzzes go, yet capable of a good range of tones.
The enclosure is probably the last 1590b build I'll ever do, as I've discovered the joy of the 125b form-factor. I used printable clear vinyl for the graphics, though as you can see the vinyl turned white when I clear-coated it. Oh well, gives it a bit of a '90s 'zine vibe that fits a fuzz pedal well.
This one found a new home at the Boy Scout auction, being used by an aspiring guitar player I'm told.
Timmy Time!
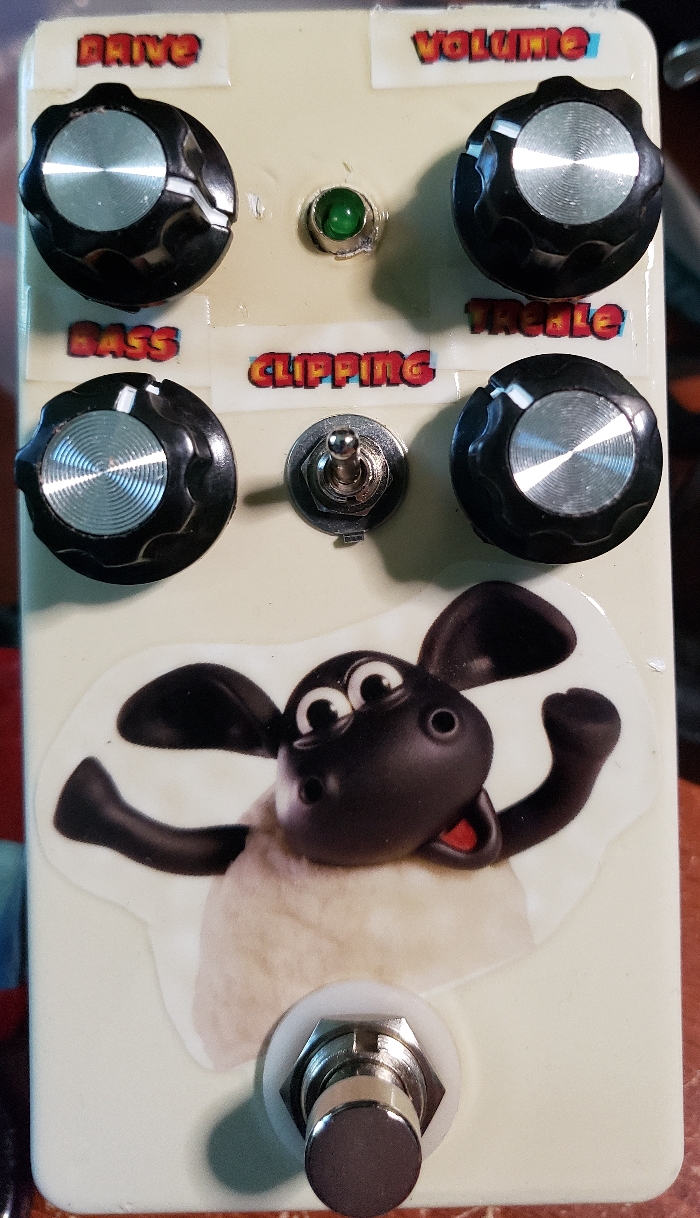
Figure 80: Iiiiiit's TIMMY TIME!
I was thinking about building a Vemuram Jan-Ray, since it's often touted as the pinnacle of distortion goodness, until I realized it was basically a Timmy with a different op-amp. I've heard great things about the Timmy too, and it was a less fussy build than the Jan-Ray (which adds some trim pots for no good reason), so Timmy it was. As soon as I got this one working I was sold on it. Definitely my favorite circuit for low-to-medium drive tones.
I spent a good amount of time deliberating between the JRC4558 op-amp (a more Timmy-ish sound) and the LM1458 (the Vemuram choice). Both sounded good in their own way, the 1458 being darker and smoother. In general I favor a brighter tone (probably because my hearing is going), so the 4558 won out.
This enclosure is my first time working with a 125b box, and with top-mounted jacks. Definitely sold on this form factor, it was a lot easier to fit things into than a 1590b and with top-mounted jacks it still fits nicely on a pedalboard.
There are a lot of Timmies out there in pop culture land I could have put on this pedal, but as a long-time fan of Aardman, Timmy the sheep won out. Plus I was humming the Timmy Time theme song to myself the whole time I was working on this.
I used the vinyl decals again, this time on a white background so it wouldn't matter if they turned white. Came out OK, though I marred the paint job a bit in my impatience to finish it.
I do wish I'd had a 3-position switch for the clipping selection, but so far it sounds great to me in assymetric mode. Maybe I'll swap that out sometime so I can get op-amp clipping mode too.
This one's a keeper, friends. Currently my go-to for light drive. Takes really well to stacking and boosts.
Three-eyed-monster fuzz
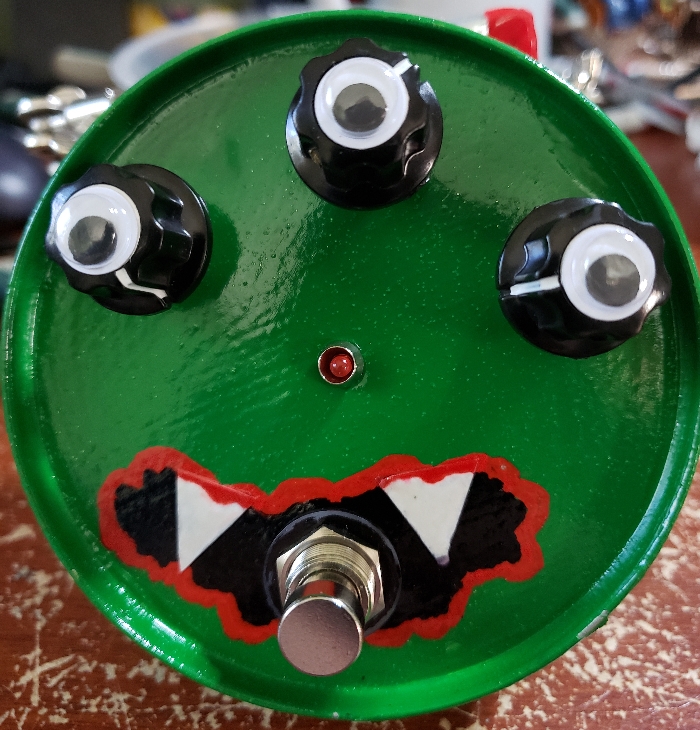
Figure 81: BLARGHHHH!
Picked up a small round tin filled with coasters at the thrift store. When I see a round enclosure, I think Fuzz Face, of course. I spent some time trying to decide on a good Fuzz Face-ish circuit I hadn't done yet. Then I remembered an experiment I'd done a while back on the breadboard of putting crossover clippers between the stages of a FF. I spent some time playing with this idea more, as well as some other tweaks and changes to the basic topology. The results were…monstrous!
As Halloween was imminent, and this fuzz really wanted 3 knobs instead of two, I decided to make it a three-eyed monster face complete with googly eyes and fangs. Mixing acrylic paint with glitter glue gives a nice monster-skin texture too.
After I built this, I noticed two things; first, the circuit had a ridiculous amount of output gain and I had to keep it really low to avoid overdriving the next pedal. Second, that a lot of the awesome sounds I was getting from it actually came from it overdriving the next pedal?
Solution? Slap some clipping diodes across the output of the circuit, of course! Now instead of an output volume, we have a second clipping stage. Since the fuzz itself is a fairly buzzy, assymetric sound, having symmetric clippers at the output really enhanced the range of available tones.
The middle knob here is a bias control, of course, and you get get some pretty heavy gating and rip from it.
Ended up trading this one away for something else.
The Leaky Puppy
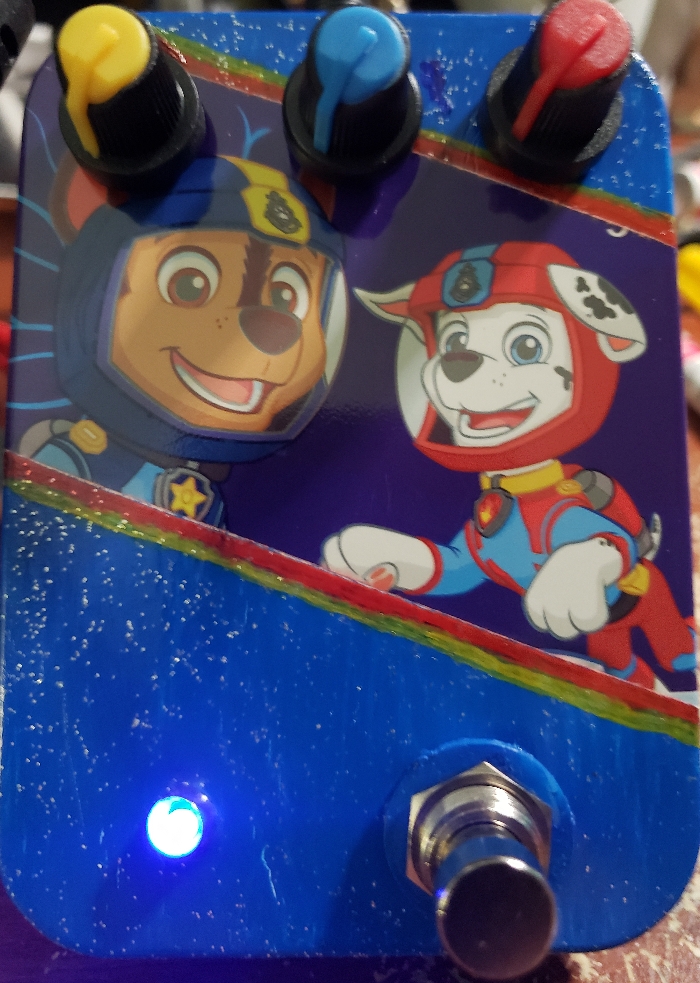
Figure 82: Yelp for Help!
These puzzle tins I've been using seem to be disappearing from stores, so I've been stocking up, buying characters I wouldn't normally be interested in buying. This includes Paw Patrol, which my kids missed the boat on by a couple of years. Still, I figured dogs offer enough pun possibility to make it worth $1 for the enclosure (and if not, I can just paint it over).
If I have a favorite distortion circuit to riff on, it's the Joe Davisson EasyDrive. Such a simple circuit topology that offers so many possibilities for clipping-stage tomfoolery. In this drive, I worked in a "leak" knob that brings back in clean tone to the rather muffy character of the EasyDrive. Similar to the Batman drive I did before, except I'm bringing in the clean sound symmetrically rather than asymmetrically.
The result allows a lot of flexibility and sounds good on bass. And all that housed in a sparkly-blue Paw Patrol tin.
This one went on Reverb.com and sold almost overnight. It's living a good life in Washington now, hopefully rocking hard.
Christmas bears Fuzz
d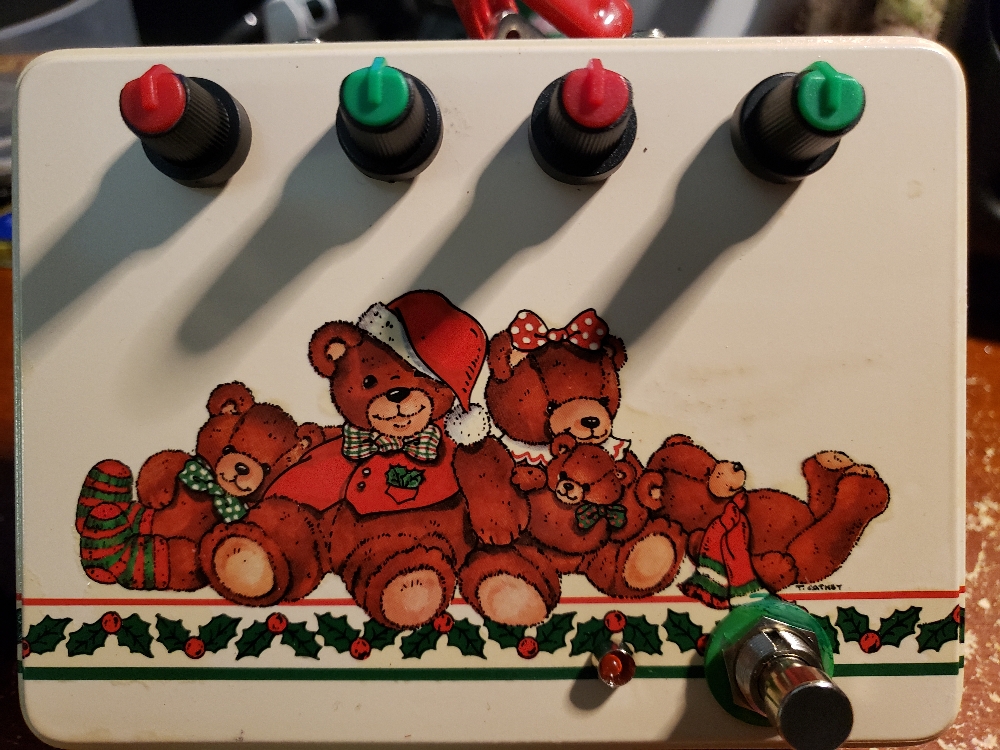
My choice of pedals to build is often driven by a combination of what an enclosure suggests, where my curiosity leads, and what will fit on a scrap of vero board I have left over from another project. In this case, I happened to have a fuzz circuit built that was based on a certain "Hairy Extinct Pachyderm" fuzz from a pedal maker who reputedly gets "vexed" when people clone his circuits (even for fun).
A four-knob fuzz works great for this Christmas bears cookie tin I got from the thrift store. It's a nice enclosure – steel rather than the usual aluminum, so very sturdy.
This is a good sounding fuzz, I must say, though pretty typical. A little less refined than the "if-6-were-9", and the big-muff-style tone control leaves it a little scooped sounding. It definitely has the gated velcro sounds if you want them.
This one was eventually traded away.
Ice Queen Chorus
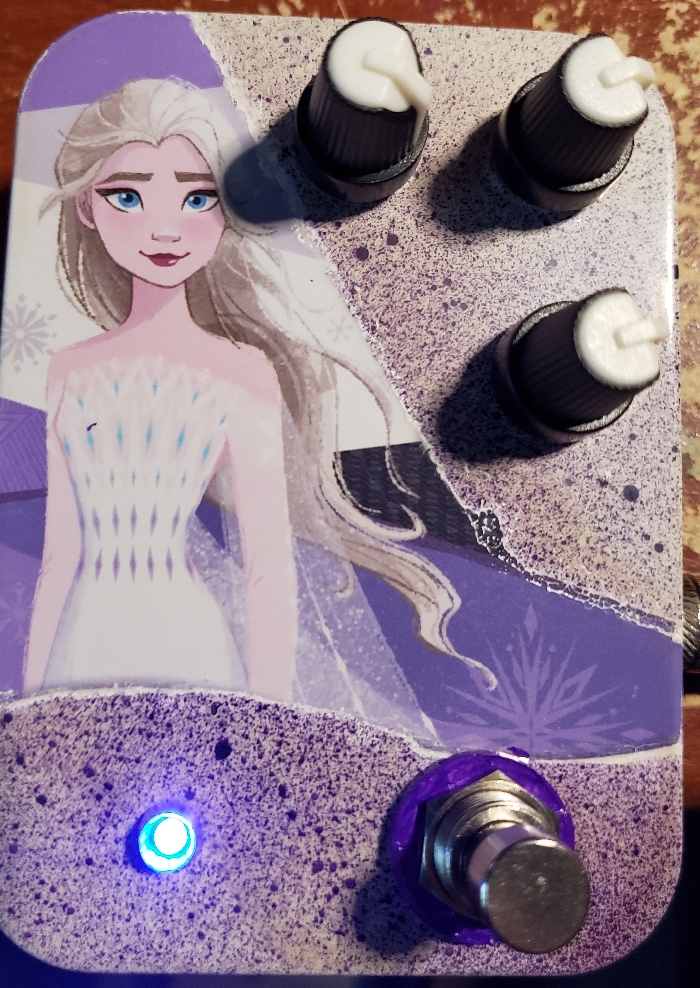
Figure 83: Ice Queen Chorus
OK, enough dirt. I need to get back into PT2399 stuff and use up some of these chips I bought. I've tried the "little angel" chorus before and found it disappointingly subtle. Decided to give it a shot on the breadboard to see if I could amp it up a bit.
The PT2399 needs a good bit of filtering to hide it's lo-fi aspects, and the schematic I was going by had some pretty large caps across the delay cutting out high-end. I decided to try removing these just to see how bad it could be. Turns out… not so bad at all! At chorus delay times (under 50ms) the chip can actually turn out a reasonably cleanish tone. I ended up leaving in some much smaller (1nF) filter caps just to knock off the stuff that wouldn't make it past a guitar amp anyway. Sounds great!
I changed a few values here and there to further increase the impact of the effect, and dropped the depth pot from 500k to 100k as it seemed useless for the first 3/4 of its range. 100k doesn't quite cut out all the modulation when down, but does give a more useful range of adjustment.
I also added a 5k pot to adjust the delay time, which is probably a bit much for a chorus pedal as it gets well into slapback territory at the top of the knob. So this pedal can really do triple duty as a chorus/doubler/slapback effect.
After building it, I didn't think I could fit it into a puzzle tin. Which was a shame, because my little girl really wanted me to use the Elsa tin she'd found for me some months back, and "Ice Queen" seems like a good name for a chorus pedal. With some careful planning, thought, and circuit-board trimming, though I managed to do it! So proud of this I have to share a pic of the internals:
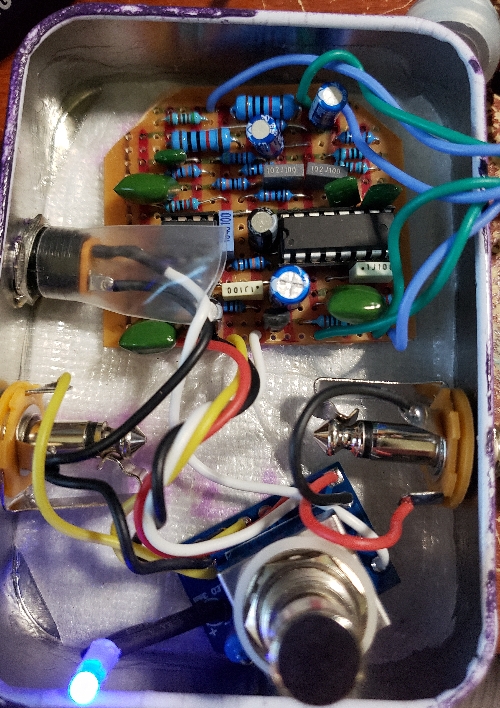
Figure 84: Ice Queen Chorus guts
This one will be a keeper. While it's not the most exciting chorus pedal I've ever used, it does have a unique lilt to the LFO that makes it different enough from other choruses. More importantly, my daughter won't allow it to leave the house, because princesses. At some point I need to work myself up to doing a 2-chip chorus for more depth, though the current options for that have a lot of reported issues.
Christmas Muff
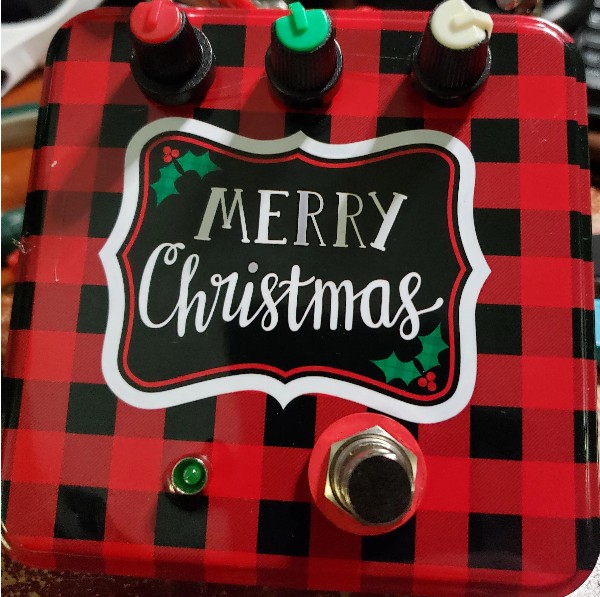
Figure 85: Christmas Muff
All these distortions and I've never yet built a big muff. Well, it was time to change that, so I put together this little box that approximates a "Civil War" muff as close as my collection of parts could muster. And it sounded pretty legit! Housed neatly in this little square Christmas tin, it was quite the nice build. Someone agreed because it eventually sold on Reverb.com.
I need to build more muffs, they're fairly easy and have a really satisfyingly complex sound.
Shakey Pup
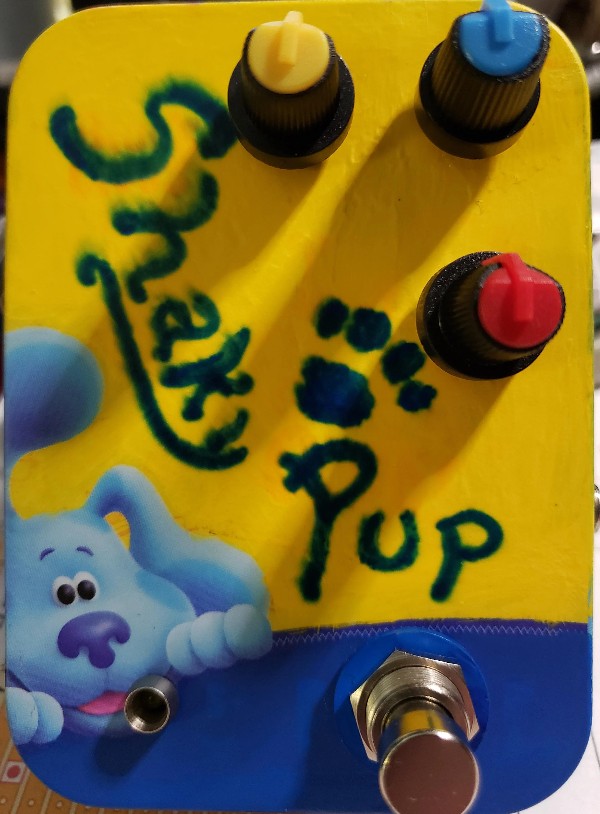
Figure 86: Shakey Pup
Winter makes one nostalgic for some reason…
It was the summer of 1995, the end of my second year in college. I decided not to go home, but to pick up a friend's rental contract and spend the break in a sleepy Indiana college town. The plan was summer classes, a job, and spending time with a girl I was crazy for.
Well the classes were duds, the job never materialized, and the girl decided to go on a summer-long mission trip at the last minute. I was left in an empty college town with my friend Shane who was more or less in the same situation. We spent the summer half-heartedly applying for jobs then staying up late into the night drinking the fanciest coffee broke college students could afford and playing guitar. He had this old, beat-to-crap harmony practice amp with three knobs – just tremolo controls and a gain knob. Get it up to any kind of volume and it clipped.
This pedal started as a Colorsound tremolo, but I added a gain knob and some asymmetric clippers. The minute I got it together and fired it up, I was back in that lonely college town playing Donovan songs, mooning over lost love with my old friend.
Why is it in a Blue's Clue's puzzle tin? Because it is. Didn't have anything else to put it in. Anyway, too much nostalgia is unhealthy, so I've got this one up for trade/sale.
Red Dot
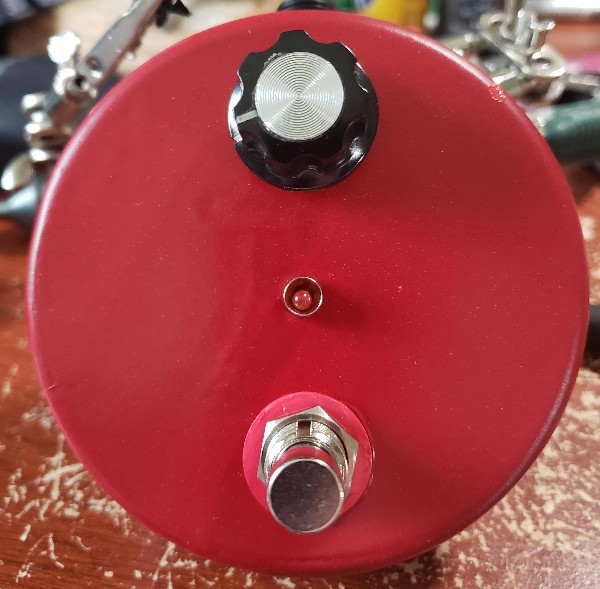
Figure 87: Red Dot
I kept hearing about the EQD Speaker Cranker and how magical it was on everyone's tone, so I decided to drop one on a stripboard scrap and try it out. Curiously, it's not a far cry from the "Patina" pedal I came up with back in the Spring, so I guess I was onto a good thing there. Both are just minor variations on the Electra distortion idea, as I've since learned, and have a kind of one-dimensional aspect to their overdrive sound. Still, it does work handily for stacking with drive pedals or pushing an amp, and the clipping gives some more depth than just a boost would do.
Since my Nastygram already covers this turf for me, I'm trying to move this one on Reverb or trade it.
Minnie Unleashed
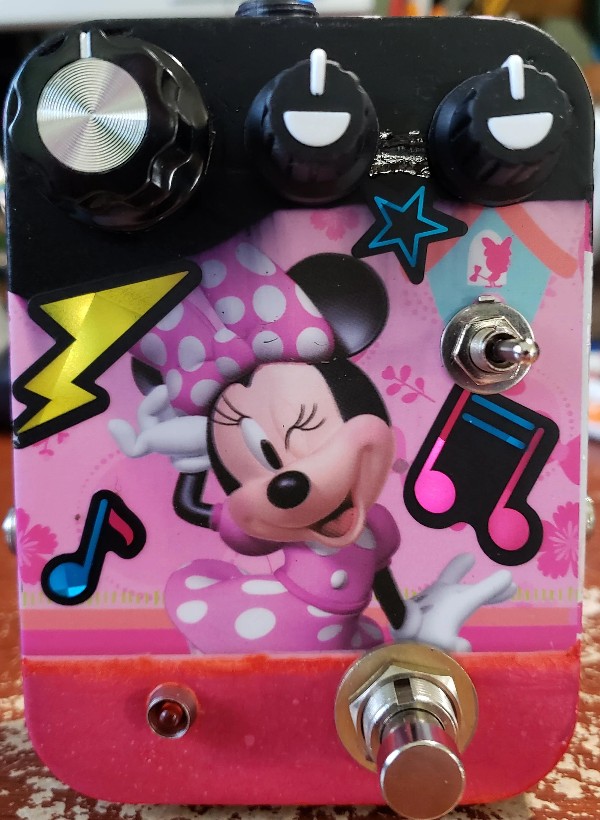
Figure 88: Minnie Unleashed
Towards the end of 2021 JHS put out the "Rat Pack", did a bunch of videos about the Rat, and basically got the whole guitar world talking about Rats again. Since I'd sold my other Rat builds I thought it was time to build another. This one is more or less like my "Lit Mickey" that I did before, with a new twist: a 3-way switch to go between diodes, LEDs, and op-amp-only clipping. Turned out a bit squeally at first but I swapped to an LM1458 op-amp and made some adjustments in the feedback network.
I kind of botched the artwork on this one; turns out the matte finish clear coat makes other paints run badly. I tried to cover my issues with sticker and more paint. In the end it looks a bit "princess punk", which isn't a bad look for a Rat.
Unfortunately for my capitalist intentions, my daughter took one look and laid claim to it. So this one stays.
Pukey Troll
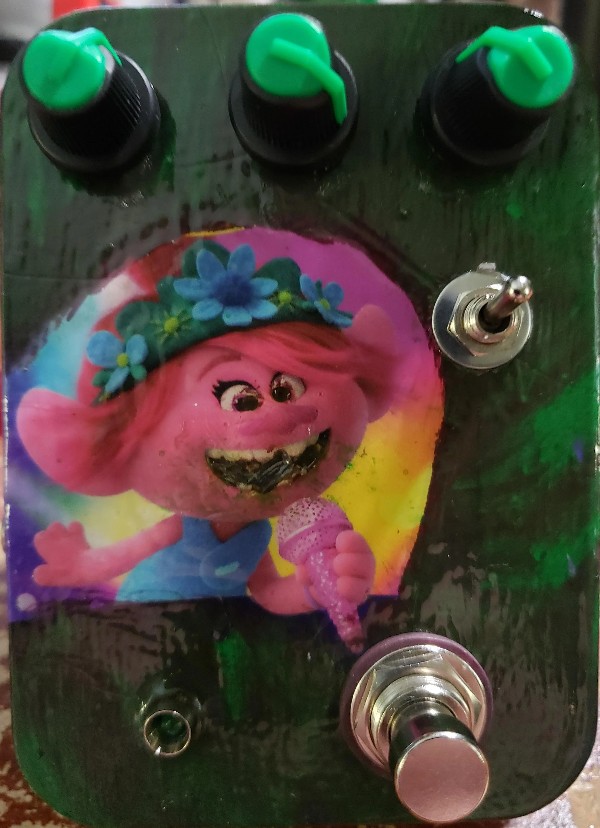
Figure 89: Pukey Troll
For some reason I bought a bunch of CD4066 switch ICs; whatever I had intended to build with them, I lost interest in building at some point. So I decided to try a little experiment: Fuzz a guitar sound to a square wave, then feed it to the switch pins to open an close the switches with each cycle of the wave. Then, put +9v at one end of the switches and chain them all together so that a new wave would be synthesized. I was hoping some internal latency between the switches would result in some crazy amplitude modulation.
Well the result was definitely interesting – it had to be tweaked in just right, but at the sweet spot it sounds like a cross between an octave fuzz and the "distortion guitar" patch on a 2-op FM synth. (You can hear a demo here).
I don't think the circuit is actually doing what I intended it to do, and as my EE knowledge improves I plan to revisit this circuit again. But the prototype here sounds pretty crazy.
I think the artwork on the tin pretty accurately reflects the sound. The pukey mouth lights up when you play, thanks to the LED-powered Bazz Fuss circuit that squares the guitar for the IC.
Red Rodent
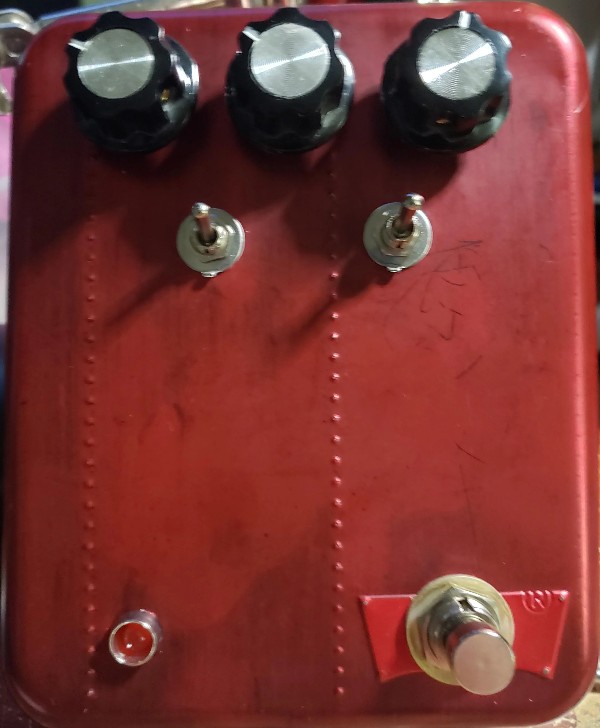
Figure 90: Red Rodent
Since my daughter claimed my last Rat build, I wanted to make another and hopefully cash in on the Rat craze JHS has precipitated. This one is even more deluxe, though; not only has it a 3-way switch for clipping, but a second switch that makes each clipping network asymmetric. This took some pretty good pondering to work out correctly, but I made it happen with pleasing results.
If I came to one conclusion through this build, through, it's that clipper switches on Rats are overrated. In my opinion, about 90% of the Rat's sound is coming from the op-amp distortion. Once you adjust for the volume change caused by different clippers, the tonal distinction between different arrangements is pretty minimal. I spent quite some time trying creative ways to maximize the difference between different clipping settings, but it will take a more refined ear than mine to really find one more compelling than another.
This pedal got traded away eventually, and I'm hoping the new owner is enjoying those clipper options.
UT Booster
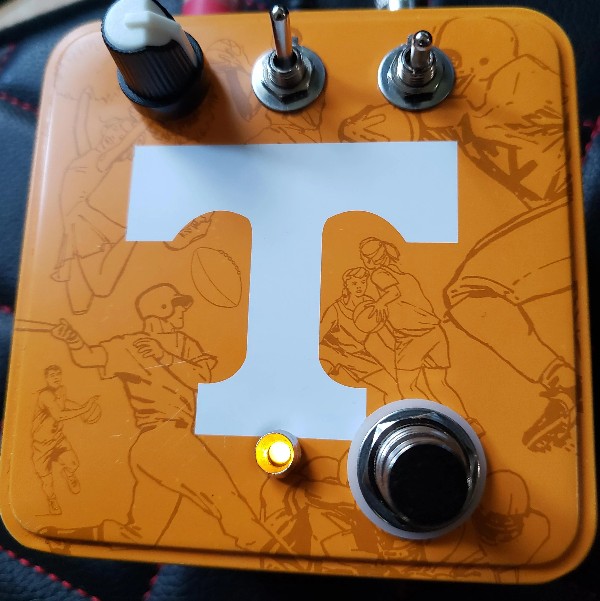
Figure 91: UT Booster
I enjoyed the subtle warmth and haziness of the EP Booster setting on my Zoom B1XFour, so I decided to try my hand at making the real thing. Boosts are a nice way to use up spare parts, and easy to house in small enclosures.
One thing that had held me back from building this pedal and many others was the lack of available through-hole JFETs like the J201 or 2n5457. At last, though, I had a solution:
Figure 92: JFETs are back on the menu, boys!
Rather than paying upwards of $2 a pop for NOS JFET transistors from suspicious warehouses in China, I finally decided to try my hand with surface-mount parts. I picked up some little adapter boards from oshpark.com and some SMD J201s from my usual supplier and it came out to something like sixty cents plus a little labor for each JFET.
I was pleased with how it all came out. The switches (normally internal DIP switches on the commercial unit) are supposed to adjust bass and treble response. I found the bass switch to be rather subtle for my tastes, so I adjusted some capacitor values to make it more pronounced.
The enclosure is a watch tin. A bit tall for a pedal, but I feel like this is an always-on unit anyway. This being Tennessee, both the EP boost and UT are quite popular, and this pedal did indeed end up in the hands of a Vols fan (who subsequently rehoused it in a UT-themed hammond box, so my inclination about the tin was correct, I guess).
(But note to self: build another one sometime!)
Tron Fuzz/Synth

Figure 93: Tron Fuzz/Synth
Getting tired of boosts, rats, and easydrives, it's time for something weird and complicated. I had seen someone on reddit build the Theremin Fuzz from Parasit Studios, and I was blown away that a DIY pedal could do something that cool. I had immediately ordered up the required ICs to put this together, and once they arrived I was ready to build.
The original circuit allows you to imitate a theremin pretty accurately, giving you a triangly-wave monosynth tone with lots of glide that tracks your guitar playing. I modified the circuit to allow for adjustable portamento time, and also found a suboctave signal one one of the pins of the CMOS chips, so build a blend knob for bringing that in. The result is a respectable guitar synth pedal that can give a decent variety of tones.
The only bad thing about this box is the tracking, which is sadly a bit dodgy on the lower strings. It seems optimized for higher notes, which is consistent with the idea of emulating a theremin. Wish I could work out some kind of tracking adjustment or improvement. You can hear a demo of it here. I was so impressed with the circuit I decided it deserved a 125b box.
This one's a keeper, I think, at least until I can build something that works better. Parasit Studios has some really awesome synth pedal builds, but sourcing some of the chips is a problem.
Phoenix Drive
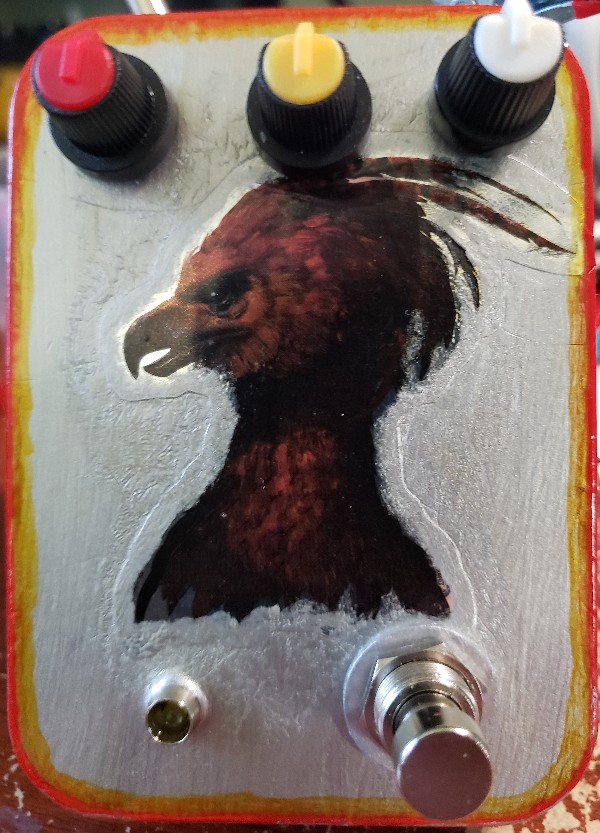
Figure 94: Phoenix Drive
I ended 2021 with this less-than-inspired build hastily put together between holiday preparations. It's an easy drive with a symmetry knob, not much different from the batman drive I did before. Mostly created to use up some scrap stripboard and I had some Harry Potter stickers sitting around from an old calendar or something, so I thought I'd use it for decorating the tin. You can tell it's a bit rushed here.
Trying to trade this one, though I must admit it's not super compelling.